A Quick Guide to learn to enter opening balances for accounts in QuickBooks
When creating a new account in QuickBooks, the user is suggested to pick a day to start tracking all of the transactions. The user should enter the balance of the real-life bank account for the day that has been selected. This will let QuickBooks match the bank records form the start. The starting point here is the account’s opening balance. This summarizes all the past transactions that came before it. To learn the process toenter opening balance in QuickBooks, make sure that you read this article carefully till the end. Or you can also ask our QuickBooks support team professionals using our support number 1-888-368-8874, and they will come up with the most effective steps for you.
Steps to enter opening balance for accounts in QuickBooks
The below steps can be of some help in entering opening balance for accounts in QuickBooks. Let us check the steps out one by one:
Step 1: Enter an opening balance
The steps for the type of account the opening balance is for are listed below:
Bank or credit card accounts
Before creating a new account on QuickBooks chart of accounts, ensure to know what to enter for opening balance. The user can enter an opening balance for a real-life bank account you just created, or one that is already present.
At first, the user needs to get the bank statements or sign in to the bank’s website
And then, in QuickBooks move to the company menu and then choose chart of accounts
Right click anywhere on the chart of accounts and choose new
The next step is to select bank or credit card for the account type and also choose continue tab
The user needs to give account a name. in case the user is having multiple accounts of the same type or at the same bank and give them unique names so that they are easy to tell apart
After that fill out the rest of the data fields
And also, choose enter opening balance. In case the user requires to edit the opening balance, the button will be change opening balance
Once done with that, the user should choose save and close to record the opening balance
Asset, liability, ad other types of accounts
The user can enter an opening balance for a real life bank account that is created above. The user should also be careful entering the opening balances for accounts on your balance sheet. This includes fixed asset, equity, long-term liability, other assets, other current assets, and other current liability accounts. In case the user is unsure or have any queries, then it is suggested to reach out to the accountant. In case the user isn’t having an accountant, he/she can look for one.
The user can get the bank statements or sign in to the bank’s website initially
After that, move to the company menu in QuickBooks and then choose chart of accounts
The next step is to right click on chart of accounts and choose new
Choose fixed asset, loan, or equity. For other types of accounts, choose the other account types drop down and one of the types
Also, choose continue tab
Assign the account a name
Enter rest of the details
And also select enter opening balance
After that choose save and close tab to record the opening balance
Income and expense accounts
The user need not to enter opening balances for income or expense accounts. These accounts simply track the earnings and spending.
Step 2: Check the opening balance entry
After entering the opening balance, move to the account register and ensure it is appropriate.
Here, the user needs to move to the lists menu and choose chart of accounts
Look for and open the opening balance equity account
Also, check the account balance
In case the balance isn’t 0.00, then need not to worry. The user simply needs to write down the remaining balance. Then run a balance sheet report for last year.
The user needs to move to the reports and hover over company and financial
And choose balance sheet standard
The next step is to select last fiscal year form the dates dropdown
Check the retained earnings balance
Compare last year’s retained earnings balance with the remaining balance in the opening balance equity account
That's it!
Entering opening balances for accounts in QuickBooks can be a little easy, once the above stated steps are performed properly. However, if there is any query or if for some reason the user isn’t able to perform the required steps, then in that case give us a call at 1-888-368-8874, and we will be there to come up with the best possible assistance immediately.
Facing QuickBooks error 213 and unable to decide what to do? Well, not to worry anymore, as we have come up with this article, where we will be talking about the causes and fixes of the Rebuild error 213 in QuickBooks. Error 213 indicates that the data contains the duplicate list of elements. This error code is seen when the user runs the verify data utility. It also appears when running, installing windows startup or shutdown, monitoring when and where such an error happens.
To know more about eliminating QuickBooks error code 213, make sure to read this article till the end. Or you can also contact our QuickBooks support team at 1-888-368-8874, and let them resolve the issue for you.
What leads to QuickBooks Error 213?
The user can end up in QuickBooks error 213, due to the following reasons:
The most important reason can be if the framework is having an issue
Another reason can be if there is incorporate off base client input
Also, if there are faulty passage of non-existent projects which are as a rule because of disgraceful programming uninstall
Moreover, if there is missing records that were unintentionally removed from the registry
Steps to fix QuickBooks Rebuild error 213
The user can try fixing the QuickBooks error 213 by performing the below methods. Let us have a look:
Method 1:
The very first step is to sort all lists from the re-sorting list
After that, locate the re-type QuickBooks list
The next step is to reopen the QuickBooks software again by entering all needed details
Select that specific view and click on all employees, customers, and vendors
Open the list menu for all other names, custom message and accounts
Ensure about all things, proceed further to open and edit the window by clicking on twice
Settle down the account, in case any duplicate account name found
Choose the specific account and click on edit tab
To make this special, check the features like punctuation, capitalization, and spacing to change the name
Click on ok tab to save all new changes
If you wish to end any other copied list item that is set up in the qbwin.log file
When you edited all items, click on file tab
Choose utilities and enter and verify data
Signs and symptoms of QuickBooks Error Code 213
The user can spot the error message 213 by using the below signs:
One of the major signs can be if the user doesn’t switch in the multi user mode in the system
If the system becomes an idle on all programs
Another sign can be when the software will confront QuickBooks freezing issues in QuickBooks
The user isn’t generally fit for starting the business information company data files that are put on some other system that is as of now
Conclusion!
Fixing the QuickBooks error 213 might be easy, if you follow the steps discussed in this article. However, if the error persists for some reason, then it is suggested to talk to our QuickBooks support team at 1-888-368-8874, and let our QuickBooks professionals perform the issue for you.
If you are seeking an easy walkthrough to transfer QuickBooks to a new computer, then you have landed at the perfect spot. It is the right choice to upgrade to a new system to leverage the superior features and improvements that come along with it. Users can restore their company files from a backup by installing a newer or identical version of QuickBooks on the new computer. QuickBooks Migrator tool can come to your rescue and facilitate an easy transfer of critical QB-related data to the new computer. This blog aims to shed light on how to move QuickBooks desktop to a new computer without any hassle. Thus, keep read on!
Requirements for Moving QuickBooks desktop to a New Computer
Some of the prerequisites to be ensured in order to move your QuickBooks desktop to a new computer are outlined below.
Upon installing QuickBooks on the new computer, you'll need to create an account and confirm that the new computer is connected to the internet.
It is recommended to back up your QuickBooks company files before removing the QuickBooks desktop from the old computer.
Keep the disc or downloaded files for QuickBooks at safe disposal.
Secure the license and product keys before transferring QuickBooks to a new computer. You will need it while registering and activating QuickBooks on the new computer.
While transferring the QuickBooks files manually, you will need to store the QuickBooks desktop files on an external device like a USB device.
What is QuickBooks Migrator Tool?
QuickBooks Migrator tool is a QuickBooks transfer program. If you aren't logged in as an Admin user, you won't have access to this feature. The migration utility will let you save up to three sets of company files and their accompanying documentation on a USB flash drive. The data will be physically transferred using a pen drive, while the migration tool handles the technical details in the background. In addition to assisting with file setup, the program can download the appropriate version of QuickBooks Desktop to the new system.
Methods to Move QuickBooks Desktop to Another Computer
Here are the speedy procedures for transferring QuickBooks and its data from an older computer to a newer one:
First, convert QuickBooks Desktop data with the Migrator Tool
You can use the migrator tool or execute the process manually if you need to reinstall QuickBooks desktop or transfer it to a new computer. For your convenience, we have broken down the transfer procedure into two distinct phases. Be sure to have access to the admin account before proceeding, as these actions need the usage of the admin password and username.
Note that you must have Company Admin privileges to access the Migrator Tool. Take your time with first learning the fundamentals of the migrator tool. The migrator operates as follows:
To access the files transferred to the new computer, you must create a strong password. The migrator utility simply needs to enter the password once. You should also write the password so you don't forget it in the future.
After a while, the program will save USB copies of the most recent three company files you've accessed.
Transfer the files using the flash drive. The remaining technical tasks are completed by the Migrator tool.
After selecting the appropriate QuickBooks desktop version, the utility will download and install it on the target computer, complete with all of the user's data.
It's important to remember that the program did not format the drive or delete any other data on the device.
Directions for Installing and Running QuickBooks's Migrator Tool
Now that you're familiar with the fundamentals of the migrator tool and other pertinent details, you may launch the procedures for establishing and utilizing the tool in QuickBooks. The entire process can be bifurcated into two parts - one on the old computer and other on the new computer.
1. Steps on the old computer
To initiate the process, download the QuickBooks Migrator tool and store it on the flash drive. Make sure to acquire the same from the Intuit website.
Connect the USB drive to the old computer.
Now from QuickBooks, navigate to the File menu and then choose Utilities.
After that choose Move QuickBooks to another computer opt.
After then, select "I'm Ready"
QuickBooks will also need the following information: Make an elaborate password for the company's USB device.
This OTP will be required at the time of connecting the USB device to the new computer for the first time. Remember the password so you don't have to keep entering it.
Follow the on-screen prompts to begin the file-copying procedure.
This procedure could take some time to finish, mainly depending on the number of company files. The typical size of a company file is between 150 and 250 MB.
2. Steps on the New Computer
The Windows security procedures prevent the migrator utility from automatically starting when you insert the USB disc, so you'll need to launch it yourself.
The first step in using the mover program is to launch the Move QuickBooks.bat file from the flash drive.
To finish the process, input the One-time password you generated.
The folder containing the QuickBooks Migration tool will be deleted immediately once the transfer process is complete. Other information stored in the USB drive will not be affected. Files on the previous system can be renamed to eliminate any confusion.
Soon after, click on the Help menu, and select Register QuickBooks.
To finish the registration, please enter your phone number, address, and license key.
Although the Migrator tool helps to transfer most of the accounting data to the new computer, some data and information may require manual transfer.
You may need to sign out of Intuit data protection on the old computer before using it on the new one.
Users will need to manually log in to the new computer to transfer the QuickBooks payroll and Payment service data. Furthermore, the transfer of multi-user configuration data to the new system is only possible in manual mode.
How to Move QuickBooks Desktop Manually
The transfer of all the QuickBooks dataat once requires users to manually transfer QuickBooks from their old computer to the new one. The set of procedures listed below should help:
Create a copy of the company files and QuickBooks license.
The user should then create a Back up of the company files to be transferred.
It is recommended to transfer the latest version of QuickBooks rolled out by Intuit to the computer.
Proceed by retrieving the backup file of the company file and then running it on the new computer.
Upon the successful transfer of accounting data, uninstall QuickBooks.
The subsequent step is to access the company file backup into the new computer.
Subsequently, download QuickBooks on the new computer.
Follow up by plugging in the USB containing the backup of the company files.
After that, users need to run QuickBooks as an admin on the new computer.
Follow up by heading to the File menu.
And then click on Open and Restore company.
Hit on Restore a backup copy, and then Next.
Select Local backup and navigate to the backup file you made on the old computer to restore the backup from the external device.
Next, select a folder on the new computer to save the backup file and click the Save button.
Final Words
We have discussed above all the potential methods to transfer QuickBooks to a new system. For assistance on other issues confronted while using QuickBooks, you can reach out to our experts via a mere phone call at +1-888-368-8874 to avail timely assistance from our experienced QuickBooks support staff.
QuickBooks has garnered unfathomable popularity across businesses owing to a multitude of diversified tools and accounting features offered by it for the effective management of finances. One major benefit of using this accounting program is that it is frequently bone-guarded advanced updates that shield the program against technical aberrations. QuickBooks Desktop 2023 is the latest entrant in this context, and this version of QuickBooks is incorporated with advanced avant-garde features. However, users have been witnessing various issues while upgrading to this QuickBooks version. The current discussion shall entail all the facades of this error and shall also bring to the forefront various solutions that can help in fixing QuickBooks Desktop Update errors.
What is QuickBooks Desktop Update Error?
QuickBooks Desktop update error is a major technical issue that impedes the update process of QuickBooks Desktop 2023. Update errors are more often associated with the crashing of QuickBooks Desktop 2023. Besides the crashing issue, different error codes are observed while attempting to update QuickBooks. These include QuickBooks Error 404, QuickBooks Error 6190, QuickBooks Error 1328, and all errors belonging to the family of QuickBooks Error 12xxx and QuickBooks Error 15xxx series. These error codes often appear in the form of an elaborate error message, and most often, the error message states, "QuickBooks won't update".
Update errors are typically incited by the following factors:
Multiple QuickBooks versions may be installed.
The internet settings might be incorrectly configured.
Windows O/S may be out-to-date.
QuickBooks critical files, including the QBWUSER.ini, ND, and TLG files might be damaged.
The system time and date may be incorrect.
Some threatening viruses may have damaged QuciKBooks and system files.
Methods To Resolve QuickBooks Desktop Update Issues
QuickBooks Desktop update errors can be extremely bothering, especially when updating the accounting program is indispensable. The multiple troubleshooting approaches described below should help readers in resolving these errors.
Method 1: Use QuickBooks Tool Hub
Step 1: Downloading QuickBooks Tool Hub
Download the latest version of the QuickBooks Tool Hub and double-click on the “QuickBooksToolHub.exe” file.
This will initiate the installation process. Follow the prompts that appear on the screen.
Proceed by agreeing to the terms and conditions and entering the required details correctly.
Now, run the tool and allow it to detect the issues.
Step 2: Using Quick Fix My Problem
Open the QuickBooks Tool Hub and the “Program Problems” tab
Locate and click on “Quick Fix My Program.”
After that, run QuickBooks and try to perform the update for QuickBooks desktop once again.
Step 3: Quick Fix My File
Locate the “Company File Issues” option and choose the “Quick Fix My File” tab.
Select “Check Your File and Network” and click “Next.”
This tool will repair the QB file when found corrupted with issues.
Method 2: Change the file name of QBWUSER.INI
Go to the QuickBooks installation folder. For this, right-click the QuickBooks desktop icon and click on Properties. Subsequent to that, click on the Open file location option. This action will directly take you to the QuickBooks folder.
Find the file named QBWUSER.INI and select “Rename.”
Add .OLD at the end of the file name.
Click on “OK”
Now, alter the name of the DataStore.ecml file in the same manner.
Next, restart the system and check if the QuickBooks Desktop is working correctly.
Method 3: Reboot the Software and System
Close all operations in QuickBooks and make an exit from the accounting program.
Navigate to the “Start” menu and opt for Restart.
Now, access the QuickBooks desktop program again and try updating it.
Method 4: Alter the Extensions .TLG and . ND Files
Navigate the QuickBooks folded and search for the files with the extension .TLG and .ND.
When located, right-click and navigate “Rename.”
Now, add.OLD at the end of their names.
Again, launch the QB application and check if the problem is resolved.
Method 5: Suppress QuickBooks Desktop
The procedure for suppressing the QuickBooks program is discussed below:
Hold the Ctrl key and simultaneously open the QuickBooks desktop app.
Keep holding the Ctrl until the “New Company Open” window is not opened
Once opened, choose the company file according to the need
Next, press and hold the Alt on your keyboard and select the “Open” tab
Once the dialog box prompting your username and password appears, release the key from the keyboard and input the information
Again, press and hold the Alt key until the company file is opened completely
Method 6: Verify and Rebuild Data Utility
QuickBooks Desktop is accompanied by a myriad of tools and features to fix any technical issues emanating from different sources. One such feature is the Verify and Rebuild data tool. The procedure to use the tool is given as under:
Open the QuickBooks desktop application.
Navigate towards the “File” tab and choose the “Utilities” option
Select the “Verify Data” tab
Launch and run it
It will detect the errors in the app; once done, locate “File” and go to “Utilities” again.
Launch and run the rebuild data utility tool, which will troubleshoot QuickBooks Desktop
Method 7: Copy Company Files to the Desktop
Create a new folder on the Desktop.
Go to the current location of the company files.
Create a copy of the company files, and navigate to the new folder created on the Desktop. Then, press Ctrl + V keys to “Paste.”
Run QuickBooks and hold the Ctrl key on the keyboard.
Once the “No Company Open” window appears, release the key when QuickBooks opens.
Hit on File menu, and select the “Open or Restore an Existing Company”.
Click on “Next” once the company file opens
Once done, navigate to the new folder to open it.
Method 8: Repair the QuickBooks Desktop program
The approach for repairing the QuickBooks Desktop is illustrated below:
Navigate towards the “Control Panel” and choose the “Programs and Features” tab.
Locate the “Uninstall/Change the Application”
Locate the QB desktop and select it.
Then, choose “Uninstall/ Change.”
Next, click the “Repair” tab and let the program resolve the problem.
Once done, reboot the system.
Method 9: Clean Install QuickBooks Desktop
Step 1: Uninstalling QB Desktop
Locate the “Control Panel” of the computer and select the “Programs and Features” tab.
Let the application run. It will detect the problem itself and fix QuickBooks desktop.
Step 3: Reinstall QuickBooks Desktop
Download the QuickBooks installation file.
Save the downloaded file in an easily accessible location.
Select the “QuickBooks.exe” file.
Follow the guided prompts.
Enter the asked important information like license, service keys, etc.
Agree to the terms and conditions that appear on the screen.
Now open the QuickBooks application again and check if the problem persists.
Method 10: Remove Antivirus
If antivirus software or other external programs are causing QuickBooks to crash, it is recommended that they be disabled. Anti-virus software may flag some QuickBooks updates or patch releases as malicious software. Their removal follows this before being used. To disable the antivirus, navigate to the settings menu.
Method 11: Disable the Windows Firewall
Go to the “Start” menu or “Task Manager.”
Search for “Windows Firewall” and choose “OK.”
Click Settings.
From the pane in the left pane, turn “Windows Firewall” on/off.
Now, disabled for public and private networks.
Once done, restart the computer and launch QB to see whether it crashes.
Method 12: Do SFC and DISM Scans
Initiate by navigating the “Start” menu and entering the input “cmd” for Command Prompt.
Ensure to do this by running the computer as an administrator
When the command prompt opens, input SFC/Scannow after C:\windows\system32>
Wait for the scan and launch of the QB application again to ensure the problem is finished.
Method 13: Correct System Date and Time
One major cause of the update errors encountered during the installation procedure of QuickBooks Desktop is the wrongly set date and time. So, correcting the system date/time becomes pertinent.
Proceed by right-clicking on the date at the bottom-right corner of the Toolbar.
Then, tap on update system date/time and make necessary adjustments to the date/time besides opting for the correct time/date.
Once done, tap on Apply and Ok.
Conclusion!
This comprehensive explanation of the QuickBooks desktop update issues and the various fixation methods should help you easily resolve the issue. Unfortunately, this blunder is possible for any of the causes mentioned above. However, if you follow the troubleshooting procedures and techniques appropriately, the update errors can easily be dealt with. Also, you connect with the QuickBooks support team.
You might be working with utmost concentration on your QuickBooks desktop software when suddenly the QuickBooks payroll error 20102 popped up on your screen. This particular error basically indicates that the EIN is linked to another account and you have an active direct deposit already on the replica of the EIN that is connected to some other account. To get a better insight into this particular error, you simply need to scroll through the segment with much care.
For additional assistance on any query related to this error, feel free to call our Customer Support team. We shall make it sure that the error doesn't trouble you any further. Nonetheless, let us proceed forward and learn about the various aspects surrounding the error code 20102 in QuickBooks accountancy software.
More About QuickBooks Error 20102
Throwing light on the QuickBooks payroll error 20102, this error might appear when you have an active DD on the employer identification number. It might also show up on the screen while trying to link the EIN directly connected to a different account. Another big reason behind this sort of issue can be an incomplete installation of QuickBooks software. You can head further to find out the triggers and fixation steps to this issue.
Signs and Symptoms of QuickBooks Payroll Error 20102
There can be certain indications that can help you in spotting the QuickBooks payroll error 20102. These indications include the following:
One of the major connections can be new program showing up and crashing.
If the PC collapses with error 20102 now and again when running a similar program.
You might continuously see an error message popping up on the screen.
Also, if the PC begins to respond slowly and freezes for a quite while..
Triggers to QuickBooks Payroll Error 20102
There can be numerous reasons as a result of which you might be facing such an error. Here are some of the most common factors causing it:
As a result of incomplete installation of QuickBooks, you might be facing such an error.
Another trigger for the same can be any sort of virus or malware attack.
You might also come across such an error if there is corruption in the windows registry.
Unintentional deletion of essential QB-related files.
Methods to Follow for Fixing the QuickBooks Error Code 20102
You can perform any of the below methods, so as to get rid of the QuickBooks error 20102 successfully.
Method 1: Take Assistance of the QuickBooks File Doctor Tool
In the first step, you need to install the QuickBooks tool hub in the system.
And choose the Tool hub option and hit on the Company file issue.
Close all programs and applications, including QuickBooks.
Run the downloaded file and follow the on-screen instructions.
Restart your computer and try to open QuickBooks again.
Summing Up!
We wrap up with the hope that the technical snag got fixed. If not, then we are always there to assist.
That was all you need to know to fix the QuickBooks error 20102. As always, if you need any of our assistance, or for any queries, comments, or concerns, connect with our support representatives today via our helpline i.e., 1-888-368-8874! Our certified accounting professionals and QuickBooks error support team are always ready to assist you and fix the errors for you in the least possible time. So, do not hesitate in calling us anytime, we will be happy to help you!
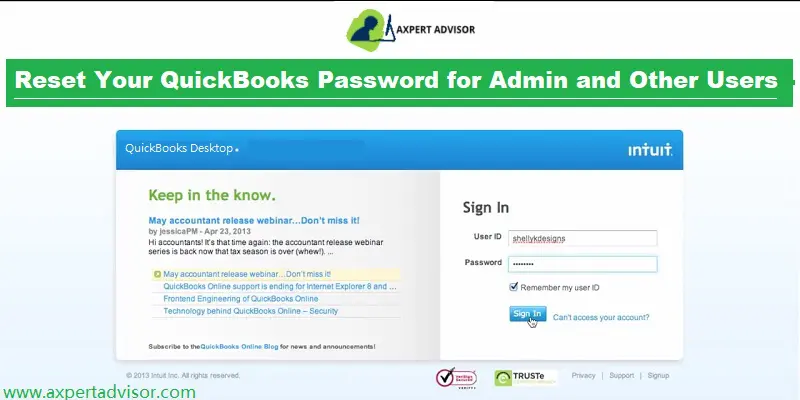
Learn the easiest ways to reset QuickBooks desktop password for Windows:
Have you forgotten or lost your QuickBooks admin password and are locked out of your crucial business data? You've landed on the right page! Maintaining a strong admin password is vital for protecting your business from unauthorized access, but occasionally, forgetting it happens.
This comprehensive guide provides a step-by-step process to reset your QuickBooks admin password for both QuickBooks Desktop for Windows and QuickBooks Desktop for Mac. We'll walk you through the necessary procedures to regain access to your accounting files quickly and securely. Don't let a forgotten password halt your operations – learn how to reset it now!
Convenient Steps to Reset the QuickBooks Desktop Admin Password
Just in case you forgot your password, you can perform some steps and try retrieving your admin password successfully:
Steps to Follow for a Misplaced Admin Password:
You should note that there is no need to Enter a username, as when logging in, you only would have to Enter a password.
Moreover, your User name will be admin, or other Admin user names that you created at the time of creating the admin user,
There can be two scenarios for changing the Admin password, either you want to change it for security reasons, or you have forgotten the password.
In case you are not an admin user, then your QuickBooks admin can reset your password for you. You need to contact your admin and have them follow the steps in the "Reset a user password" section below:
Steps for Resetting password for QuickBooks desktop 2020 or later versions
You will first have to Login the company login window and select the option stating I forgot my password.
Now, in the drop-down list, go for the Next tab and a token will be Emailed to reset the password. It should be noted that if you are unable to see the email address, then you are supposed to go for the option stating Don’t see your email in the list above? And perform the onscreen instructions.
You are then required to Insert the token that you received in the email address. You can also check the spam or junk folder if the email is not visible in your inbox.
Steps for Earlier Versions of QuickBooks Desktop 2019
If you are using the earlier version, you are supposed to Start the QuickBooks desktop first. And choose ''I forgot my password.''
Later on, enter all the information in the form:
The License number of the QuickBooks version that you are using is to be entered, which can be found by tapping on the F2 key.
Fill in the Accurate name, email address, phone number, and ZIP code you formerly used at the time of purchasing the software.
Just in case the information recorded is accurate, then you will Get a code on the original email listed in the CAMPS. Moreover, emails from Intuit sometimes can be marked as spam, so you can check the spam folder.
QuickBooks will guide you through the process to create a new admin password.
You will now see a screen where you can enter a new password and choose a challenge question for safety purposes.
After creating your new password and entering a challenge question you will be navigated to the login screen.
Now, enter your latest created password to login into your account. Here you will another window where you will see the 'Change QuickBooks desktop password' message. You need to fill in all the information asking it is and then push the OK tab.
Now you will get a message i.e. "Your password has been changed". Hit on OK to close it.
Important
In a scenario, when none of the methods to reset QuickBooks Desktop password work out, then you can perform the below-illustrated steps:
Cross-checking the information that you provided is recommended. Also, we suggest you verify that the information you catered matches with the info you registered in CAMPS.
You must meticulously adhere to the instructions given below in order to use this tool:
1st Step: The QuickBooks Desktop Version Needs to be Verified.
To verify your QuickBooks Desktop version, follow the steps listed below:
Press F2 to open the Product Information window, and then go through it.
View the QuickBooks version.
Now, Select Reports after launching the QuickBooks program.
Select QuickBooks Report writer and then select Help.
Go to the About QuickBooks Report Writer menu.
Next, look for the QuickBooks version in About window.
For QuickBooks Basic and Enhanced Payroll, Proceed as Follows:
Go to the Payroll centre by selecting Employees.
Next, select the Payroll tab.
For QuickBooks Point of Sale:
Select Help from the menu, then select Product Information.
Look up the release and version of QuickBooks.
2nd Step: To Open the Company File, Select an Earlier Version.
Download QuickBooks Automated Password Reset Tool first onto your computer first.
You must save the file to your desktop after downloading it, then execute it by following the on-screen directions.
Next step is to confirm your registered mail address because a message with a password reset token will be sent to that address.
Resetting the new password requires the token.
Pick the Product from the drop-down menu.
Select the file that you wish to reset the password for now.
Make sure the company file you select to reset the password for is the correct one.
Create a new password and type it in again.
In order to complete the operation, you must now click the Reset button.
Resetting Password in QuickBooks Desktop for Mac
Following are the quick steps for resetting your admin passwords if you are a QuickBooks desktop for Mac user:
Steps for QuickBooks Desktop Mac 2019 or Earlier Versions
If you are a QuickBooks desktop mac 2019 user, then you will require a QuickBooks license number for resetting the admin password and also will need an email address, phone number, zip code, and the name that you use to purchase and register the product. You can get all the information on the CAMPS website.
You can head to the login page and choose Forgot password.
Furthermore, you should Enter all the information on the form and hit the OK tab.
You will then receive a password Reset code or link on the registered email id. Where you can insert the code and tap on the ok tab.
QuickBooks will cater to you with the instructions to Create a new admin password.
Steps for Resetting Admin Password in QuickBooks Desktop Mac 2020 and Later Versions
Well, if you are using the Mac 2020 or later versions of QuickBooks, then you would require the following steps:
Start with selecting the Lock icon from the password field. Moreover, you will see a pop-up menu listing the Recovery email address.
Further, you would have to choose an Email address that you have access to and hit the OK tab.
You will get an email from QuickBooks itself, within a short period of time that would state the further steps for Creating new admin password.
Reset a Non-Admin Password in QuickBooks Desktop for Mac
These steps are only for limited users. Only the company file admin can reset a password for non-admin users.
Firstly, sign in to the company file as the admin.
After that, from the Company menu, choose Users and Passwords opt.
Furthermore, choose the user you want to Change the password, and then choose the Edit option.
Now you need to select the Lock icon, then enter the new password.
Last step to perform is to choose Save.
Points to Keep in Mind Before you Reset QuickBooks Desktop Password
Before you head to the process of resetting the admin password, we have got certain pointers for you to consider and ponder on:
The most important point that you should keep in mind is that the password shouldn’t contain any spaces. Also, you are supposed to re-enter the password without spaces, in case any spaces are found.
Moreover, always try to create a complex password. You can take into consideration the instructions which include having at least 7 characters, i.e. letters, numbers, special characters, and at least 1 number and upper case letter.
Another important aspect is that the password might be blank, as a few of the users wish to leave the admin password blank.
You should also keep in mind that your keyboard should be functioning properly, as at times it might happen that your keyboard might not be functioning properly.
One more aspect to be considered is that you might be seeing an incorrect login screen. As a login screen that asks for a password but doesn’t ask for a username is the admin login screen and you have a non-admin login, then try closing QuickBooks and reopening it.
Before you head forward, also check if the caps lock is turned on.
The final words..!
That was all you need to know about how to reset QuickBooks desktop password successfully. As always, if you have any queries, then you can get in touch with our QuickBooks desktop support team via our toll-free i.e., 1-888-368-8874. Our team will provide you with the best possible information in a single call.