One of the most important features of QuickBooks desktop is its Direct Deposit. This feature provides you a hassle-free method to pay your employees electronically. This simplifies the salary payment process and saves ample of time. This is a convenient feature that many QuickBooks users use in their daily processes. But like any other feature, this feature also encounters some problem of direct deposit not sending. This problem of direct deposit not sending can disrupt your payroll schedules and cause inconvenience for both employees and employers. Thus, it becomes crucial to resolve this error and ensure smooth payroll processes.
Meaning of Direct Deposit Not Sending
Whenever QuickBooks show this error, this means that the payroll data has not been shared with Intuit’s servers successfully, and then it not able to process it. This error can occur because of several reasons which include incorrect setup, connectivity issues and some other internal errors.
Common Reasons that lead to the error of ‘Deposit not sending’
Incorrect Bank Information
Payroll Deadline has been missed
Funds in the account are insufficient
Account has not been verified with QuickBooks
QuickBooks is not updated to the latest release
QuickBooks Payroll service is not activated
What happens when Direct Deposit failure occurs?
When this error occurs, the users face the following problems:
Employees do not get payment on time
Payment status shows pending or rejected
Error messages keep appearing
Methods to Fix QuickBooks Direct Deposit Unable to Send, Failed, or Returned Error
Following are the troubleshooting methods for fixing direct deposit errors in QuickBooks desktop:
Solution 1: Use the QuickBooks software in Incognito mode
At first, open your browser (Chrome, Firefox, Safari, or Edge).
After that press Ctrl + Shift + N keys to open an Incognito/Private window.
Navigate to the QuickBooks Online login page and sign in as you normally would.
Solution 2: Create Unscheduled Payroll
Go to QuickBooks Online.
Open the Payroll menu.
Click on Employees and then click on Run Payroll.
Now, select any Employee and choose Create another check.
Add the compensation details like salary, leaves.
Enter Pay Period and Date.
Preview Payroll and then submit it.
Now, click Finish Payroll.
Solution 3: Clear Cache
Clearing the cache of Google Chrome can help fix the Direct Deposit failure issue in QuickBooks.
After this, try sending the direct deposit again.
Open Chrome and click on menu.
Go to Settings and then click on Privacy and Security.
Click on Cookies and other Site Data. Click on See all cookies and site data.
Check for Intuit.
Now, Remove all and restart Chrome.
Solution 4: Reconnect Bank Account
In QuickBooks, go to Employees menu.
Choose ‘My Payroll Service’ and then click on Activate Direct Deposit.
Click on Getting Started and then click on Business Tab and hit Next.
Add the desired information and then click Next.
Add a new bank account. Enter all details and create a Pin to send payroll to QuickBooks.
Additional Tips:
Make sure that you keep a record of all the error messages that you encounter. This will help when you seek external assistance.
Ensure that you create regular backups of QuickBooks and prevent data loss.
Reach out to Professional help if the issue is not resolved following the above steps.
Summing Up!
It is very clear that QuickBooks direct deposit not sending error can hamper the important process of the businesses. This can be resolved with careful troubleshooting but if the problems still persist, and you are not able to get over it, then you can seek professional support. Reach out to our QuickBooks error support team at 1-888-368-8874 and seek professional help. Our team is available round the clock and can resolve your errors to ensure smooth performance and functioning.
Errors due to technical issues in QuickBooks are a common problem. One of these common errors is QuickBooks error 6105 which also known as condensed data issue. This error occurs when the user faces problems in accessing their files due to data corruption or damage. Due to this error, the user is unable to access their important data which disrupts daily business operations. This error may also occurs due to improper file handling, system crashes or when users try to condense a large size company file. In this segment, we will learn in depth about what this error is and what causes it. Along with this, we will also know the right solutions to fix it by understanding its causes.
Methods to resolve QuickBooks error code 6105 when accessing company file
If you are facing QuickBooks error code 6105 then you need not to worry as below we have provided some DIY methos to rectify this error.
Solution 1: Stop QuickBooks programs running in background
Open Task Manager by pressing Ctrl + Shift + Esc together on the keyboard. This will open the list of programs running on your system.
Now, select the Processes tab and go to QuickBooks Processes.
Then, right-click on each process and click on the End task option.
Solution 2: Restart your system
Close all the programs running on the system.
Now restart your system.
After restarting your system click on Windows button and type control panel in the search box and enter it.
Next, click on user accounts then again click on user account.
Now check if your account is labeled as an administrator under your name.
To view other accounts, click Manage other accounts
To convert your account to an administrator, enter administrator credentials when prompted-
Select your profile.
Click Change account type.
Select Administrator and enter the administrator password when prompted.
Solution 3: Run QuickBooks desktop as Administrator
First you need to close the QuickBooks desktop.
Now right click on the QuickBooks desktop icon and select run as administration.
A dialog box open on the screen click yes to proceed.
Solution 4: Change the extension of QuickBooks supported files
Open the folder that contains your QuickBooks company files.
Now Locate the following support files:
Network Data File: company file name.nd
Transaction Log File: company file name.tlg
Right-click each file and select Rename.
Add .OLD at the end of the file name:
company file name.nd.OLD
company file name.tlg.OLD
Save the changes and close the folder.
Open QuickBooks desktop and check if the error is resolved.
Solution 5: Re-Create company file
First you need to locate our company file and open it.
Now choose Utilities option.
After that choose the opt that allows you to reset the company file.
Click Verify to check the hosting of the company file.
Finally, allow rebuilding to occur.
Solution 6: Run Verify and Rebuild data utility tool
First, press the File tab and scroll down to Utilities.
Select the Verify Data option and click OK to run the tool.
Wait for the process to finish. You will see one of these messages:
“QuickBooks detected no problems with your data.” (No issues found)
An error message with on-screen instructions.
“Your data has lost integrity.” (Requires running the Rebuild Data tool)
Go to File > Utilities > Rebuild Data if required.
Create a backup when prompted, then let the tool run.
Once you see “Rebuild has been completed,” close the window and restart QuickBooks.
Solution 7: Perform a clean installation using clean installation tool
First, close your QuickBooks desktop.
Now, type Control Panel in the search box in your Windows OS.
Then, select Programs and Features.
Go to QuickBooks and click on the Uninstall option.
Follow the on-screen instructions to scan and repair the corrupted file.
After the process is complete, check if the company file opens correctly.
What are the reasons behind the QuickBooks error message 6105?
There are many reasons which trigger the QuickBooks Error Message 6105 are as-
This error can be caused by the QuickBooks company file being corrupted or damaged. It can also be caused by problems during file creation, data transfer or storage.
If you are using an older version of QuickBooks than it may result in compatibility issues and errors.
Insufficient administrative privileges interfere with normal QuickBooks operations.
If your QuickBooks software not be installed properly than it cause the error 6105.
QuickBooks file extensions can become corrupted, which affecting data access.
Programs running in the background can cause problems and interfere with proper functioning.
System error or insufficient permissions can also cause such an error.
How to identify QuickBooks error message 6105?
A pop-up shows “Error code 6105: Compressing data failed.”
The condensation process is not completed.
QuickBooks cannot open or access the file.
Missing transactions, incorrect balances, or distorted reports.
QuickBooks runs slowly or crashes.
QuickBooks freezes when opening or managing the file.
Conclusion
In this segment we discussed about the QuickBooks error code 6105. Here we discussed why this error happened and how it disturbed user. We also try to give you the best solutions to resolve this error. If you have any doubt and still need any technical guidance then you contact our QuickBooks error support team at 1-888-368-8874. You can speak our experts they will provide you immediate guidance for your problem.
A Quick Guide to learn to enter opening balances for accounts in QuickBooks
When creating a new account in QuickBooks, the user is suggested to pick a day to start tracking all of the transactions. The user should enter the balance of the real-life bank account for the day that has been selected. This will let QuickBooks match the bank records form the start. The starting point here is the account’s opening balance. This summarizes all the past transactions that came before it. To learn the process toenter opening balance in QuickBooks, make sure that you read this article carefully till the end. Or you can also ask our QuickBooks support team professionals using our support number 1-888-368-8874, and they will come up with the most effective steps for you.
Steps to enter opening balance for accounts in QuickBooks
The below steps can be of some help in entering opening balance for accounts in QuickBooks. Let us check the steps out one by one:
Step 1: Enter an opening balance
The steps for the type of account the opening balance is for are listed below:
Bank or credit card accounts
Before creating a new account on QuickBooks chart of accounts, ensure to know what to enter for opening balance. The user can enter an opening balance for a real-life bank account you just created, or one that is already present.
At first, the user needs to get the bank statements or sign in to the bank’s website
And then, in QuickBooks move to the company menu and then choose chart of accounts
Right click anywhere on the chart of accounts and choose new
The next step is to select bank or credit card for the account type and also choose continue tab
The user needs to give account a name. in case the user is having multiple accounts of the same type or at the same bank and give them unique names so that they are easy to tell apart
After that fill out the rest of the data fields
And also, choose enter opening balance. In case the user requires to edit the opening balance, the button will be change opening balance
Once done with that, the user should choose save and close to record the opening balance
Asset, liability, ad other types of accounts
The user can enter an opening balance for a real life bank account that is created above. The user should also be careful entering the opening balances for accounts on your balance sheet. This includes fixed asset, equity, long-term liability, other assets, other current assets, and other current liability accounts. In case the user is unsure or have any queries, then it is suggested to reach out to the accountant. In case the user isn’t having an accountant, he/she can look for one.
The user can get the bank statements or sign in to the bank’s website initially
After that, move to the company menu in QuickBooks and then choose chart of accounts
The next step is to right click on chart of accounts and choose new
Choose fixed asset, loan, or equity. For other types of accounts, choose the other account types drop down and one of the types
Also, choose continue tab
Assign the account a name
Enter rest of the details
And also select enter opening balance
After that choose save and close tab to record the opening balance
Income and expense accounts
The user need not to enter opening balances for income or expense accounts. These accounts simply track the earnings and spending.
Step 2: Check the opening balance entry
After entering the opening balance, move to the account register and ensure it is appropriate.
Here, the user needs to move to the lists menu and choose chart of accounts
Look for and open the opening balance equity account
Also, check the account balance
In case the balance isn’t 0.00, then need not to worry. The user simply needs to write down the remaining balance. Then run a balance sheet report for last year.
The user needs to move to the reports and hover over company and financial
And choose balance sheet standard
The next step is to select last fiscal year form the dates dropdown
Check the retained earnings balance
Compare last year’s retained earnings balance with the remaining balance in the opening balance equity account
That's it!
Entering opening balances for accounts in QuickBooks can be a little easy, once the above stated steps are performed properly. However, if there is any query or if for some reason the user isn’t able to perform the required steps, then in that case give us a call at 1-888-368-8874, and we will be there to come up with the best possible assistance immediately.
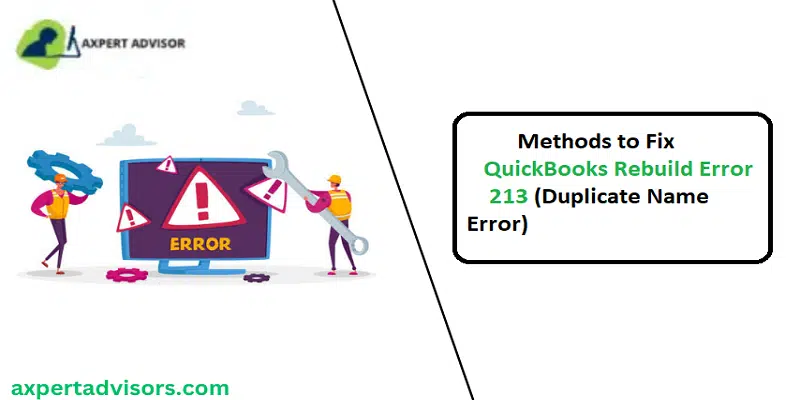
Facing QuickBooks error 213 and unable to decide what to do? Well, not to worry anymore, as we have come up with this article, where we will be talking about the causes and fixes of the Rebuild error 213 in QuickBooks. Error 213 indicates that the data contains the duplicate list of elements. This error code is seen when the user runs the verify data utility. It also appears when running, installing windows startup or shutdown, monitoring when and where such an error happens.
To know more about eliminating QuickBooks error code 213, make sure to read this article till the end. Or you can also contact our QuickBooks support team at 1-888-368-8874, and let them resolve the issue for you.
What leads to QuickBooks Error 213?
The user can end up in QuickBooks error 213, due to the following reasons:
The most important reason can be if the framework is having an issue
Another reason can be if there is incorporate off base client input
Also, if there are faulty passage of non-existent projects which are as a rule because of disgraceful programming uninstall
Moreover, if there is missing records that were unintentionally removed from the registry
Steps to fix QuickBooks Rebuild error 213
The user can try fixing the QuickBooks error 213 by performing the below methods. Let us have a look:
Method 1:
The very first step is to sort all lists from the re-sorting list
After that, locate the re-type QuickBooks list
The next step is to reopen the QuickBooks software again by entering all needed details
Select that specific view and click on all employees, customers, and vendors
Open the list menu for all other names, custom message and accounts
Ensure about all things, proceed further to open and edit the window by clicking on twice
Settle down the account, in case any duplicate account name found
Choose the specific account and click on edit tab
To make this special, check the features like punctuation, capitalization, and spacing to change the name
Click on ok tab to save all new changes
If you wish to end any other copied list item that is set up in the qbwin.log file
When you edited all items, click on file tab
Choose utilities and enter and verify data
Signs and symptoms of QuickBooks Error Code 213
The user can spot the error message 213 by using the below signs:
One of the major signs can be if the user doesn’t switch in the multi user mode in the system
If the system becomes an idle on all programs
Another sign can be when the software will confront QuickBooks freezing issues in QuickBooks
The user isn’t generally fit for starting the business information company data files that are put on some other system that is as of now
Conclusion!
Fixing the QuickBooks error 213 might be easy, if you follow the steps discussed in this article. However, if the error persists for some reason, then it is suggested to talk to our QuickBooks support team at 1-888-368-8874, and let our QuickBooks professionals perform the issue for you.
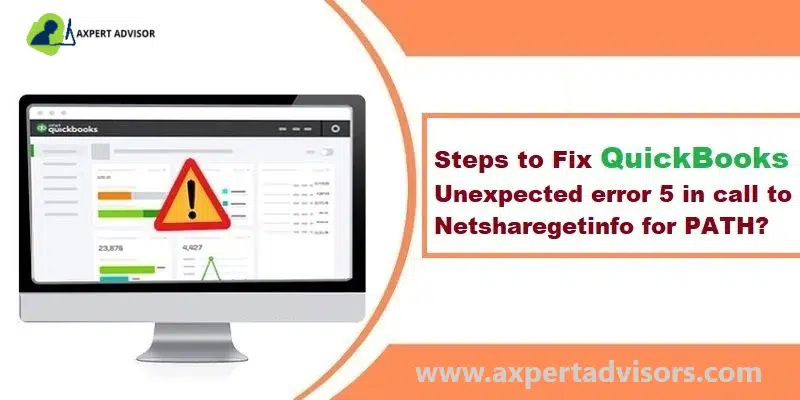
QuickBooks Point of Sale has garnered unexpected preference in recent years owing to its ease of access and the multifarious features this accounting program has on offer for its users. However, just like its counterpart QuickBooks versions, QB POS is also vulnerable to different types of technical issues arriving every now and then. One such error which we will be focusing on in this blog is "QuickBooks Unexpected Error 5, or the System Code 5 Access Denied error". You may this error when you install the hardware or when opening/running other functions in QuickBooks POS. It appears as:
Status code 5, or
System Error. Code: 5 Access Denied.
This error code has mostly been reported by users when they install the QB POS. Other instances when this issue has been experienced involves the use of specific QuickBooks functionalities, or when trying to open company file via the multi-user mode. This article provides a full in-depth overview of this error, and comprehensively discusses its causes and potential fixes to help troubleshoot QuickBooks Unexpected Error 5.
Solutions to Resolve QuickBooks POS Status Code 5 or System Error Code: 5 Access Denied
Users can conform to the following solutions to ensure a complete extermination of this QuickBooks error message 5 out of their systems. These troubleshooting methods are comprehensively discussed below:
Method 1: Update QuickBooks Desktop Point of Sale
The first easy and effective strategy to fixing this problem is to update the program. This is possible in two ways, the Automatic method and the Manual method.
There, choose Check for updates, and wait for the results. If any update is available, the same shall appear on the screen.
If the update shows up, hit on Update Now, then click Ok.
Steps to update QuickBooks POS using Automatic method
For this, user needs to first sign in to QB POS as admin.
Then, go for Help menu, then to Software Update.
There, choose updater preference, and then go to General tab.
Click on Automatically download updates. The user can also choose Notify Me option if he/she wants the system to give a notification asking for the user’s consent for the update.
Then, hit Ok tab.
Method 2: Turn off User Account Control (UAC) in Windows
To turn off UAC, the steps are:
From Start menu, open Control Panel.
Then go for User Account, followed by going to Change user Account Settings option.
Choose Yes, then move the Slider to Never Notify.
Then, click Ok, and go for a system restart.
This should fix such error in QuickBooks POS encountered during the update process. If the update goes on smoothly, then make sure to Turn on UAC again after the update.
Method 3: Recreate QuickBooks Company File User
This method requires removing the company file user and then recreating the same. The steps are:
Process to Remove Company file user
Run QB, then move to Company tab, then choose Users.
Now, opt for Set up Users and Roles.
Under Users list, pick the user, then click Delete.
Hit on Yes for the confirmation.
Process to recreate the Company file user
Head to Users and Roles section.
Here, click New, and type in the Username, following by typing in the correct password.
Set roles, then click Ok.
Method 4: Use of QuickBooks File Doctor to resolve company and Network file issues
If no method discussed till now works out, then the ultimate resolution is to clean Install QuickBooks. One easy way is to resort to Clean Install Tool in Tool Hub program. Another conventional way is to uninstall QuickBooks in the Control Panel, then get it reinstalled.
Access Control Panel, then Programs and Features.
Pick QuickBooks, then Uninstall/Change.
Click on Uninstall and follow the steps on the screen.
Now, don’t forget to rename the QuickBooks folder.
Then go for the reinstallation of QuickBooks.
Primary Causes behind QuickBooks system error 5
This QuickBooks POS error 5 usually occurs due to any one of the following mentioned factors:
Windows User account not having sufficient rights.
The Shared download location for Point-of-Sale update is not valid.
The company File or Network data (.ND) File have data damage.
QuickBooks folder not having rights to be shared in the Multi-User mode.
An old version of QuickBooks may also trigger Status code 5 error in QuickBooks POS.
Wrapping Up!
The blog encapsulated all approaches to resolve QuickBooks Unexpected Error 5, which can also appear as 'Status code 5 or System Error. Code: 5 Access Denied'. If you are having any doubts, unhesitatingly call our QuickBooks error support experts at the helpline i.e., 1-888-368-8874.


 4")
 5")
 6")
 7")
 8")
 9")
 10")
 11")
 12")
 13")


? 23")
? 24")
? 25")
? 26")
? 27")
