Facing QuickBooks error 213 and unable to decide what to do? Well, not to worry anymore, as we have come up with this article, where we will be talking about the causes and fixes of the Rebuild error 213 in QuickBooks. Error 213 indicates that the data contains the duplicate list of elements. This error code is seen when the user runs the verify data utility. It also appears when running, installing windows startup or shutdown, monitoring when and where such an error happens.
To know more about eliminating QuickBooks error code 213, make sure to read this article till the end. Or you can also contact our QuickBooks support team at 1-888-368-8874, and let them resolve the issue for you.
What leads to QuickBooks Error 213?
The user can end up in QuickBooks error 213, due to the following reasons:
The most important reason can be if the framework is having an issue
Another reason can be if there is incorporate off base client input
Also, if there are faulty passage of non-existent projects which are as a rule because of disgraceful programming uninstall
Moreover, if there is missing records that were unintentionally removed from the registry
Steps to fix QuickBooks Rebuild error 213
The user can try fixing the QuickBooks error 213 by performing the below methods. Let us have a look:
Method 1:
The very first step is to sort all lists from the re-sorting list
After that, locate the re-type QuickBooks list
The next step is to reopen the QuickBooks software again by entering all needed details
Select that specific view and click on all employees, customers, and vendors
Open the list menu for all other names, custom message and accounts
Ensure about all things, proceed further to open and edit the window by clicking on twice
Settle down the account, in case any duplicate account name found
Choose the specific account and click on edit tab
To make this special, check the features like punctuation, capitalization, and spacing to change the name
Click on ok tab to save all new changes
If you wish to end any other copied list item that is set up in the qbwin.log file
When you edited all items, click on file tab
Choose utilities and enter and verify data
Signs and symptoms of QuickBooks Error Code 213
The user can spot the error message 213 by using the below signs:
One of the major signs can be if the user doesn’t switch in the multi user mode in the system
If the system becomes an idle on all programs
Another sign can be when the software will confront QuickBooks freezing issues in QuickBooks
The user isn’t generally fit for starting the business information company data files that are put on some other system that is as of now
Conclusion!
Fixing the QuickBooks error 213 might be easy, if you follow the steps discussed in this article. However, if the error persists for some reason, then it is suggested to talk to our QuickBooks support team at 1-888-368-8874, and let our QuickBooks professionals perform the issue for you.
Are you seeking to create a new QuickBooks company file from an existing one? Here is the complete guide that you can follow so as to create a new QuickBooks company file. This can be a time-saving technique as it can create a basic framework of the new company files which would comprise accounts, different types of lists, templates, and preferences. Users don't need to start the company files from scratch but should simply copy and use accounts lists, templates, and preferences from an existing company file to start with.
The process requires the creation of a copy of an existing company file and then condensing the file to remove all the transactions. This will give a basic framework to make use of the new company file. Keep reading this segment to unleash the entire process to create a new QuickBooks company file from an existing one.
Essential Points to Remember
Before starting with the process of creating a new QuickBooks company file from an existing one, make sure to go through the below pointers one by one:
You should also note that QuickBooks might not be able to remove all of the transactions in case you have the payroll data for the current year.
Another essential point can be if you use QuickBooks-assisted payroll, then we suggest you to consult some professional before starting with the steps
If you are making use of QuickBooks payroll, direct deposit, e-file, or e-pay, then it is suggested to ensure that the subscription is only active for one company
When should I create a New QuickBooks company file from an Existing One?
The user should create a new Company file from an existing one in the following situations:
Slow performance of QuickBooks and recurring freezing of QuickBooks especially when accessing the company file.
Surpassing the List limits
Corruption in the company file data
Conversion of Inventory items to non-inventory items or vice versa
The company file changed from one business type to another.
Procedure to Create a New QuickBooks Company File in QuickBooks Desktop Enterprise, Enterprise Accountant, or Premier accountant
QuickBooks Enterprise or Accountant users have a composite feature which can help them create a new company file from existing one in no time. The process is presented in a schematic order below:
Begin by heading to the File menu, and when reached there, opt for the “New Company from Existing Company File” tab.
The next step is to tap on Browse and soon after, choose the Company file to be copied.
Now, open the company file and then give a suitable name to this name.
Assign a name to the copy of the company file.
After that, click on the Create Company option.
You should also note that QuickBooks copies the preferences, sales tax items, memorized reports, and chart of accounts to the new company file. This won’t bring over bank or credit card accounts, ad would not copy sensitive information.
Walkthrough to Create a New Company File from an Existing one in QuickBooks Desktop
The procedure below should be adhered to for the easy creation of a new company file from an old one. Before proceeding any further, first make sure that you take a backup of the company file data. Once that is accomplished, follow the steps given below:
Step 1: Creating a duplicate copy of the existing company file
This first step involves the creation of a copy of an existing company file. The steps are:
Run QuickBooks.
Move to the Report menu.
Opt for the report to keep a copy of:
Account balance: Choose the company and financial, then the balance sheet detail.
Customer balance: Pick customers and receivables and then select customer balance detail.
For vendor balances: You need to opt for the vendors and payables, and then the vendor balance detail.
Just in case you wish to customize the reports to better fit the needs.
On the report window, it is suggested to select the print drop down
From where, you can select print, if you want to keep a physical copy of the report.
Choose the Save as PDF option in case you wish to have a digital copy.
Step 2: Export the lists from the old company file
You need to enter each of the lists manually. And can also export the accounts and lists from the old company file and carry them over to the new one.
Step 3: Create a new company file
In this step, you need to open the QuickBooks Desktop.
And further, choose to Create a new company in the No company open window.
You will see two options:
Either select Express start or start Setup, in case you want to start straight away. You will have to enter the business name, industry, and business type to create the company file. You can enter the information later on.
Else, select the Detailed start tab to complete setup so all of the information is in from the start.
You are then required to follow the prompts that appear on the screen so as to Finish setup. You should note that if you have an existing company file in QuickBooks, then a unique name should be assigned to another one.
Step 4: Import the lists and enter the beginning balances
In the new file, you can import the lists and enter the account's initial balances. You are first required to import the accounts and lists. And also enter the beginning balances.
Step 5: Examine the Accounts
Condensing the company file should remove the transactions. To get this double-checked, just Run a Transaction List by Date report and check if the transactions got removed.
First step is to make a move to “Reports menu”, and from there, tap on the “Reports Center”.
The following step is to search for the “Account and Taxes” section.
Upon locating that, proceed by opening a “Transaction List by Date report”.
Change the date range for the report in such a way that it begins before the oldest transaction of the copied file.
Check if all the transactions got removed.
The file is now ready for incorporation of new data and is as good as new.
Step 6: Set up online banking, payroll, and other services
Under this, you should set up bank accounts for bank feeds.
Also, set up Intuit Data Protect so as to back up the new file.
And track account balances by classes using class tracking.
Summing Up!
That was all you needed to know so as to create a new QuickBooks company file using an existing one. For any queries, comments, or concerns, call our QuickBooks desktop support team at +1-888-368-8874!
Before installing any software, especially robust accounting solutions like QuickBooks Desktop, it's crucial to verify your system meets the minimum requirements. This ensures optimal performance and stability and prevents frustrating issues down the line. With over 29 million businesses relying on Intuit QuickBooks in the United States, proper configuration is key to seamless operations.
This article provides a comprehensive overview of the system requirements for various QuickBooks Desktop versions, including the latest hardware and software specifications to help you make an informed decision. We'll detail the necessary operating systems, processor speeds, RAM, disk space, and other critical components for smooth QuickBooks functionality. While we aim to provide all the information you need, don't hesitate to reach out to our certified professionals for personalized consultation and expert assistance if you have any doubts.
System Requirements For QuickBooks desktop 2022 and It's all Versions & Editions
Operating Systems
Windows 10: All editions with 64-bit and Natively Installed
Windows 8.1 (update 1): All editions which include 64-bit, Natively Installed
Microsoft Windows 7 SP1: All 64-bit edition and Natively Installed
Windows Server 2016
Windows Server 2012 R2
Microsoft Windows Server 2011
Windows Server 2008 R2 SP1
Database Servers
For Windows: Windows Server 2016, Windows Server 2011, Windows Server 2012 R2 and Windows 8.1 (update 1) or Windows 7 SP1 (Enterprise and Professional editions only), also Windows Server 2008 R2 SP1, and Windows 10, natively installed.
Linux: -Only installation: OpenSuse 42.3, Fedora 27, Red Hat Enterprise 7 when you using QBES Database Server.
Browser Requirement: Internet Explorer 11 (32 bit)
Hardware and Operating System Requirements (Client and Server)
2.4 GHz processor Minimum
4GB RAM minimum and 8 GB RAM Recommended
Server RAM Requirements
8GB RAM: 1-5 Users
12GB RAM: 10 Users
16GB RAM: 15 Users
20+GB RAM: 20 Users
Disk Space
2.5 GB disk space
Additional Software is provided for Microsoft .NET 4.6 Runtime on the QB CD 60MB.
Intuit Data Protect in QB Connected Services offerings
Minimum 4 GB RAM
Twice the size of the largest file for backup or restore is required.
Windows:
When using US QuickBooks Software, US version of Windows is required
When using Canadian QB software, make use of the Canadian version of Windows.
Regional setting is supported when set to English with keyboard setting to US/CA only
Administrator rights will be required while hosting Multi-user access on server computer
Natively Installed
Optical Drive
For CD installations: 4X DVD-ROM drive.
Screen Resolution
Higher with up to 2 Extended monitors or 1280 x 1024 screen resolution
Default DPI Setting.
Software Compatibility
QuickBooks is quite compatible with users and allows them to interact with third-party applications. Integrations for this with QuickBooks are below:
Microsoft Office
Office 2016 including Outlook 2016 on 32 and 64 bit.
Office 2010 and Office 2013 and 365 both on 32 and also 64 bit (including Outlook 2010 and Outlook 2013)
Gmail Estimates, Invoices and other forms with Microsoft Outlook with office 365, Microsoft outlook 2010-2016 and other support to Gmail, Yahoo! Mail and Outlook.com.
Microsoft word 2016, 2013, or 2010 or Office 365 (includes 64-bit) for preparing letters
Microsoft Excel 2016, 2013, or 2010 or Office 365 (Includes 64-bit) to export reports
Outlook 2010 (32-bit) to contact Synchronization with Microsoft Outlook.
Requires QB contact Sync for Outlook synchronization Outlook.
QB Point of Sale Version 18.0 and Version 12.0 (applies to US only)
4 GB RAM for single workstation and 8 GB RAM for multi-user
1 Gb disk space
4 GHz processor for single users and 2.8 GHz for multi-users
Multi-core processor for multi-user implementations.
System Requirements For QuickBooks Desktop For Mac 2020, 2021 and 2022
QuickBooks for Mac (US Only)
Minimum System Requirements:
MacOS 10.12 (Sierra) ad should be supported by macOS 10.13 and macOS 10.14
2GB RAM ( 4GB Recommended)
Product registration
250 MB disk space should be available
CD/DVD Drive for download installation
Printer to print invoices, checks, etc.
Use intuit checks
Intel processor (Core Duo 2 or higher) is required
Integration/Compatibility Requirements:
To export data, Microsoft Excel 2016 or later, Apple Numbers v3.5, including Mac Office 365 are required
Apple Mail, Microsoft Outlook 2016 or later, including Mac office 365, almost all support to Email is required for Emails
Intuit Merchant Services for QB for Mac is required in order to accept debit and credit cards.
Integrating Processing Payroll: Requires a paid subscription, EIN and Internet access for QuickBooks for Mac.
To print checks and forms in QB payroll for Mac, Adobe reader and printer would be required because of the basic needs of the system. (Additional fees apply)
Top pay may differ from those of QB. even more, details visit the website at www.macpayroll.com and www.matrix.com
A one-way conversion is being supported by QBD for Mac 2019 in QuickBooks online and the same is also supported from QBD for windows 2016 to 2018
Supports Round- Tripping with QuickBooks for Windows 2019 and later as it is a better option to send data file to Accountant.
System Requirements for The Older Versions of Mac
The requirements for older versions of Mac include:
MacOS 10.10.2 and MacOS 10.11 required for QuickBooks for Mac 2016 R5 or earlier.
MacOS 10.11 and MacOS 10.12 required for Mac 2016 R6 and later
At least 2 GB RAM and 4 GB recommended
250 MB disk space
Intel Core 2 Duo or higher should be the Mac processor
If you wish to print checks, then use intuit checks
Product registration required
A 100% Macintosh-compatible printer if print of invoices, checks, purchase orders, reports and graphs.
Integration/Compatibility Requirements of QuickBooks Software:
Apple Mail, Outlook 2011 for Mac or Microsoft Entourage 2018 for e-mail
Internet connectivity is required for QuickBooks Payroll for Mac and Adobe Reader is required to print checks and forms.
Apple Numbers ’09, Microsoft Excel 2008 or 2011 to export report information
QuickBooks for Mac 2016 supports one-side conversion from QB for Windows OS 2012, 2013, 2014, and 2016.
Intuit Merchant Service is required to accept credit and debit cards directly into QB 2016 for Mac.
If QB is integrated with Mac, then a paid subscription, internet access and EIN are required to process payroll.
For Windows: Windows 10,
Windows 7 and Windows 8.1
For Mac: Mac OS X 10.11 (El Capitan), Mac OS 10.9 (Mavericks), and Mac OS X 10.10 (Yosemite)
Display Required:
1280*800 screen resolution or higher than that
Between 1200*800 and 1600*900
It's Between 1600*1200 and 1920*1200
Between 1920*1440 and 2560*1440
Up to 200% DPI
Extended monitor support
Winding up!
The blog will be quite useful for you to find the minimum system requirements for QuickBooks desktop. If you wish to seek more help or guidance, connect with our QuickBooks desktop support experts at toll-free number.
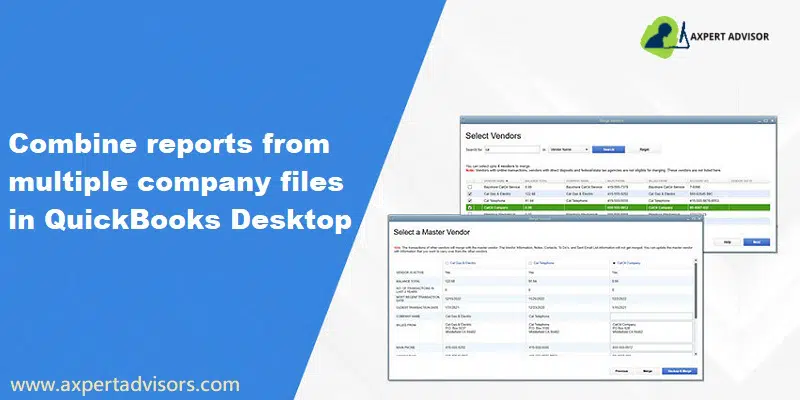
A Guide to Combine Two or More QuickBooks Reports from Multiple QuickBooks Desktop Company Files:
QuickBooks is the go-to accounting program for countless small and medium-sized businesses today, thanks to its extensive features and user-friendly design. One of its most powerful yet often overlooked capabilities is the ability to merge and combine financial reports from multiple QuickBooks company files. This feature is incredibly useful for businesses managing several entities or needing a consolidated view of their financial health.
This article will guide you through the process of combining reports from multiple company data files in QuickBooks. You'll learn how to seamlessly integrate data to create comprehensive reports, such as a consolidated balance sheets that can be easily exported to Microsoft Excel spreadsheets for further analysis. This functionality provides a highly reliable way to gain a holistic financial overview.
If you have any questions as you go through the process, don't hesitate to send a support request or contact our dedicated technical support team for expert assistance here.
Steps to Combine Two Companies Into One in QuickBooks Desktop
Option 1: Combine Reports in QuickBooks Desktop Enterprise (Built-In)
A few main features of built-in combines reports in QuickBooks Desktop Enterprise:
If you are having any built-in function in any of the fields, then you can simply perform several complicated tasks with utmost ease. Likewise, QuickBooks Enterprise also offers a built-in feature for merging various company files.
Note that QuickBooks Enterprise allows you to combine reports from multiple company files. These include:
Standard of record
A conclusion of the balance sheet
Financial loss amount and profit
Category of profit and loss
Comment on the cash flow
Check on balance
For Combining the Reports:
Initially, you need to choose Combine reports from multiple companies from the reports menu.
Moreover, opt for the "add files" option, then locate the other company file and choose "open." Repeat the same process for additional files.
Now, underSelect reports for combining, choose the reports you wish to combine.
Heading forward, pick the report from and to date range and also go for a report basis.
You now have to hit on Combine Reports in Excel. A Microsoft Excel spreadsheet will show up with the combined information.
Option 2: Use a Third-Party Software
If you agree to use third-party software, then you can simply pinpoint various programs that work with QuickBooks. Some of these programs offer important information to make the additional data from various corporate files.
Option 3: Manually Export Reports From Each File and Combine them Using Microsoft Excel
You can simply transfer the reports by following some of the given steps and merge reports through Microsoft Excel:
You need to initially access the first company file.
Now, on the select reports, you are supposed to export to an Excel worksheet and save the workbook.
You are then required to access your second company file.
Furthermore, create the same report and then export it to an Excel worksheet in the same workbook, and also choose the Save tab.
You now have to launch Microsoft Excel and open the workbook.
Later on, combine the two reports into a third worksheet manually.
End the process by saving the workbook.
Launch Microsoft Excel and open the workbook.
How to Customize QuickBooks Desktop Custom Reports?
Some basic parts for the simple data about reports in QuickBooks Desktop are described below:
Understanding Between Two or More Several Accounts:
One of the main tasks for performing the combined reports is completely understandable. If you are acquainted with this or you can simply understand the several data, then you can simply check the needed information for the completion of a task.
Maintain Report for Orientation:
After checking all the information, the next thing is to organize the data as it is needed.
Modify Reports:
If you are willing to make any kind of changes in the information as per the requirement, then it is an imperative part.
Mark Comment:
To make your information effective as well as a favorite, then you can simply comment.
Build and Organize Regular Reports:
One of the most imperative things is to classify the data, and it also needs to be scheduled.
Important Points to Note
To combine the reports, some of the below points are required to remember:
The report is required to be much simpler for reading as well as for creating a profile in several company files that are almost similar.
The reports are required to be combined if they contain appropriate data in an identical way, such as name, type, and alike gradable level.
Below are some valuable points that tell that accounts will not be combined if:
If they contain dissimilar property and assets.
There is some difference in alphabetic character.
Account mismatch.
If one user has a dissimilar report and the other has distinct data.
Reports are categorized into different types. The details are to be selected in some order of what has been done in the chosen company file within each report. If the account is appended by others in sequence after that, they are encountered.
If you choose to log in to your file and also want to switch them to various users so as to accommodate the merging routine.
Which data cannot be merged?
The types of data that cannot be merged include the following:
Memorized Transactions from secondary files.
Bank reconciliation.
Negative inventory and assembly builds.
Payroll checks cannot be displayed in payroll reports
Files having sales tax groups and items
Customer notes and to-do lists.
Customer fields brought from transactions.
Conclusion!
We hope that this article assisted you in integrating QuickBooks reports. In case the issue persists or you need further assistance regarding the process to combine two or more QuickBooks reports, you can speak to our 24x7 QuickBooks support team. Whatever your accounting issue is, our professionals have the capability to root out all the technical problems encountered while using the QuickBooks accounting software.