Checkout the possible ways to fix subscription has lapsed error in QuickBooks desktop:
If you are a QB user, then you might be aware of the fact that this software works on subscription. Often users report an issue that appears with an error message stating “Your QuickBooks subscription has lapsed”. If you have also faced an issue that the QuickBooks subscription has lapsed or expired, then today’s article will be of great help to you. The most important point to be noted here is that this issue does not affect the company data. Thus, need not to panic, all you have to do is read this article carefully till the end. Subscription error in QuickBooks is often caused by majority of the factors.
Today’s article will brief you with the information related to fixing the subscription error in QuickBooks desktop. However, if you want our team to fix the error on your behalf, then you can simply contact Axpert Advisors team via our helpline i.e., 1-888-368-8874. We are a team of professionals who would help you in fixing the issue with much ease.
What is a QuickBooks Subscription Lapsed Error?
A QuickBooks subscription lapsed error occurs when a user's subscription to QuickBooks Desktop expires. When this error occurs users can not able to access their account or any features related to their subscription. This error message appears as a pop-up on the screen and prevents the user from accessing the application or its features until the subscription is renewed. The following error message might be seen on your desktop screen:
Why does the QuickBooks Subscription Lapsed Error occur
QuickBooks Desktop requires a subscription to access the software and its features. When the subscription of QuickBooks Desktop expires, you may receive an error message indicating that your subscription has lapsed. The causes of this error can vary and include:
The most common cause of the this error is that your QuickBooks Desktop subscription has expired.
If your billing information is incorrect or outdated, it can result in payment issues and the "subscription has lapsed" error occurs.
If you have connectivity issues, it can cause problems with processing your subscription renewal payment.
You are using an outdated version of QuickBooks Desktop,
Sometimes, the issue can be with the Intuit server that manages QuickBooks Desktop subscriptions, resulting in the subscription has lapsed error.
What are the consequences of a QuickBooks Subscription Lapsed Error?
The consequences of a lapsed subscription can be severe, especially for businesses that rely heavily on QuickBooks to manage their finances. A lapsed subscription can cause delays in payroll processing, missed payments, and other financial inaccuracies, that can harm a business's reputation and financial stability. If you are a victim of this problem, there are several steps you can take to resolve the issue. Below are some of the most effective solutions:
Methods to Resolve QuickBooks Subscription has Lapsed Error
To resolve the "subscription has lapsed" error in QuickBooks, you can try the following solutions:
Method 1: Checking the Internet Connection Settings
Changing the internet connection settings in QuickBooks can fix the subscription error in QuickBooks desktop. You can carry out the troubleshooting steps to check the internet connection settings, in order to connect to online services in QuickBooks.
Method 2: Restoring the Product and License file
If checking the internet connection settings didn’t work for you, then you can restore the product and license file. It should be noted that the QuickBooks desktop saves a file with the product and license information to the hard drive. You can easily restore the file, with the help of the steps below:
First of all, you need to close QuickBooks desktop.
And after that, close QuickBooks desktop.
Once done with that, you need to open the Windows start menu.
Followed by typing the Run into search box and hit Run tab.
Next step is to type C:\ProgramData\Intuit\Entitlement Client\v8 and then hit Enter tab. In case it doesn’t open a folder, you need to enter C:\ProgramData\Intuit\Entitlement client\v6 instead.
After that, you need to look for the file entitlementdatastore.ecml and also right click it and also choose Delete. You will then have to select Yes to confirm.
Now, open QuickBooks and also the Company file.
The last step is to follow the onscreen instructions to Register QuickBooks again and with the product and license info.
When none of the above methods worked for you, then we recommend you to use the QuickBooks tool hub program. At times damaged windows might prevent the software from connecting to our online services. You need to download and use the hub and try fixing the issue. The steps involved in this process are as follows:
Initially, you will have to open the QuickBooks desktop tool hub.
The last method that can be implemented is to update the billing information. If you have changed the business credit cards or accounts, then simply updating the payment details would work for the subscription. The steps involved here are:
Firstly, sign in the Customer Account Management portal. Make sure that you sign an with the Admin credentials.
After that, choose QuickBooks from the list of Products and Services.
Next step is to opt for Edit in the Billing information section.
Once done with that, you need to Update the payment information. And then choose to Save and Close, after you are done with the process.
Now, open QuickBooks desktop.
The last step is to navigate to the Help menu and then move to Manage my license. Also, choose Sync license data online.
And check if the error has been resolved or not.
Note: If none of these solutions work, you may need to renew your subscription
Solution 6: Renew your subscription
The most straightforward solution to a lapsed subscription error is to renew your subscription.
Navigate to the Help menu in and choose "Manage My Account" option.
Now log in to your Intuit account and follow the prompts to renew your subscription.
Conclusion
Up till now the Subscription Error in QuickBooks Desktop might have been fixed. However, if you continue to face the same error, then need not to worry, as we are there to assist you. Do not hesitate in calling us at any point of time at our toll-free i.e., 1-888-368-8874. We are a hub of technically sound accounting professionals, who work round the clock to provide the best possible QuickBooks desktop support services.
QuickBooks sync manager is a secure way of synching the desktop application with other third-party apps, as well as the internal add-ons. This particular program helps in exchanging the data between the desktop database with that of the version, which is stored in the Intuit cloud server.
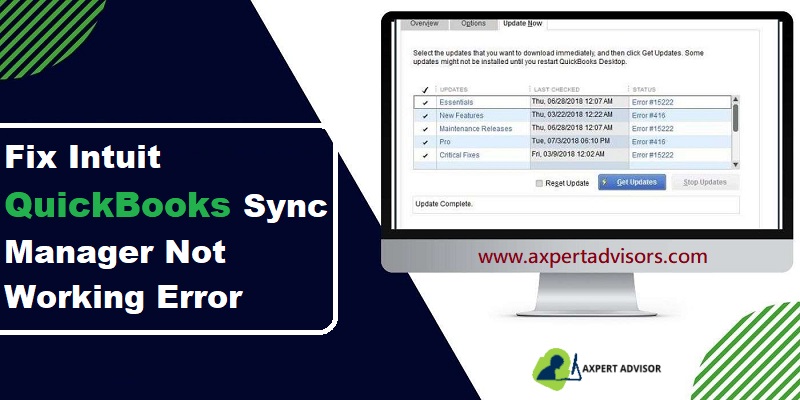
However, at times you might come across QuickBooks sync manager not working issue. This is where, you either need to check this segment out, or consult a tech geek and get the error rectified. You might see the following error message on your desktop screen:
What Can Instigate the Sync Manager Not Working Error in QuickBooks?
You can bump into QuickBooks Sync Manager not working problem due to the following reasons:
One of the major factors can be lost program files.
Another trigger for the same can be if the firewall settings are not allowing the access to the main server.
Furthermore, if the program files are corrupted.
One such factor can be if there are networking issues during data transfer.
What Solutions to Use to Fix Sync Manager Not Working Issue?
Shunning off the error can be easy, by implementing the measures stated below. Dig in deep to find out the ideal solutions.
QuickBooks Sync Error 5_13944
You might come across with QuickBooks sync manager error when uploading data.
It can be caused by Network issue when transferring data as the firewall setting doesn’t permit entrance to the main server.
You can try resolving such an error, by:
By accessing the server URL https://services.intuit.com and https://datasync.intuit.com
If your Intuit sync manager trusted certificate is not valid now, then:
You would have to fix the issue by heading to C:Program DataIntuitSync manager in your system and remove the file SBConnect.crt
Run the Sync manager setup once again.
Reset the Sync settings.
In case an internal issue has appeared, then wait for sometime and try again later.
QuickBooks 2014 Sync Manager Error
Such an error could be seen as a result of missing or damaged program files in intuit sync manager. To shun off QuickBooks Sync Manager Error, you need to rename the sync manager folder.
You would first have to try to open the company file and log out from QuickBooks.
For logging out from QuickBooks, right click the Sync manager icon, present in the System tray exit and click on Exit sync manager.
Spot the sync manager folder in the system and change the name to syncmanager.old
Last but not the least, you would have to restart the software and open the Sync manager. The sync manager will form a sync manager folder and then link the same by clicking on Sync now tab.
QuickBooks Sync Manager Error 17_7300
You might get such an error message when downloaded data will not be written to the QuickBooks company file or write back phase. This error can be resolved using the steps below:
Herein, you would have to ensure that the Sync manager is up to date.
You would also have to try to Open the company file in the QuickBooks software.
Select Edit and click on Preferences tab further.
After that hit a click on Integrated applications.
Select the Company preferences tab.
QuickBooks Sync Manager Error on Windows 10
You might come across with QuickBooks Sync Manager Error if you have upgraded to Windows 10 and trying to use the sync manager. The problem can be due to corrupt or missing program file. This can be rectified by using the steps below:
You would first have to retitle the Sync manager folder name and try to fix the issue.
Exit all company files from the QuickBooks software and also Sync manager.
Look for the Sync manager folder and also rename it to the syncmanager.old
Make the New sync manager folder and reopen the software and to Sync the company data select the Sync now tab.
QuickBooks Sync Error Code 17_7118
To fix this error, you would have to close the QuickBooks sync manger and right click the Icon in the system tray.
Log out of the company file in the QB and close the application
Open QuickBooks software and not the company file.
Download and install all the available updates for the software.
Lastly, try to Sync the essential data using the sync manager again.
Configure Intuit Sync Manager
Herein, you would have to open QuickBooks desktop application.
From the Help menu, choose Manage data sync option.
Reset the Intuit sync manager and click on Reset data sync tab.
Lastly, you would have to sign back into the Sync manager with the right credentials to complete the process.
Winding up!
That was all you need to know about the procedures to shun off the QuickBooks sync manager not working error. As always, for any queries, comments, or concerns feel free to call us immediately at 1-888-368-8874!
However, if you are in quandary over choice of the experts to resolve your issues, our 24/7 QuickBooks error support team comprises of certified and experienced professionals who shall leave no stone unturned to address your queries.
Checkout the quick Guide to Set up your Email Service in QuickBooks desktop
Sending transaction via webmail or outlook in QuickBooks, is one of the most important features. You can send invoices, reports, and more, with only a simple set up of email in QuickBooks desktop. In this article, we will be talking about the detailed process to connect email to QuickBooks desktop.
If you are interested in knowing the process, then make sure to scroll through the article. However, before you begin with the steps, make sure to use Outlook 2010 or newer version and also ensure to have an outlook email profile. Moreover, if you are seeking for any technical assistance, then you can contact our team of experts and certified ProAdvisors.
Steps to Set up QuickBooks to Work with QuickBooks
You can simply set up QuickBooks desktop email by carrying out the steps below:
Step 1: Contacting the Internet or Email Provider to Get the Information Below
Username
Password
Incoming email server type
Outgoing email server address
Incoming email server address
Step 2: Setting up Outlook
The first step is to move to the QuickBooks edit menu.
And then select Preferences and then Send forms.
Also, select Outlook and hit OK tab.
Setting up the Secure Webmail to Work With QuickBooks
Points to be noted:
Before starting with the process to set up your email service in QuickBooks, you need to note that the newer versions of QuickBooks can use secure webmail. This will create an easier and safer connection to the email.
Also, secure webmail works when you link the Intuit account and the webmail account.
Moreover, once linked, you need not to enter the password every time while sending the email.
QuickBooks Versions That Work With Secure Webmail
QuickBooks 2019 and 2020: This version is available for Gmail, yahoo mail, windows mail, Hotmail, and AOL.
QuickBooks 2018: This one is available for Gmail and Hotmail
Important things to know
In case you adds secure webmail to the company file, you are supposed to set up complex password for the file.
Also, hosted environments might need to sign into the webmail while sending emails.
Steps to Set up Secure Webmail in QuickBooks
In order to set up secure webmail, the below steps should be followed:
First of all, move to the QuickBooks edit menu and choose Preferences.
And then, choose Send forms.
Followed by selecting Web mail and Add options.
Now, you can select the provider from the drop down and then enter the Email address.
Next step is to select the Use enhanced security checkbox and also select OK tab.
The last step is to Sign in to Intuit account when prompted.
The webmail provider’s login page will display. You need to sign in and select to Grant Intuit access.
Setting up Webmail to Work with QuickBooks
Important points:
Verifying the webmail servers is a must and also the Port settings with the internet service provider.
Also, the webmail providers need users to enable their account settings for two step verification.
Another important point is that QuickBooks can auto fill information for some of the most common providers.
Set up the Webmail
You need to move to the QuickBooks edit menu and choose Preferences.
And then select the Send forms option.
Followed by selecting Web mail and then selecting Add option.
Now, fill out the Add email info and then select OK tab.
The last step is to select OK to save changes.
Things to Remember:
QuickBooks will prompt you to enter webmail password for the first time you send an email using webmail.
Also, if the password isn’t accepted, you will see QuickBooks will not accept my password for more info on screen.
For QuickBooks desktop for United States
LYCOSsmtp.mail.lycos.com25
ISP (Internet Service Provider)
SMTP Server
SMTP Port
1AND1.com
smtp.1and1.com
587 (SSL enabled, with password)
ADELPHIA
mail.adelphia.net
110
AOL
smtp.aol.com
465 or 587 (see Note) (SSL enabled for incoming and outgoing mail server)
BELL SOUTH
mail.bellsouth.net
110
COMCAST
smtp.comcast.net
587
COMPUSERV
smtp.compuserve.com smtp.aol.com
110 or 587
COX Business
smarthost.coxmail.com
25
COX CENTRAL
smtp.central.cox.net
25
COX EAST
smtp.east.cox.net
25
COX WEST
smtp.west.cox.net
25
EARTHLINK
smtpauth.earthlink.net
25 (with password)
LYCOS
smtp.mail.lycos.com
25
MICROSOFT OUTLOOK 365
outlook.office365.com
587 (SSL enabled)
NETSCAPE
smtp.isp.netscape.com
25 (SSL enabled)
PRODIGY
smtp.prodigy.net
25 (SSL enabled)
ROADRUNNER
smtp-server.sc.rr.com
587
SPRINT PCS
smtp.sprintpcs.com
25
VERIZON
outgoing.verizon.net
465
VERIZON YAHOO
outgoing.yahoo.verizon.net
465
For QuickBooks desktop Canada Version
ISP (Internet Service Provider)
SMTP Server
SMTP Port
MICROSOFT OUTLOOK 365
outlook.office365.com
587 (SSL enabled)
BELL MAIL
smtphm.sympatico.ca
25 (or 587 if port 25 does not work)
BELLNET
smtpa.bellnet.ca
25
CLUB INTERNET
smtp.club-internet.fr
25
COGECO
smtp.cogeco.ca
465
COMCAST
smtp.comcast.net
465
EARTHLINK
smtpauth.earthlink.net
587
GMAIL
smtp.gmail.com
587
HOTMAIL
smtp.live.com
587
LAPOSTE
smtp.lineone.net
25
MAIL
smtp.aol.com
587
MSN
smtp.live.com
25
MTS
smtp.mts.net
25
NETSCAPE
smtp.isp.netscape.com
25
NETZERO
smtp.netzero.com
25
NEUF
smtp.neuf.fr
25
ROGERS
smtp.broadband.rogers.com
25
SASKTEL
mail.sasktel.net
25
SHAW
shawmail.cg.shawcable.net
25
SKYNET
smtp.skynet.be
25
SYMPATICO
smtphm.sympatico.ca
25
TELUS
smtp.telus.net
25
VIDEOTRON
relais.videotron.ca
25
YAHOO
smtp.mail.yahoo.com
465
Cox users: The standard SMTP setting of Cox isn't to use SSL or login information when sending emails. The QuickBooks prefers SSL connections and requires log in information. Hence, using the port 25 and no SSL connection with SMTP doesn't work with QuickBooks Desktop. The alternative is to use SSL with port 587 or 465.
Connecting Email to QuickBooks Desktop for Mac
Connecting Email to QuickBooks for Mac, allows the user to send invoices, reports, and sales forms directly. Also, you can set up as many email accounts as you wishes to and QuickBooks will remember which email address to use for each type of message. The steps to be followed are:
The initial step is to choose QuickBooks and then select Preferences.
After that select the Email icon.
Also, from Send emails using, you need to select Custom.
In the next step a list will appear, which would be blank if you hasn’t added any email accounts to QuickBooks.
Moving ahead, choose + tab to Add new account.
And also, add a name to it, followed by adding the settings from the email provider.
Last step is to repeat for any other accounts and you are good to go.
You can easily spot the email address listed in the from filed of the message, after the setup is process. And you can select any account, in order to send anything.
Winding Up!
Towards the end of the procedures as well as the article, we believe that you might have successfully connected the email to QuickBooks desktop. The process to set up your email service in QuickBooksDesktop would ease sending invoices, reports, and more.
However, in case of any query or if you need any sort of technical assistance, then we would recommend you to directly get in touch with our Certified ProAdvisors at 1-888-368-8874. Our 24/7 QuickBooks desktop support team will ensure to provide the best possible support services in no time.
Your QuickBooks accounting software might seem smooth sailing, until an error code with a warning message appears on the screen. In this segment, we are going to discuss about QuickBooks error code 324, which is basically a banking error by the program. You can come across with this error when the bank issues a new account number or a credit card.
Furthermore, you can face the similar error when the account is closed, or any changes are made to it. It also indicates that QuickBooks online is unable to find the account on the financial institution’s website. To get a grip of the error and some procedures that you can follow, so as to get rid of this QuickBooks banking error 324, we recommend you to stick around the segment.
You might see the following error message on your desktop screen:
Signs and Symptoms of QuickBooks Error 324
The signs and symptoms of an QuickBooks error 324 basically assist in finding out the error with much ease. Let us check out the signs of this banking issue.
Just in case the active program window crashes suddenly.
Another sign can be if the system often crashes with the error code itself.
If the system freezes periodically.
Moreover, if the Windows performance becomes sluggish.
What Triggers the QuickBooks Error Message 324?
Well, there can be certain triggers of the QuickBooks error code 324. These triggers include the following:
One of the major causes can be corrupted QuickBooks download.
In case the installation is incomplete.
You can further face such an error if the windows registry is corrupted.
If there is any virus attack.
Also, if you have opted for the same name for two different accounts in QuickBooks online.
Quick Methods to Fix QuickBooks Banking Error Code 324
Below can be the error solutions that you can follow to shun off the QuickBooks error 324. Let us check out each of the method, one by one:
Method 1: Making Use of Windows System Restore to Undo Recently Occurred System Changes
You need to start off with clicking on to the Start tab.
Furthermore, type in the System restore tab and hit Enter key.
You would then have to click on the System restore option.
Enter in the Admin password of the system.
Pay heed to the onscreen prompts in the wizard to select any restore point.
Restore the system.
Method 2: Declutter the System Junk Files
You need to debunk the system junk files, so as to fix the issue. The steps involved in this are as follows:
Start with clicking on the Start tab.
After that enter in Command.
Hold Ctrl + Shift keys and hit Enter tab
Hit Yes tab in the permission dialog box.
Type in cleanmgr and hit Enter key.
Check the boxes of all the categories that you wish to clean in the Disk cleanup dialog box
Hit OK tab and you are good to go
Method 3: Fix Registry Entries Related With 324 Error
Under this method, you are supposed to click on Start tab.
Type in Command.
Press Ctrl + shift and hit Enter key.
Click on Yes in the permission dialog box.
Type in regedit and hit Enter key.
Select the error related key you wish to backup in the registry editor.
Opt for Export that could be seen in the File menu.
Go for the folder where you wish to save the backup key in the save in list.
Pick the selected branch in the Export range box on the screen.
Hit Save tab.
Save the file with .reg file extension.
Backup the QuickBooks related registry entry.
Method 4: Run Windows File Checker
In this particular method, you are supposed to click on Start tab.
Type in Command tab.
Press Ctrl and shit and hit Enter key.
Click on Yes in the permission dialog box.
Type in sfc/scannow and end the process by hitting Enter key.
Method 5: Uninstall and Re-install QuickBooks
In case none of the above methods worked for you, then you can simply uninstall and reinstall QuickBooks.
Simply start off with opening the Programs and Features in control panel.
Spot the QuickBooks error 324 related program in the name column.
Hit a click on Uninstall tab.
After the uninstalling process ends, reinstall the software.
Method 6: Install All Windows Updates
An alternate method can be to install all Windows updates. This can be a basic solution, but tends to work in majority of the cases. The steps to be followed here are:
Start off with clicking on the Start tab.
Furthermore, you would have to type in Update in the Search bar.
Head further by clicking on to the Enter tab.
You are then supposed to download the available updates, if any
And you are good to go.
Method 7: Using Windows System Restore to Undo Recently Occurred System Changes
You would have to first have to click on Start tab.
Type in the System restore in search bar on the screen and hit Enter tab.
Click on the System restore tab.
Enter the Admin password of the system.
Follow the steps in the Wizard to select any Restore point.
Restore the system.
Wind Up!
Reading this segment would be enough to tackle through the QuickBooks banking error 324. As always, if you have any queries, comments, or concerns, call us instantly through our helpline i.e., 1-800-761-1787! Our 24/7 QuickBooks error support team will be more happy to assist you in solving your QB-related concerns.
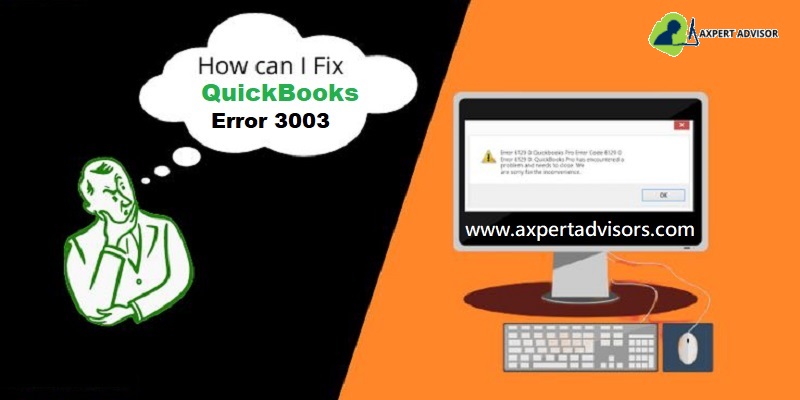
Checkout the easy methods to resolve the QuickBooks error code 3003:
The QuickBooks error code 3003 might seem a tough error to tackle. You might across this issue when you try to sync the databases with an Intuit admin and the sync gets failed. There can be a handful of factors that might trigger such an error, a few of them are discussed in today’s segment, along with the solution steps that you can implement to successfully shun off the issue.
Before you start with information ahead, note that intuit has officially announced regarding the discontinuation of the intuit sync manager. To get a better insight into QuickBooks error code 3003, make sure to stick around this segment.
Symptoms to Identify the QuickBooks Error Code 3003 Issue
You can easily spot the QuickBooks payroll error 3003 by using the below signs and symptoms:
In case the Error 3003 itself appears that crashes all your active programs of a Windows operating system.
Moreover, if your system gets crashed when running the same program, then it is a sign of error 3003.
Another active symptom can be pc freezing up periodically.
If the Windows run slowly.
What are The Cause of QuickBooks Error 3003?
The following factors can trigger the QuickBooks error 3003.
One of the major reasons can be incomplete sync.
Another reason can be if the sync process is running and you click on Exit tab accidentally.
You can also face similar issue, if the space in your system like the RAM, hard drive, or other resources are insufficient.
You might come across similar issue if there is issue with the disk space.
Steps to Fix the QuickBooks Error Code 3003
You can try the below methods, in order to get rid of the QuickBooks error 3003.
Method 1: End Process Using Task Manager
Under this process, you are supposed to click on the Sync key.
Select the Processes tab and open the window of a task manager.
Further look for the dbmlsync.exe file.
In case dbmlsync.exe file isn’t available on the list, then you would have to contact the QuickBooks support team to resolve the issue for you.
Method 2: Check the Security Programs Being Updated or Not
Just in case you have installed any Antivirus or Security application, then we would suggest you to remove it.
If the firewall on your system is on then you need to turn it OFF.
Another step is to ensure that you are not running too many applications.
Further, if your application is running with the security, then ensure that it is updated.
End the process by removing any newly installed app on the system.
Method 3: Look for The Latest Windows Update
In this method, you need to ensure that you are updated to the latest Windows version, if not then make sure to do so.
Kick start the process by pressing Windows or Start tab on the system.
Type in Update Windows in the Search bar.
Click on Check for updates tab.
In case there are any latest Windows update, then download and install it.
Summing Up!
Once you are thorough with the segment, it is easy to shun off the QuickBooks error 3003. As always, for any query, comments, or concerns, you can connect with us immediately by dialing our helpline i.e., 1-888-368-8874! Also, you can connect with our Axpert Advisors experts through our Live chat experts.