Here is how you can use QuickBooks Install Connection Diagnostic Tool
Encountering unexpected errors while installing QuickBooks Desktop can be incredibly frustrating. Fortunately, Intuit provides a powerful solution: the QuickBooks install diagnostic tool. This essential utility is designed to automatically diagnose and fix a wide range of common installation errors, getting you back on track quickly.
This article will delve into how this handy tool works, explaining its effectiveness in resolving problems that arise during QuickBooks installation. Since QuickBooks Desktop relies heavily on core Microsoft components, issues often stem from missing or malfunctioning elements within your Windows operating system. Specifically, problems with .NET Framework, C++, and MSXML are frequently linked to installation failures.
The QuickBooks Install Diagnostic Tool is your primary resource for addressing these underlying Windows component conflicts that trigger installation glitches. For personalized assistance or a free consultation on utilizing this tool, our dedicated support team is available round the clock to help you.
Steps to download and Install QuickBooks Connection Diagnostic Tool
Once the setup file appears, save that on your desktop.
Let the download complete and the ‘QBInstall_tool_v2.exe’ file will appear on your screen.
Close all open and running apps.
Double-click on ‘QBInstall_tool_v2.exe file’ and click on run when prompted.
Once you restart your computer, you should be ready to proceed.
Steps to Use QuickBooks Connection Diagnostic Tool
The very first step is to 'double-click to the 'QuickBooks desktop icon'.
Next, make sure to avoid opening the corrupted company file for now.
Thereafter, hit on the 'utilities' option and then navigate to the option for repair file and network problems.
A pop-up will prompt you to grant permission to collect private QuickBooks data and information; accept it by clicking 'Yes' and 'continue' option.
In next step navigate to the folder where your company files are stored, locate the faulty company file, and access it.
Then select the option to show 'advanced settings' and you should progress to a drop-down list of items.
A list of fixes would be found to choose from. It is supposed to select the one that suits the situation.
The next step is to enter the 'QuickBooks login ID and password'.
Following the above steps correctly will launch the QuickBooks connection diagnostic tool.
Steps to Test Workstation's Connectivity
Tap on the company file field to search the company file.
Next, ensure you are using a Linux system when the network setup is available in alternate mode.
Opt for the change hosting server checkbox.
Each status might appear as not application in blue, before starting the connectivity test.
After you run the test, status should appear in green that denoting that no threats are found or red denoting threats found.
Now click to the test connectivity option.
If the file open status shows 'red', it means that the test failed and the advanced section option will display.
Now, hit on what do these mean? option.
After the state has been fixed, you need to run the tool againto see if there are any other problems.
You would now get a message denoting the success of the process.
Repeat the same steps on all the systems that have QuickBooks.
Wait for the tool to complete its task.
Steps to Fix Installation Errors using QuickBooks Install Connection Tool
QuickBooks Desktop connection diagnostic tool enables you to examine and evaluate the following points:
Diagnose Connection Tab:
You can use this tab to check the status of your system. Moreover, this tab also assists you in setting up the ‘QuickBooks company data file.’
Checking the Firewall Status:
This diagnostic tool provides significant information on the Firewall status. You can take suitable action depending on the obtained details.
Testing Your System Internet Connectivity:
QuickBooks Connection Diagnostic tool can assist you in analyzing your system connectivity. Thus, the tool’s installation requires a smooth internet network setup.
Perform a Re-install in a Selective Start-up Mode:
Many a time, third-party apps like ‘antivirus and anti-spyware’ programs create issues with QuickBooks desktop installation. They may misunderstand QuickBooks as a malicious program or software. In order to avoid and fix such instances, it is imperative to perform the installation process in a selective mode. The selective mode starts the windows with a few items already running in your system. Here are the steps that you can follow:
Access your computer in the 'Selective start-up' mode.
Now click 'Window + R keys together' to open the ‘RUN’ dialog box.
Type 'msconfig' there and tap on 'OK' button.
In the General Tab, choose ‘Hide all Microsoft Services.’
Choose the‘disable all’option.
Un-check the‘ Hide Microsoft services’ checkbox.
Check the ‘list of services.’
Choose the ‘Windows Installer checkbox’ and hit the 'OK' tab.
Open system configuration and select ‘Restart’ to restore the computer to its ‘Normal Configuration.’
Now, tap on the 'Windows + R' keys together to reveal the ‘RUN’ command.
Type ‘msconfig’ there and click 'OK' button
Go for the ‘General tab,’ and opt for ‘Normal Start-up'.
Click 'OK' button.
Finally, opt for 'Restart' on the system configuration screen.
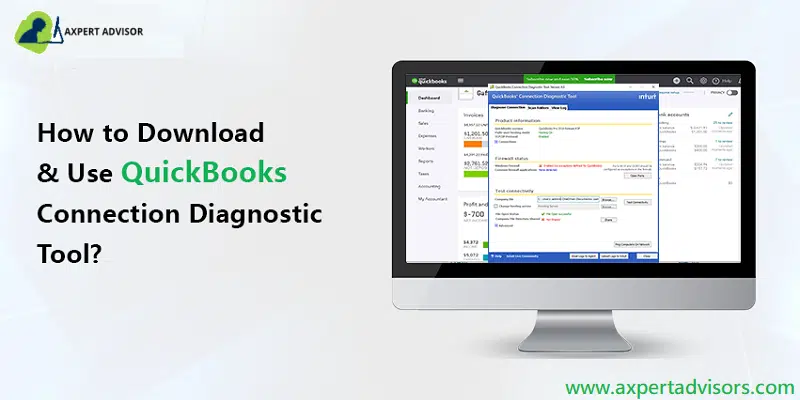
How does the QuickBooks Install Connection Diagnostic tool work?
The QuickBooks Connection Diagnostic Tool is an innovative tool that can diagnose errors while installing QuickBooks Desktop. The tool also ensures that the QuickBooks installation process starts on time. The tool fixes multiple errors and issues, including the .NET Framework, MSXML & C++ errors; it also fixes several other errors and issues. The tool also fixes several additional errors, which are listed below:
An image of the QuickBooks Connection Diagnostic Tool is given below:
Finding and fixing issues is extremely simple with the QuickBooks Connection Diagnostic Tool. You just have to start the diagnostic tool before you continue to fix the errors manually. The tool also significantly cuts off the time taken to fix issues.
Benefits of Using QuickBooks Connection Diagnostic Tool
The QuickBooks connection diagnostic tool rolls in with some great features and benefits. The advantages include the following:
This particular tool helps in diagnosing different QuickBooks errors that are seen at the time of installation of QuickBooks.
Furthermore, it assists in fixing countless errors faced by users and also saves a lot of time and effort.
When issues related to the Windows Firewall appear.
If there is any damage to the company files.
If there are multi-user errors.
Using such a tool would work when any sort of virus is affecting the QuickBooks functions.
Or where the employees make certain entries that do not get updated.
Final Words...!
We hope that you find this write-up helpful in making the most of the QuickBooks Connection Diagnostic Tool. This tool can assist you with many of the common QuickBooks issues. If you need any assistance in regards to this tool or you are not able to fix any accounting-related issue, you can contact us at our QuickBooks Support Number for quick and precise solutions.
If this article served your purpose, then Read the following articles also:
Learn what to do if you see QuickBooks Error 3371 (Could not initialize license properties):
Encountering QuickBooks Error Code 3371, often accompanied by Status Code 11118, can be incredibly frustrating. This common technical glitch typically arises when you're reconfiguring your system or setting up a company file, preventing you from accessing your crucial financial data.
While these errors can be annoying, this comprehensive guide provides the precise fixes you need to tackle them effectively. Scroll through this segment carefully to ensure you don't miss any vital steps in resolving QuickBooks Error 3371.
If you'd rather not invest your time in manually troubleshooting this issue, our experienced tech experts are readily available to assist you. Simply reach out to our support team for prompt and professional help.
What is QuickBooks Error 3371 (Couldn't Initialize License Properties)?
This error is a common error reported by many users of QuickBooks software. This error may occur due to a missing or damaged company file. If you are facing this error, then you have reached the right place because in this article we have focused on this error and its causes, alongside a comprehensive section containing all the solutions. When you reconfigure your system or try to activate your QuickBooks desktop for the very first time, then QuickBooks error message 3371 may be on your display screen.
You may get a warning message showing
Error
QuickBooks could not load the license data. This may be caused by missing or damaged files. For troubleshooting steps, note the error and type the following in a web browser window: www.quickbooks.com/support/register.html.
Once you hit the OK button, it will display another box showing as “QuickBooks Fatal Error."
QuickBooks Fatal Error
QuickBooks has encountered a problem on startup. This may be due to an invalid software license. Insert the QuickBooks CD into your computer and then reinstall the software. If you encounter the problem again, contact Technical Support.
In order to resolve this error without any hassle or exerting any effort, you can take help from our certified experts. Our technical support team will be pleased to help you out with this error code. Check out the infographic below and learn the ways to resolve the ongoing error:
Different Fixes for QuickBooks Error 3371 Status Code 11118
This section encloses some of the easy yet effective methods to resolve the QuickBooks Error 3371 Status Code –11118. In case you require an instant solution in a short time frame, you can follow the quick manual solution. Follow the below-given manual troubleshooting guide to up-stem the error once and for all.
Method 1: Update your Windows system drivers
Ensure that all the Windows updates are installed.
Later, follow the instructions given on the screen to complete the installation process.
Once it’s successfully done, install the QuickBooks application again.
Method 2: Delete the ‘EntitlementDataStore.ECML' file
Make sure that QuickBooks is completely closed.
Check that no QB-related program or file is operating in the background.
To see and close the background QB programs, visit the Task Manager.
Now, hit the Windows + R keys on your keyboard.
After that, type 'C:\ProgramData\Intuit\Entitlement Client\v8' in the Run command box.
Go to the QuickBooks directory, search for & open the Entitlement data folder.
Look for the EntitlementDataStore.ecml file and delete this file.
Once the above steps are done, run the QuickBooks program, and register the product again.
Method 3: Setting up Windows updates
One useful approach to fix error message 3371 in QuickBooks Desktop is by updating Windows. This will update the Windows components to their latest version and will also set up the security updates. The steps include:
In the beginning, go for the Start menu
The subsequent step requires typing “Update” and then opening the Windows Update feature.
Next, set the Check For Updates tab.
As the updates get revealed, mark all of them.
Afterwards, tap on the Update Now tab and kickstart the update.
The system shall restart, and if it doesn’t, go for a manual system restart.
The updates will start installing on the system, and once they are done, the desktop will load up.
Launch the tool and let it run and fix any issues.
Note that the process might take some time to complete.
End the process by rebooting the system.
3rd Step: Run 3371 error fix
Double-click the icon on the Windows desktop and open the tool hub.
Choose the Installation Issues tab.
Hit on the 3371 error fix.
Finally hit on the OK tab and start QuickBooks and open the company file.
Method 6: Terminate all running QB-related processes
Herein, you are required to initially close QuickBooks.
Also, close all running QuickBooks processes.
Type in 'C:\ProgramData\Intuit\Entitlement Client\v8' in the Run window and hit the OK tab.
Now, open the Task Manager.
Move the tab named Processes and find all QBW32.exe instances.
Choose each instance individually and hit the end task option.
You now have to remove the entitlementDataStore.ecml file and open the QuickBooks company file and register the application.
Method 7: Uninstall and Reset MSXML
Some corruption in the Windows components can also embolden QuickBooks Error 3371 Status code 11118. To get this thwarted, perform the steps below:
The first move is to head to the Control Panel.
Therein, make a move for the Programs and Features tab.
Upon clicking on this tab, a long list of installed apps will appear. Search for MSXML and .NET Framework programs and get them uninstalled by clicking on the Uninstall/Change tab.
Then, proceed by clicking on the Repair tab to get these components removed.
Although there is another option of repairing the file, it is better to uninstall the components and install the compatible versions of these components from the official website of Microsoft.
The QuickBooks Error 3371 Status code 11118 shows up in different forms
This error can appear in the following forms:
“Could not initialize license properties. [Error 3371]: QuickBooks could not load the license data. This may be caused by missing or damaged files.”
“Could not initialize license properties. [Error 3371, Status Code -11118] QuickBooks could not load the license data. This may be caused by missing or damaged files.”
“Could not initialize license properties. [Error: 3371, Status Code -1] QuickBooks could not load the license data. This may be caused by missing or damaged files.”
Possible causes of QuickBooks error code 3371
Let us now check out the possible reasons that incite the error message 3371 in QuickBooks Desktop. The error may be caused due to any single factor or may be due to the various causes working together to bring about this error:
If one or both crucial components of QuickBooks get corrupted or damaged, in such a situation, it possibly moves from its original location. Usually, those two components are
dat: It is one of the essential files present in the QB folder that contains the account’s license information. To check this file, you need to retrieve it while the QuickBooks version opens.
MSXML Component: The MSXML Component is also a crucial component that ensures smooth operation.
Due to the outdated Windows operating system.
If the system security program detects QuickBooks files as a threat or virus to the system.
For Right Networks and QB Enterprise with WebConnect users: You may experience this error if you open the file before you save it.
Sum up!
Hopefully, this segment would be useful for you to understand and fix QuickBooks error code 3371. However, in any case, if you need immediate QuickBooks help or support for this particular error or any other QB-related issue, you can contact our Intuit-certified professionals via our helpline, i.e., 1-888-368-8874. We comprise a US-based team of qualified professionals who have devoted themselves to the field for several years and have served clients on a global level.
Learn How to Resolve QuickBooks Error Code 6123 When you Can't Open Company File
QuickBooks is an invaluable asset for accounting, offering impeccable services and features. However, like any sophisticated software, it can encounter various error codes and glitches that disrupt your workflow. One common and particularly disruptive issue is QuickBooks Error Code 6123, 0.
This error typically appears when you're trying to restore the backup of the company file, potentially jeopardizing your crucial financial data. It's essential to address this issue promptly to prevent further complications or data loss.
This guide provides all the necessary information and effective solutions to help you resolve QuickBooks Error 6123, 0. Dive into our full analysis and tips on how to solve the issue as soon as possible. If you prefer professional guidance, don't hesitate to speak with our technical experts. You can connect with us through our helpline, 1-888-368-8874 or by using the live chat option for immediate assistance.
A brief look at the QuickBooks Error code 6123
This error generally occurs when a user tries to upgrade the company files to new version over a network. Also, it appears if the user tries to restore the QuickBooks company file backup or open the company files in multi-user mode. When this problem occurs the user might see the following error message on your desktop screen:
Error
Description
Error Code:
Error: -6123.0
Error
We’re sorry, but QuickBooks can’t open your company file
Error -6123,0 while opening, upgrading, or restoring your company file
Software
Intuit QuickBooks desktop
Quick Solution
Run QuickBooks tool hub program or Run the file doctor tool
Curative Methods to Troubleshoot the QuickBooks Error 6123, 0
Now that you know what factors would have dragged you to QuickBooks error code 6123, 0. So, let’s take a look at some special methods that you can try out to fix this error. Let us visit these troubleshooting methods one-by-one:
Method 1: Create a portable company file to restore your company file
You can try to create a portable company file and then use it to restore the company file. If you faced any issue while restoring a backup on a new computer.
At first, open QuickBooks on the system you used for creating the backup company file.
After that, open up the original company file.
Now make a portable copy of the company file.
Next, launch the QuickBooks program on the New system.
Restore the company file using the portable copy instead of the backup.
Method 2: Rename .ND and .TLG files
First, go to the QuickBooks folder.
In this folder, search for the file with ND and TLG extensions.
Afterwards, right-click on these files one by one, and then click on the Rename option.
Lastly, just add “.old” to the file names, and following that, run QuickBooks to open the company file once again.
Method 3: Use the QuickBooks Tool Hub Utility
In case you experience any issue in the company file, then perform the below steps.
Step 1: Download & Install the QuickBooks Tool Hub
At first, make sure that QuickBooks software and QuickBooks-related programs running in the background are closed.
Can’t fix the QuickBooks error 6123, 0 using the above corrective measures? Don’t worry! We're here for you. Speak to our 24/7 QuickBooks error support professionals and ask them to eliminate the ongoing problems in your accounting. Our support team has profound experience and expertise in this domain and has successfully served clients globally. To avail the offered services by our expert team, all you need to do is ring us a call at 1-888-368-8874.
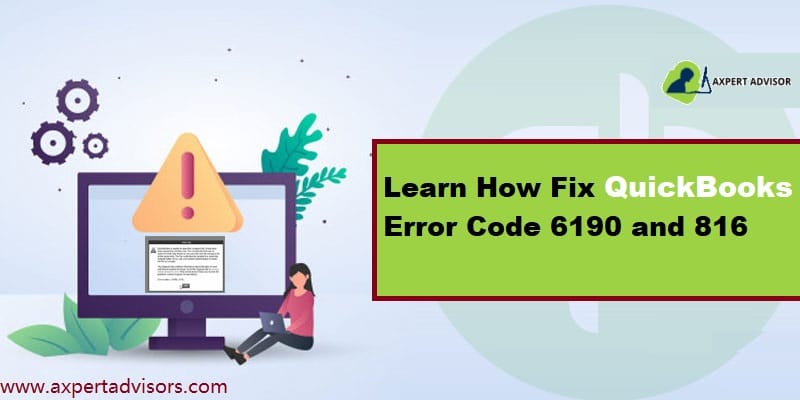
Are you facing an abrupt halt in your QuickBooks workflow due to Error Codes -6190 and -816? This common technical glitch frequently occurs when multiple users attempt to access a QuickBooks company file that is inadvertently set to single-user mode. Such disruptions can severely impede your progress and cause significant frustration.
The good news is that like most errors in QuickBooks, this issue is entirely fixable with the right approach. This comprehensive guide is specifically designed to provide you with all the essential information regarding QuickBooks Error Codes -6190 and -816, along with a detailed set of corrective measures you can perform to resolve them.
Stick with us to the end to master these troubleshooting steps, or for immediate assistance and personalized solutions, don't hesitate to connect with our QuickBooks technical support experts via our dedicated helpline. Let's get your QuickBooks back on track!
Troubleshooting Strategies to fix QuickBooks Error Code 6190, 816
This error can be resolved by conforming to the following strategies:
Go for Update Now, and then Reset Updates checkbox.
Now, click on Get Updates.
At last, quit your QuickBooks and then run it again. Also, you need to click Yes to install the updates.
Method 3: Use the QuickBooks File Doctor Tool
When it comes to fixing errors in the company files, the QuickBooks File Doctor tool should be your first priority.
To use this to fix QuickBooks error message 6190, 816, do the following:
In the first step, download Tool Hub and then install it on your system.
Run the tool, then go to Company File Issues, and then select Run QuickBooks File Doctor.
Now hit on Browse, then choose company file.
Provide correct credentials, then begin scanning the file.
When it is over, run QuickBooks, then open the company file again.
Method 4: Check for the Single-User Mode
Initially, go to the File menu and click on the Single to single-user mode option.
It will turn on single-user mode.
After that, log out of the QuickBooks software accounts.
Then reboot the systems that are on the network.
Also, copy the company data file to the desktop screen of the system.
Now transfer it back to the original position.
In the last step, log in to the QuickBooks account.
Method 5: Removing Temporary files
At times, excessive accumulation of temp and junk files can lead to such errors. For this, it becomes necessary to remove the temp files:
At first, click on the Start menu, then search for Clean.
After that hit on the Disk Cleanup tool, choose the C drive.
Now, following that, tick the box besides Remove Temporary Files.
Now, start the cleanup process and wait until it is done.
Manual method to delete the temp files:
Press the Start button and type the Windows + R keys to open the Run box.
After that, hit the Enter key.
In the next step, type %Temp% in the run box.
You need to select all the temp files in this folder.
At last, delete them by pressing the Shift+Delete key.
Method 6: Update your Windows operating system.
Updating Windows sets up the latest Windows components on the system, which lays the groundwork for a seamless working of QuickBooks. The steps for updating Windows are
From the Start menu, search ’Update,' then open Windows Update.
Go to Settings and choose the Update & Security tab.
In the next step, open the Windows Update tab.
Pick the Check for Updates option.
In case there are any updates, then it will start downloading on its own.
You need to mark the important ones and then download the updates.
To install them, restart the PC, and all the updates will install in the next restart.
Method 7: Verifying and rebuilding the company file
Open QuickBooks and select the Filemenu > Utilities > Verify Data.
QuickBooks will perform a scan of the company file and identify any data issues. If it finds any issues, it will prompt you to rebuild the data.
To rebuild the data, select File > Utilities > Rebuild Data.
QuickBooks will display a successful message once the rebuild process is complete.
Method 8: Try the Windows Restore
At first, click on the Start menu, and then search for “Restore.”
In the next step, click on the System Restore option.
Now select the Recent Reset Point and proceed with the restore process.
At last, run QuickBooks and make another attempt to open the company file.
Method 9: Rename Network and Transaction files
As mentioned in the list of causes, damage in the network (.ND) or transaction log files (.TLG) could also trigger QuickBooks error message 6190, 816.
To resolve this, the most effective approach is to rename these files.
At first, go to Drive C: Users/Public/Public Documents/Intuit/QuickBooks.
Then, look for files having the .TLG and .ND extensions.
Right-click them, then choose Rename.
Then, choose .OLD at the end of the filename.
When all done, run QuickBooks, then open the company file previously facing the ongoing error.
The file should be accessible this time without the occurrence of the error.
Method 10: Move the company File to different folder
Moving the company file to the desktop or any other location besides the original company file folder has fixed this error in many cases. To do this:
At first, go to the company file folder, then look for the company file.
Right-click it, then select Copy.
Then make a new folder on the desktop and paste the file in it. Either use the Ctrl + V keys or right-click in the folder, then hit Paste.
Run QuickBooks, then try opening the file from this new location.
A Sneak Peek Into the QuickBooks Error 6190 and 816
This company file error shows in the form of a message stating as:
Information
Description
Error code:
6190, -816
Error description:
QuickBooks has encountered a problem and needs to close. We are sorry for the inconvenience.” or “An error occurs when QuickBooks tries to access the company file (-6190, -816): or "QuickBooks was unable to open the file [path] on the host computer.
“QuickBooks is unable to open the company file. It may have been opened by another user. You should ask that user to switch to multi-user mode so that you can both use the company file simultaneously. This file could also be located in a read-only network folder. Error Codes: (-6190, -816) or QuickBooks Error 6190 Multi-User Not Working.”
Software:
Intuit QuickBooks Desktop
Symptoms:
Error code appearing on the screen, windows running slowly, system freezes, system crashes, loss of some essential data files, etc.
Quick solution:
Use QuickBooks file doctor tool
When this error happens, QuickBooks is unable to access the company file and the user receives the following error message on their screen:
Some of the noteworthy causes of QuickBooks Error 6190 and 816
It is prudent to first go through the various causes that may result in this error code. These include:
The company file may be damaged due to a virus or a sudden system shutdown, which led to its data damage.
The transaction log file (TLG file) may be damaged or not showing a match with the company file. Another reasons can be damaged Network (ND file)
QuickBooks is not updated to the newest version.
The company file may be saved in the read-only folder.
The file location got changed, and the user may be trying to access the file from the previous location.
You can land into a similar issue if the .qbw file is being updated on another system but the transaction log file isn’t updated to the latest version.
What Signs indicate QuickBooks error code 6190 816?
Some of the notable symptoms that act as a forerunner of this company file error in QuickBooks include
The first conspicuous sign is the appearance of the error message related to Error 6190 and 816 when opening the company file.
QuickBooks and the system experience technical glitches when opening the company file or when running QuickBooks.
Need further assistance...!
This blog earmarked the major strategies to help you resolve QuickBooks Error 6190, 816. If the error is still occurring, or if you need help on any other matter, call our 24/7 QuickBooks error support team at Axpert Advisors through the helpline, i.e., 1-888-368-8874
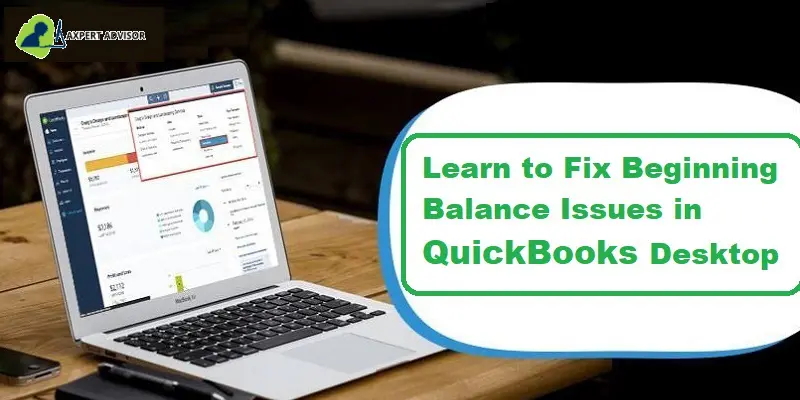
Encountering incorrect or zero beginning balances in QuickBooks Desktop can be a frustrating hurdle, especially when you're trying to reconcile your accounts. This common issue can lead to inaccurate financial reporting and disrupt your accounting workflow. You might face this problem in the Begin Reconciliation window if an incorrect or zero balance was initially entered when setting up the account, if previously cleared and reconciled transactions were voided, deleted, or modified, if there's underlying data damage within your QuickBooks company file, or if the file was converted from a different version of QuickBooks, leading to conversion-related discrepancies.
This article will guide you through the process to fix beginning balance issues in QuickBooks Desktop, helping you restore accuracy to your financial records. Read on to resolve these common reconciliation challenges. For further assistance, don't hesitate to reach out to our support team.
Different Solutions to Fix Beginning Balance Issues in QuickBooks Desktop
Following are the advanced steps to fix beginning balance issues in QuickBooks Desktop:
Solution 1: Correcting a Zero Balance
Recreate the opening balance: To correct a zero balance, you would have to recreate the opening balance. Just in case you are reconciling the account for the first time, then try to recreate the opening balance, but this option is not present in the Begin Reconciliation window. Moreover, you can create a journal entry and then perform a mini reconciliation to mend it.
Step 1: Creating Journal entry
To initiate the process, you would first have to create a journal entry using the correct date and amount that you would like to see in the begin reconciliation window:
Move to the Company menu and pick the Make general journal entries.
Further change the date to the correct statement date of the beginning balance.
Head to the Account drop-down, and from there make a choice for the account.
Enter in the appropriate opening balance in the debit column.
In the second line, choose Opening balance equity.
Pick the Save tab.
Step 2: Reconciling to rectify the beginning balance issue
Perform a mini reconciliation to correct the beginning balance in the begin reconciliation window:
In the inception, make a visit to the Banking tab.
From there, make a move to the Reconcile option.
The next step is to proceed ahead by hitting on the Account drop-down, and within that, opt for the Account.
Thereafter, the statement date needs to be entered correctly along with the ending balance. It should necessarily match with the journal entry.
Once done with the foregoing steps, the user needs to hit Continue.
Now, follow up to the Deposits and Other Credits, and here, hit on the Journal Entry.
Notably, the amount showing up corresponding to the difference should be null.
Afterwards, proceed to the Reconcile Now tab.
Solution 2: Fixing an Incorrect Balance
Step 1: Mend edited, deleted, or cleared transactions
You should run one of the below-given reports to identify the transaction facing the beginning balance issues:
Reconcile Discrepancy
Audit Trail
Previous Reconciliation
To find the transactions causing the discrepancy, you need to run any of these reports:
Step 1: Reconcile discrepancy report
Under this, you would have to check the Reports menu and select Banking and reconciliation discrepancy.
Pick the appropriate account and choose the OK tab. You will have a list of transactions that were changes since the last reconciliation. And you are recommended to use this report to spot the transaction triggering the issue.
In case you spot a discrepancy, keep a note of the transaction date and the entered modified date, which will let you know when the change took place.
Step 2: Audit trail report
It can be run using the following steps:
You are supposed to move to the Reports menu and choose the Banking and Previous Reconciliation tab.
Pick the needed account that is to be reconciled.
Select the most recent statement date. Choose the transactions cleared at the time of reconciliation and choose the Display tab.
Take a note of the statement and the reconciliation creation date.
Further, choose the Reports menu and select Accountant and taxes and also the Audit trail report.
Set the account filter to the account that is being reconciled.
Choose the Customize report tab.
And head to the Filters tab and pick the account from the filters.
Select the needed account.
Then move to the Display tab and set the Date filter with the from field blank and the date set to the statement date.
Click the OKtab.
Set the entered filter with the From date set to the previous reconciliation creation date from the PDF and the To field as today’s date.
Check if any of the transactions in the Report account for the issue.
Step 3: Previous reconciliation report
It should be noted that if you are using QuickBooks Desktop Pro, then you will only be able to access the last reconciliation report. To keep a copy of other reports, save a PDF copy on the hard drive. Check view previous bank reconciliation reports to learn more. Steps to run the Previous Reconciliation report
At first, go to Reports, and afterwards, head to the Banking option.
Within the Banking option, opt for Previous Reconciliation.
In the next step, opt for the Account and Statement Ending Date, followed by the Display.
The final step requires going for a comparison of this report with the past statements.
For mending the issue, you will have to re-enter or edit the transaction.
Step 4: Undo a previous reconciliation and redo it
For this, Back up the QuickBooks company file.
After that, choose Undo last reconciliation in the begin reconciliation window.
When asked to, choose Continue tab and hit OK button.
Close and reopen the Begin reconciliation window.
Step 5: Avoid the discrepancy and let QuickBooks enter an offsetting adjustment
Even if you didn’t get a zero difference, pick the Enter Adjustment tab to complete the reconciliation process. QuickBooks software will automatically enter a journal entry under a special expense account termed as reconciliation discrepancies. Further check and edit it as required by going to the chart of accounts:
In order to locate the journal entry,
Use the find feature
Select the Edit menu and pick the Findtab.
Move to the Advanced tab and pick the Memo from the filters.
Further Type "balance adjustment" and then choose the "find" tab. Any balance adjustment will appear on the screen.
View the previous reconciliation report:
By heading to the Reports menu and picking the Banking tab and then Previous Reconciliation.
In case the balance adjustment was made, you will see a general journal entry at the top of the report under the cleared transactions section.
Step 6: Reach out to bank about a banking error
You can reach out to the bank if the discrepancy is caused by the banking error that appears when downloading or importing transactions. For further assistance when reaching out to your bank, ask for a bank representative familiar with QuickBooks bank feeds and account activation.
Some primary causes that could lead to beginning balance issues in QuickBooks
The main causes of this issue can be ascribed to
The account wasn't been set up properly with correct balance
Possible company data damage could also result in the beginning balance issue in QuickBooks Desktop.
The user got the QuickBooks file converted from some other version to the current one.
Some transactions that had been reconciled earlier were voided or modified.
Limitations while switching from other QB versions
The user should realize that the reconciliation process is different for QuickBooks Desktop for Mac and QuickBooks Online. During the process, certain transactions may not get reconciled, and this may result in beginning balance issues in QuickBooks Desktop.
Summing up!
This segment might work for you to resolve the beginning balance issues in QuickBooks. However, as always, if you have any questions, comments, or concerns related to any type of accounting issues, feel free to get in touch with our support executives via our helpline i.e., 1-888-368-8874. We are a hub of the QuickBooks desktop support team who work round the clock to provide the best possible support services. So, do not hesitate to call us anytime and seek assistance!