Unleash the Finest Ways to Undo or Delete Reconciliation in QuickBooks
QuickBooks stands out as a leading accounting software globally, thanks to its powerful functionality and advanced features that simplify complex financial tasks. Among these, managing reconciliations is critical, and sometimes, you might need to undo or delete a reconciliation.
Have you accidentally reconciled a transaction, entered an incorrect date, or used the wrong statement date? Don't worry! This comprehensive guide provides everything you need to know about effectively undoing or deleting unwanted reconciliations in QuickBooks.
We'll walk you through the precise steps to correct these common errors, ensuring your financial records remain accurate and up-to-date. Read on to learn how to master reconciliation adjustments in QuickBooks and rectify any mistakes with ease.
Steps to Undo a Reconciliation in QuickBooks Desktop
Among all the version of the QuickBooks accounting software, the process of undo reconciliation in QuickBooks desktop is considered to be the easiest one. Later we will be discussing the steps to undo a reconciliation in QuickBooks online and online accountant version. Just in case you make use of QuickBooks desktop version, such as QuickBooks pro or premier or enterprise solutions then perform the below steps:
The first step is to launch the QuickBooks and directly head back to the banking option.
Look for the transaction that you want to reconcile.
Further, hit on the reconcile now tab.
At last, choose the option to undo last reconciliation.
Procedure to Undo or Delete Reconciliation in QuickBooks Online
Well, it should be noted that the process of deleting reconciliation may vary in QuickBooks desktop version and QuickBooks online. QuickBooks online reconciles transactions individually, and therefore one must un-reconcile them one at a time. Also, before a user can undo an entire QuickBooks online reconciliation, it is supposed to edit every transaction manually. Once you are done with the editing part, you can proceed by following certain steps. You can undo or delete the reconciliation in QuickBooks using the steps below:
Step 1: Reviewing the account
You need to ensure that you are making the right changes.
Moreover, you should review the opening, beginning, and ending balances for the account holding the transaction.
Step 2: You can unreconciled the transactions with the steps below
Head to the accounting menu and Pick charts of account.
You need to find out the account holding the transaction. Choose account history.
Pick the transaction you want to unreconciled to expand the view.
Review the check column and if your transaction is reconciled, then you will see an R key.
Tick mark the checkbox. This will change the letter in the box. Continue selecting it till the box is blank. This will remove the transaction from your reconciliation.
Tap on the Save option.
Close the account register.
Steps to Undo the Reconciliation Manually
In order to undo reconciliation manually, you should go ahead with the steps below:
Hit on the gear icon and choose the chart of accounts.
Look for account row that you want to see.
Opt for the account history/view register.
Identify the particular account you want to edit and move to the reconcile status show by the checkmark.
Pick the top mark to change it. You are suggested to remember the acronyms: C(cleared), R(Reconcile), and blank (neither cleared nor reconciled).
Steps to Un-Reconcile in QuickBooks Online Version
You should note that the QuickBooks online reconciles the transactions separately, thus you are suggested to reconcile it once at a time.
At first choose registers from the banking menu.
Opt for the account from the register name drop down menu.
Pick the transaction that you want to undo, and then delete the R at the top of the transaction to change its status to unreconciled.
Just in case you plan to reconcile each of the transactions for a period, then it might help you in printing a list of reconciled transactions using the reconcile alternative from the banking menu.
Undo or Delete a Bank Reconciliation in QuickBooks Online Accountant Version
You can perform some easy steps to undo or delete reconciliation in QuickBooks online accountant version.
You can start by tapping on the gear icon that is in the top right corner of the screen.
Hit the reconcile option under tools.
Choose bank account you use.
You will see an UNDO button just near to the auto adjustment column.
Hit on the undo tab
Tap on the OK tab, when you get the message on the screen.
After all this, you will see the success screen opening on your screen, where you will have to tap on OK again and you are good to go.
What is The Need to Undo Bank Reconciliation?
Before heading towards the ways to undo reconciliation in QuickBooks, it would be better to explore the reasons behind deleting the reconciliation. Well, it is sometimes obligatory to undo reconciliation, especially when the QuickBooks balance sheet doesn’t match the bank statement following a monthly reconciliation. Well, you might have to undo or delete a reconciliation in the following situations:
In the event that the payment you recorded for an incorrect date.
Any uncleared transactions present at the time of reconciliation and is not taken into consideration.
Just in case the bank statement date was incorrect or not an actual date.
Any forced reconciliation by you in the bank statements.
Before you start with the reconciliation process, keep in mind if small changes can unbalance your accounts. You can minimize the impact by only reconciling transactions one at a time. If you want to completely start over, reach out to your accountant.
Assorted Benefits of Account Reconciliation in QuickBooks
Reconciliation is an important aspect to ensure that the accounts are accurate. There are numerous benefits catered by reconciliation, which includes the following:
Reconciliation permits you to look for the error in accounting and perform bookkeeping activities flawlessly, which is one of the best advantages of reconciliation. Just in case you reconcile accounts on a monthly basis, then you will be able to keep the bookkeeping identical to what is recorded at the bank.
Moreover, it prepares you for any further activity. To understand it better, let us take an example that in case you pay a check to any vendor, and he/she continues to delay the payment, again and again, then in such scenario, it is probable that you might forget to deduct it from the account. Using reconciliation, you will be able to keep a track of all the transactions.
You can also keep the business deposits correct with the help of reconciliations. Deposit errors can be pretty much common, and can lay bad effect on the business. But with reconciliation, you will be able to spot any such errors, and would be able to correct them before they even arise and create any nuisance for you.
Summing up!
This blog entailed the easy ways to undo or delete a reconciliation in QuickBooks. In case you face any difficulty, or even after following the steps you are unable to undo or delete a reconciliation in QuickBooks Online, then it would be recommended to get in touch with the QuickBooks support team and get the issue resolved.
Frequently asked questions about QuickBooks Reconciliation
Query: How to undo reconciliation in QuickBooks online 2018?
Answer: You need to follow the below given steps to undo the reconciliation in QuickBooks online 2018:
Initially, launch QuickBooks and head to the ‘Banking‘ option.
After that, opt for the ‘Banking‘ and ‘Account’ options from the top side.
Now, head to ‘Register/AccountHistory', over the ‘Action‘ column.
Search for the ‘Transactions‘ that require to be unreconciled
Highlight the transaction by hitting a single tab on it.
After that, push the ‘R‘ key on the top line of the transaction, that is between the Quantity and also Down Payment Or Fee and also Payment amount.
In the reconcile status column side, hit the top line consistently to change the following status:
C – Cleared
R – Reconcile and
Blank – Not cleared or reconciled tap on ‘Save‘ to set the settings.
Now, you’ll see a pop-up that will display this image. How do you reverse a reconciliation in QuickBooks?
Finally, hit on ‘Yes‘.
Query: What is the need of QuickBooks reconciliation?
Answer: QuickBooks reconcile ensures that the starting balance as well as deal noted in your QuickBooks matches your monthly financial institution balance or not.
Query: How usually should user reconcile their accounts?
Answer: The QuickBooks Users needs to integrate their accounts in on a monthly basis, or at the end of your bank reporting period.
Query: How to recuperate/recover deleted transactions?
Answer: There is not a particular method to recover deleted transactions. Proceed as follows:
You need to click on ‘Reports‘ and then choose ‘Accounts’ as well as ‘Taxes‘.
After that click on ‘Delete transactions‘.
Now enter the date to delete reconciliation and re-enter the transaction.
Your sales as well as purchase order transactions cannot be recovered.
Query: Does Users Manually deleting reconciliation?
Answer: Reconciliation can be done manually if you need to modify fewer transactions but if you have a lot of transactions comply with the methods in the short article.
Query: Why don’t I have a Resolve undo option on my QuickBooks?
Answer: The undo option is available if you’re utilizing the QuickBooks Online Accountant version. If you’re using the normal one, you’ll need to manually reconcile each transaction.
Firstly, hit on ‘Accounting‘, after that head for the ‘Chart of Accounts.'
After that, hit a click on the ‘Bank account‘.
Now, tap on ‘View register‘.
Search for the ‘Transaction‘ option.
In the reconcile status column side, you need to select the top line consistently to change the following status:
C – Cleared
R – Reconcile and
Blank – Not cleared or reconciled
Query: What does the reconciliation of accounts indicate?
Answer: Essentially in accounts reconciliation means to compare your bank accounts with your QuickBooks accounts to know whether the money leaving is equal to the cash invested.
Discover solutions for QuickBooks error 1618 that occurs when another program is undergoing an update.
QuickBooks has become the go-to financial management software for businesses of all sizes, thanks to its efficiency in handling complex financial tasks. Its user base is constantly expanding, a testament to its effectiveness. However, even the best software can encounter hiccups, and QuickBooks Error Code 1618 is one such annoying issue that users occasionally face.
This error often appears during the installation or uninstallation of QuickBooks or related programs, preventing you from getting the software up and running smoothly. But don't worry – you're not alone, and this issue is entirely resolvable.
In this comprehensive guide, we'll delve into the common reasons behind QuickBooks Error 1618 and provide you with multiple effective solutions to fix it. We're here to help you get past this obstacle. If you'd rather not tackle the troubleshooting steps manually, simply call our tech support line to speak with our specialists for expert assistance.
What is QuickBooks Error Code 1618?
QuickBooks error 1618 typically appears when you try to update the program or install QuickBooks on your desktop. This might occur as a result of an unsuccessful installation or update. This error, which is an update error, can take the following forms:
Error
Description
Warning
Error code: 1618
Error
There was a problem installing Microsoft Runtime library (Error 1618)
Error 1618:
ERROR_INSTALL_ALREADY_RUNNING error message when you run the setup program to install QuickBooks programs
Software:
QuickBooks Desktop
Symptoms:
Active program window crashes, system crashes, slow Windows performance, incomplete install process
Quick solution:
Create a backup of the Windows registry
You might see the following error message on your computer screen:
Causes of the QuickBooks error code 1618
There are several possible reasons behind the QuickBooks error code 1618. Some of these are related to the installation, while others may not be directly related but may trigger the error.
Installation error 1618 can occur if your updates and installations are not done properly.
After downloading, save the install file in that location from where you can access it easily.
After that, open the QuickBooksToolHub.exe file and install it.
After installation, double-click on the QuickBooks Tool Hub icon to open it.
Click on the 'Installation Issues' tab and select ‘QuickBooks Install Diagnostic Tool’ to launch the tool.
It will take approximately 20 minutes to find and diagnose the problem.
After completing the process, open QuickBooks to check whether the error 1618 is resolved or not.
If you are facing the same issue, then follow the next solution to fix it.
Method 6: Update the Windows
From the Start menu, go to Settings.
Choose the tab for Update & Security.
And further select the Windows Update option.
Next, select the Check for Updates option.
The download process will start automatically when updates are available.
Restart your computer and let the updates install.
At last, launch the QuickBooks software and check if the error 1618 got resolved.
Method 7: Run Quick Fix My Program
In the first step, run the Tool Hub and access the Program Problems tab.
After that, move to the Quick Fix My Program option.
Then, proceed with the scan process and allow this feature to diagnose and rectify issues within QuickBooks.
Method 8: Using clean install in selective startup mode
There is a possibility that the error 1618 in QuickBooks is not resolved even after applying all the above techniques. In that case, you can try a clean installation in safe mode. This prevents third-party app interruptions during the reinstallation process. Follow the below steps to resolve the error:
Step 1: Switch to the Safe Mode
Open the Run dialog box (Windows + R)
Type MSConfig in the text box.
After pressing Enter, you will see a pop-up window.
The General tab will be already selected in the window. You will see three mode options.
Now click on Selective Startup and then click on Load system services.
Now, go to the Services tab and tick the Hide all Microsoft services option at the bottom.
Choose Disable and then untick the Hide all Microsoft services option.
From the list of services provided, select Window Installer.
After selecting the above, click OK and select the Restart button.
Step 2: Uninstalling and reinstalling QuickBooks desktop
Go to Control Panel and click on the Programs and Features tab.
Select QuickBooks from the list of installed applications.
Then click on the Uninstall program option.
Finish the uninstallation by following the instructions on the screen.
Next, reinstall QuickBooks from the installation hard drive.
Continue the download and installation by following the instructions on your PC screen.
Step 3: Returning to the Normal Mode
Press the Windows + R keys to open the Rundialog box.
After that, write MSConfig in the search box and press the Enter key.
You will see a pop-up window.
Now, select the Normal Startup option in the General tab.
Reboot your system again to apply the changes and see if the problem persists.
Conclusion!
In this segment we discussed the quick fixation of QuickBooks error code 1618 and the causes of this error. By using the methods mentioned above, you will be able to fix the error easily, as this would prevent any further damage to your important company files. Moreover, if you have any doubts and you need any technical guidance, then you can contact our QuickBooks installation error support professionals at 1-888-368-8874. Let them fix the error from its root cause.
Here are the steps to address QuickBooks Error code C=272.
Are you encountering QuickBooks Error Code C=272? Due to the technical complexity of the program, users can sometimes face various error codes and glitches. This particular error often appears when you try to run the Verify and Rebuild Data Utility in QuickBooks, and some users have even reported seeing it when attempting to open memorized reports.
This concise guide will help you get to the core of the issue, providing a complete overview of QuickBooks Error C=272, including its common causes and effective troubleshooting steps. By following the solutions outlined in this article, you'll be well-equipped to resolve this error. If you need further technical assistance, don't hesitate to connect with our expert support team via our support line.
Procedure for Fixing QuickBooks Error Code C=272
You can perform the below-stated set of steps to successfully deal with error code C=272 in QuickBooks.
Step 1: Open the QuickBooks Sample Company File
To begin with, the user needs to open QuickBooks as an administrator and use the No Company Open window mode by pressing and holding the Ctrl key and releasing the same when the No Company Open shows up.
In case the error arises, then the No company open window appears.
In the "No Company Open" window, the user needs to select the option to Open a sample file.
Click on any of the sample files in the list
The company file might be distorted/damaged if the sample company file opens without displaying the error.
Go for Verifying and rebuilding QuickBooks company data or Restore the QuickBooks company file from the backup.
If the error further appears when opening the company file, head forward toward the next step.
Step 2: Run QuickBooks in compatibility mode
At first, hit a right-click on the QuickBooks shortcut icon.
After that, go for Properties.
Then choose the Compatibility tab.
Now you need to uncheck the checkbox 'Run this program in compatibility mode.'
Followed by click on Apply and Ok button,
Step 3: Disabling Windows compatibility for QBW32.EXE file
Under this step, you need to right-click on the QuickBooks Desktop icon.
After that, proceed to the Properties tab.
Then select Open File Location.
Within the QuickBooks folder, you need to right-click on the QBW32.EXE file.
Then move to Properties of the file.
Now, go to the Compatibility tab and uncheck the Run this program in compatibility mode option.
After that, hit on OK, and you are good to go.
Lastly, close your QuickBooks and reopen it.
Step 4: Repair QuickBooks desktop
Press the Windows/Start button and choose Control Panel.
After that, move to the Programs and Features tab.
In the next step, you need to choose the QuickBooks icon from all the installed applications.
Then select Uninstall/Change.
In the next window you will get two options: to Install it and repair it
Now, hit a click on Repair to repair your QuickBooks program.
Step 5: Consider performing a clean installation of QuickBooks.
Within the purview of the current discussion, we uncovered the various troubleshooting steps for QuickBooks Error C=272. Besides, we also discussed the multiple approaches for the easy fixation of this troublesome error. Just in case the issue still bothers you, just give our QuickBooks error support professionals at AxpertAdvisors a call at the helpline, i.e., 1-888-368-8874.
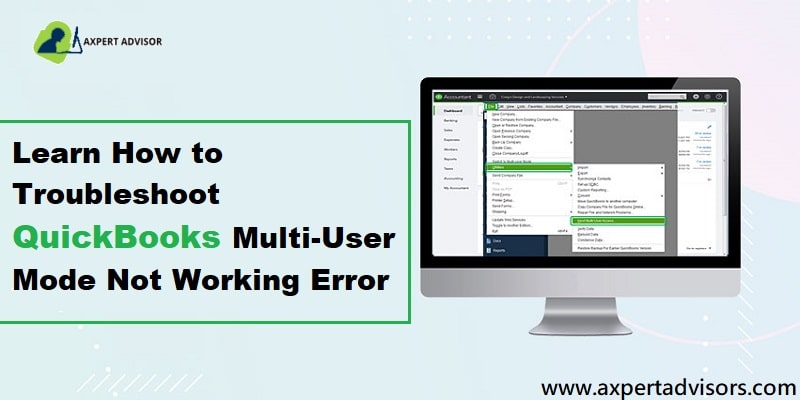
Expert Tips to Fix QuickBooks Multi-User Mode Not Working Issue:
Is your QuickBooks Desktop multi-user mode failing when you need it most, disrupting your team's workflow and productivity? You're not alone, and this common challenge can be resolved effectively. While QuickBooks Desktop's multi-user mode is designed to facilitate effortless collaboration on a single company file, encountering issues can be incredibly frustrating.
This comprehensive guide will delve into the "Multi-User Mode not working" error, exploring its potential causes and providing you with a series of effective, actionable steps to fix it. By following our expert advice, you'll swiftly overcome these roadblocks and restore seamless teamwork within your QuickBooks environment. Get ready to enhance your collaborative efficiency and minimize downtime!
What is QuickBooks Multi-User Mode?
It allows multiple users to work on the same company file simultaneously. This feature is a real time-saver, helping users get more tasks done together. Whether you’re handling invoices, generating reports, or managing day-to-day tasks, Multi-User Mode keeps everything running smoothly. For many businesses, however, it’s an essential tool for keeping operations efficient.
How to Fix QuickBooks Multi-User Mode Not Working Error?
Below are the methods to solve the QuickBooks Multi-User Mode Not Working Error.
Method 3: Needs to check if QuickBooks Services is running in a proper manner or not
(Note: Before getting started with this procedure, the user needs to verify whether the server PC is running QBCF Monitor Service and QuickBooks DBXX (XX is the year of QuickBooks).
At the very first, type services.msc in the Windows search box and click on Enter to continue.
The user needs to search for the Services Window to see the QuickBooks DBXX service.
By chance, if the Services window doesn’t appear, then the user has to follow the steps given below:
Make sure that the Database Server Manager is installed in a proper manner & Look for the latest Database Server Manager.
Ensure that the hosting is enabled on the server in case the full software is running on the computer.
Next, double-click on QuickBooksDBXX service. Two options are enabled: Run or Start.
Under the Recovery tab, in case of the first, second and subsequent failures, choose QuickBooksDBXX service option.
Finally, repeat the 1st, 2nd, 3rd and 4th bullet points for the QBCF Monitor Service.
Method 4: Needs to check if QuickBooks must be able to send data or not
First of all, the settings of Firewall and Antivirus needs to be changed.
Press the Windows key and hit a click on control Panel, find and Select the Windows firewall and select the prompt to approve an app through the Windows firewall option.
Click on the Checkbox next to the public list for the QuickBooks application.
Later on, hit a click on Change Settings, and then, hit a click on OK. Then, click on Public.
Now, try to run the user in the Multi-user mode.
Next, the user needs to test the path and make sure if the QuickBooks application can communicate with the server. (Note: Turn on Network Discovery)
Press Windows + R keys simultaneously. Type ping (server name). Press Enter. This will launch the Run command.
The user needs to use UNC (Universal Naming Convention) on the computer to access the server’s shared folder.
Finally, use the UNC path to return to the QuickBooks company file.
Next, the user needs to go to the company file by following the UNC path.
Create a New Company File Folder.
Create a New Folder for the Company File for the Company File.
Ensure to reach the Host system.
Next, configure the folder. For the new folder allow Windows to Access Permissions.
The Company files can be shared across systems.
At last, copy the .QBW File to the New Folder. Ensure that the company file is opening in multi-user mode.
Configure Firewall exception for QuickBooks Program and Port.
Method 5: Install and Run QuickBooks File Doctor tool
Next, the user must download the latest version of QuickBooks.
Finally, click on the Multi-user hosting mode and Switch the mode on.
This procedure holds sure chances of resolving the error.
Method 11: Ping the Server From Workstation
Initially, open Start menu on the server.
Heading forward, type network and open the Network and sharing center.
Once done with that, now you are required to tap a click on Change advanced sharing tab and from there Turn on network discovery and also file and Printer sharing.
And further, get the name of the server.
Followed by, tap enter in CMD in the run window.
And now hit on Enter button.
In the CMD window, you need to enter the Ipconfig/all text and also click on Enter tab.
Now you will see the Server name next to the Host name.
You now have to note down the Host name and move to the Workstations.
And then, hit a click on Start menu.
Now open the run command window.
Once done with that, type in CMD tab and then type Ping and hit Enter key.
In the last step type in Server name without the brackets.
Why Does Multi-User Mode Not Working Error Appears?
There are several causes that leads to the QuickBooks Multi-User Mode Not Working error or Error H202. Some of the reasons are as follows:
If the user has not installed QuickBooks server on the computer.
If the hosting settings are not properly arranged on the network.
Because of the firewall settings, if the computer systems on the user’s network are not compatible with each other.
If the user has not granted the permissions to the files or folders in a proper manner.
QuickBooks multi user-mode, an inbuilt feature in the accounting software package, enables more than one user to work on the same file simultaneously. Users, however, may receive some unexpected errors while working on this mode.
Error
Description
Error name:
Multi-user mode not working
Error description:
“This company file is on another computer and QuickBooks needs some help connecting”
Software:
QuickBooks Desktop
Prerequisites:
Make sure to install QuickBooks database server manager. Also, install the same version of server manager.
Quick solution:
Run QuickBooks file doctor tool
Important Points Before Troubleshooting
There are two basic requirements for setting up QuickBooks multi-user mode, without which it won’t be possible, namely:
A license of QuickBooks for more than one user.
One system requirement that is to be used as the QuickBooks server.
You need to install the QuickBooks database server manager. (Ensure that you have installed the same database server manager as the current QuickBooks version.)
Conclusion:
The company files and activities of company business may be impacted by accounting errors. With the methods mentioned above, you might be able to fix QuickBooks Multi-User Mode Not Working Error. Not paying proper heed to such errors can result in the damage of your QB files or data. So, it must be resolved quickly. If any doubt still persists regarding such errors, you can contact us at our 24X7 QuickBooks error support helpline i.e., 1-888-368-8874.
Frequently Asked Questions (FAQs)
u003cstrongu003eWhy does QuickBooks Multi-user mode not working error occur?u003c/strongu003e
Following are the reasons for the aforementioned error:u003cbr/u003e1) If the user has not installed QuickBooks Server on the computer.u003cbr/u003e2) If the hosting settings are not properly arranged on the network.u003cbr/u003e3) Because of the firewall settings, if the computer systems on the user’s network are not compatible with each other.u003cbr/u003e4) If the user has not granted the permissions to the files or folders in a proper manner.u003cbr/u003e5) If the Database server manager is unable to open the company file on the user’s system.
u003cstrongu003eWhat is the difference between the Multi-user mode and single –user mode in QuickBooks?u003c/strongu003e
The differences between the Multi–user and Single-user mode in QuickBooks is that the multi-user mode has multiple access to the company file from different workstations or systems whereas the single-user mode provides access to only one user.
u003cstrongu003eWhat are the requirements to Resolve QuickBooks Multi-User Mode Not Working Error?u003c/strongu003e
The user must ensure that:u003cbr/u003e1) QuickBooks Database Server Manager is installed on the system.u003cbr/u003e2) The version of the Database Server Manager should be similar to the QuickBooks version present in the system.
u003cstrongu003eWhat is QuickBooks Error H202?u003c/strongu003e
QuickBooks Multi-user Not Working Error is also known as Error H202.


![type ping [servername] - Screenshot](https://axpertadvisors.com/wp-content/uploads/2021/01/type-ping-servername-Screenshot.jpg "QuickBooks Multi-User Mode Not Working - How to Troubleshoot it? 53")
