Here are the most common reasons and solutions for QuickBooks Error H505:
QuickBooks has become an indispensable tool for small and mid-sized businesses globally, thanks to its user-friendly interface and robust multitasking capabilities. A key advantage for many organizations is its ability to support simultaneous access for multiple users (depending on your QuickBooks version), even from remote locations.
However, like all sophisticated software, QuickBooks occasionally encounters errors that can disrupt your workflow. While many minor issues can be resolved with in-app prompts, some require specific troubleshooting. Today, we're focusing on a common and particularly disruptive issue: QuickBooks Error Code H505. This error specifically relates to multi-user access and can prevent your team from working collaboratively.
This guide will delve into the causes of QuickBooks Error H505 and provide clear, actionable solutions to get your multi-user environment back on track.
Solutions to Troubleshoot the QuickBooks Multi-User Error H505
We are now into the section containing viable solutions for resolving the QuickBooks error H505. Try these solution steps in order to resolve this problem
Solution 1st - Modify your System’s Firewall Settings
Initially, hit on the Windows key on the keyboard and proceed to Control Panel.
Within the Control Panel, head to the Firewall Settings.
After that, choose the Allow a Program through your system’s Firewall.
Moving ahead, you need to hit on Add Program tab and include QuickBooks 20xx to the exception list.
Restart your computer to save the changes.
Add the following ports according to the version of your QuickBooks software:
QuickBooks Desktop 2015: 8019, 56725, 55363-55367
QuickBooks Desktop 2016: 8019, 56726, 55368-55372
QuickBooks Desktop 2017: 8019, 56727, 55373-55377
QuickBooks Desktop 2018: 8019, 56728, 55378-55382
QuickBooks Desktop 2019: 8091, XXXXX, XXXXX-XXXXX
QuickBooks Desktop 2020: 8091, XXXXX, XXXXX-XXXXX
QuickBooks Desktop 2021: 8091, XXXXX, XXXXX-XXXXX
QuickBooks Desktop 2022: 8091, XXXXX, XXXXX-XXXXX
QuickBooks Desktop 2023: 8091, XXXXX, XXXXX-XXXXX
QuickBooks Desktop 2024: 8091, XXXXX, XXXXX-XXXXX
Solution 2nd - Assess QuickBooks Hosting Settings
In the very start, you need to launch QuickBooks on both the systems configured as multi-user.
After that navigate to the File menu and select the Utilities option.
In the next step choose Discontinue or Stop Hosting Multi-User Access Configuration.
Now turn on Hosting through clicking on File menu and then hit on the Utilities option and selecting the Host Multi-User Configuration option.
Lastly, you need to restart QuickBooks software on both the QuickBooks.
Solution 3rd - Make Changes to the Setting of Your QuickBooks Folder Location
Initially, you need to make a New Folder on the hosting system.
After that share the folder and set/change Windows access permissions to share company files (contact an IT professional if you are not able to access the QB file server).
Now copy the .qbw file and paste it to the new folder.
Proceed with the scan. This tool will take up to 20 mins time to scan and detect the problem.
Solution 5th - Configure the Firewall Ports Settings
Make sure that the firewall settings are not blocking QuickBooks. You may have to add QuickBooks as an exception or open ports needed by QuickBooks. Usually, these ports are needed to develop a proper network connection. Also disable the firewall and then try to switch to the multi-user mode to host the company file.
At first, you need to open Run box by clicking on the Windows + R keys together.
After that type in 'Control Panel' and hit on the Enter key.
Moving ahead, you need to select the System and security option.
Following that, open the Windows firewall and network protection.
Now you have to hit a click on the Advanced settings tab and also choose Inbound rule.
Next step is to choose New rule option and then opt for a Port and hit on the Next tab.
Now select the correct TCP option.
Hereafter, you need to enter the port of the QuickBooks year version.
After the year code has been entered in the respective field, hit a click on the Next tab and restart your PC once.
Solution 6th - Edit the Host File
Step 1: Finding the IP address and system name of the server and workstation:
At first, you need to hit a click on Windows + R keys on your keyboard. It will pop up the Run box on your screen.
After that type in 'Cmd' and then press Enter key.
In the next step, you need to open the Command prompt window.
Furthermore, enter the 'Ipconfig/all' command and press the Enter tab.
Now you need to find the hostname in the Windows IP configuration section.
Then provide the hostname and IP address.
Hereafter you need to repeat the all above given steps into all of the systems with the multi-user setup.
Now you have to move back to the workstation to test the server. Do the following steps here:
Move to the Windows start menu.
Then type 'Run' into the search bar in order to open the Run box.
Now type in 'CMD' into the run window and hit the Enter key.
Here you need to type 'Ping' command and then hit on the Enter tab.
Step 2: Edit the Windows Hosts File
At first, you need to close the QuickBooks software and move to the Start menu.
After that move to the PC option and head to the address:
C:\Windows\System32\Drivers\Etc
C:\Windows\System64\Drivers\Etc
If you're not able to find the Windows folder, then perform the steps to unhide the folders.
At first, you need to tap on View and then choose Hidden items.
Now, right-click on the View tab. It will unhide all the hidden files and folder.
In the next step hit a click on open with notepad option.
Now fill in the IP address and system name.
To complete the process, you need to save the changes and then reopen the QuickBooks software in multi-user mode.
Solution 7th - Run the QuickBooks Database Server Manager on Your Server
Step 1: Download and Install the QuickBooks Tools Hub on your Server
Firstly, you need to close QuickBooks desktop and other apps running on the background.
Next, you need to download the latest version of QuickBooks Tool Hub program and save the file on your computer.
Moving ahead, search for the downloaded file (i.e. QuickBooksToolHub.exe)
To run ToolHub.exe file and install the tool hub on your system, you need to follow the on-screen instructions and Agree to the terms and conditions of it.
Now hit double click on the created QB tool hub icon to open it.
Step 2: Run the QuickBooks Database Server Manager on your server
At the very first step, you need to open the tools hub program and then choose Network Issues tab.
It will open the QuickBooks database server manager on your system.
Now inside the Database Server Manager, you need to click on Browse button and navigate to the location of your company file and then select Start Scan button.
You need to select the Start Scan option if you already see your company file folder on the scan folder option.
The QBDSM will automatically repair your firewall permissions.
Once the process finishes, you need to hit on Close.
Lastly, select the File option and Switch to Multi-user Mode.
In case your workstations can go into multi-user mode without any issues, everything is fixed.
A brief about QuickBooks Error H505 and reasons for it's occurrence
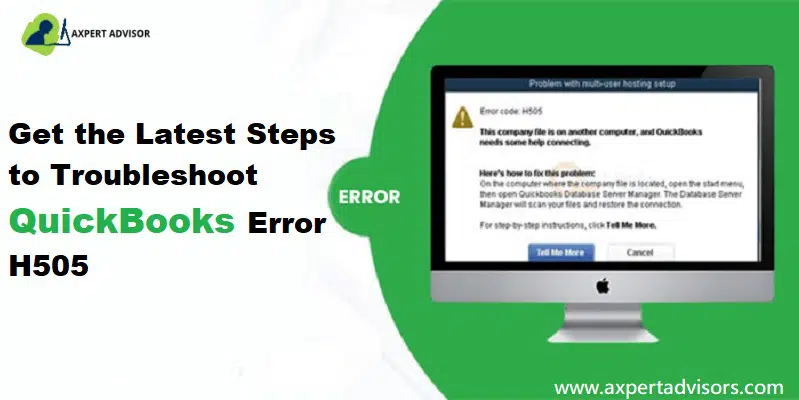
QuickBooks is a prevalent accounting software preferred by evolving businesses. It helps in management of finances efficiently. But even this software can throw up errors and issues from time to time. One such standard error is H505. It can occur if the company file is not located on the computer. This article explains the causes, symptoms, methods to rectify this QuickBooks multi-user error H505. You may get the following image if the multi-user error occurs on your software:
Error
Description
Problem with multi-user hosting setup
QuickBooks has faced a problem and needs to close. Sorry for any inconvenience caused.
Error code H505: This company file is on another computer, and QuickBooks needs help connecting.
Error H505 in QuickBooks enterprise is a part of the H series error in QuickBooks. All these H series errors are hosting settings-based problems. This error usually appears with a message stating that the computer on which the QuickBooks company file is stored needs reconfiguration.
Possible Reasons Behind the QuickBooks Error Code H505
Some of the possible causes of this error code are as follows:
The QuickBooks file you are trying to access is located on some other computer.
QuickBooks installed and available in the system server name is set-up to consent to all the shared connections to the company file, however, the QuickBooks accounting software is failing to communicate resulting in error H202.
Host PC has incorrect settings
Firewall causing connectivity problems.
.ND Network file may be damaged.
The required hosting configuration setting is not appropriate.
QuickBooks database server manager facing issues.
What are the Symptoms of QuickBooks Error Code H505?
This error can be identified easily if the multi-user mode is not accessible.
If in case you fail to access the QuickBooks company file stored on the server.
Another indication of the same can be when the error H505 flashes on the screen.
If the system or laptop crashes frequently.
Windows might become unresponsive and freeze periodically or the software freezes.
Summing Up!
The above-mentioned solutions shall enable you to fix QuickBooks multi-user error H505 and resume working. However, on the off chance that the issue persists, you can contact us and speak to our QuickBooks enterprise support experts via our helpline i.e., 1-888-368-8874. We'll be happy to help you in every possible way. So, what is the wait for? Just ring us on our helpline and get your queries resolved.
Got QuickBooks Error code 80070057? Here is the solution!
QuickBooks is an indispensable tool for millions of business owners globally, simplifying complex tasks like tracking daily transactions, managing expenses, invoicing, and tax filing. Despite its robust capabilities, users occasionally encounter errors that can disrupt workflow and cause significant delays.
One such issue is QuickBooks Error 80070057. This error can be a major roadblock, preventing you from efficiently managing your financial operations. This comprehensive guide will delve into the precise causes of QuickBooks Error 80070057 and provide you with effective, step-by-step solutions to fix it.
By understanding the triggers behind this error and applying our expert troubleshooting methods, you can quickly resolve the issue and restore seamless functionality to your QuickBooks software. Don't let technical glitches interrupt your business — learn how to tackle Error 80070057 today.
What is QuickBooks Error Code 80070057?
QuickBooks error 80070057 is one of the errors that users face when they are unable to access or open their company files in QuickBooks. This error indicates that the parameters used in your software are incorrect, causing problems in accessing the company file. Also, this error usually indicates that there is a problem with the network connection in your system. This error code generally shows up as “80070057: the parameter is incorrect.” It denotes that you do not have the required permission to read/write and also create/delete the company files from their current folder or location.
Also, this error usually indicates that there is a problem with the network connection in your system. This network connection is the connection that creates the connection between the server and the workstation. Problems in this connection cause problems in opening the company file. Other reasons for the error to emerge include communication interruptions, incompatibility between QuickBooks and company file versions, etc. You may see the following error message on your computer screen:
Another error message you might see:
Error
Description
Message
80070057 the parameter is incorrect or You do not have sufficient permissions
Message
80070057 the parameter is incorrect.
Message
Error Code 80070057: There was an unexpected error reported while trying to run QuickBooks
Message
Error: “80070057: parameter is incorrect” when clicking on a QBB, QBM, QBW, ND, or TLG file from a Google Search Timeline.
In this article, we are providing you with some invaluable tips to get rid of this QuickBooks error code 80070057 issueand help you to start working. However, you can hire an expert in order to save your valuable time and efforts. Let's start with the solutions behind this error.
Resolve QuickBooks Error 80070057 When Trying to Open Your Company File
Perform the following recommended solutions to resolve the Error code 80070057 in QuickBooks desktop:
Solution 1: Verify the company file name extension
Right-click on the company file.
Then, click on Properties and then QuickBooks.
Now, check the company file extension, if it is not qbw, then change it to qbw.
Then copy and paste the company file into the new folder.
Next, rename the new folder and change the extension of the file to .qbm
To save changes click anywhere on the screen.
Now open QuickBooks Desktop to Restore the Portable.
Rename the extension to .qbb if you are not able to open QuickBooks.
Again Open QuickBooks Desktop and restore the Backup.
Rename the File extension to .qbx if it still doesn’t open.
Lastly, open QuickBooks to convert the file to an Accounting copy.
Copy the company file and paste it into another folder on the Flash Drive
Open the Windows Explorer with QuickBooks Desktop.
Right-click on the File option and select New Folder.
Then Copy (CTRL+C) the “Companyfile.QBW” from the Flash drive and Paste (CTRL + V keys) it into the new folder.
Finally, open QuickBooks Desktop and then new folder.
Solution 2: Perform a Clean Installation of QuickBooks
Perform a clean install while uninstalling and reinstalling QuickBooks. You can also uninstall QuickBooks manually from the Control Panel and then reinstall the software. You will need your license key while re-installing the QuickBooks software.
Open Control Panel then the Programs and Features.
After that find QuickBooks desktop, then go for Uninstall/Change tab.
Now, click on Uninstall and wait till QuickBooks is removed.
Then, rename the QuickBooks folder, and proceed with reinstallation of QuickBooks.
Solution 3: Convert the Files From Mac to Windows (Mac Users Only)
In case you are converting files from Mac to Windows, make use of the Back-Up option available in Windows function and convert QuickBooks from Mac to Microsoft Windows.
Solution 4: Install and Run the QuickBooks File Doctor
And then, select the Network issues, in the tool hub.
Next you need to select the QuickBooks Database Server Manager. In case QuickBooks isn’t installed on the server, you will be prompted to install it.
After that, select the Start scan option inside the database server manager, in case the company file folder is displayed. In case they aren’t displayed, then browse to the location of the company file and then select the start scan option.
The last step is to opt for the close option and you are good to go.
Solution 10: Modify Firewall and Antivirus Settings
Press Window + R key together from keyboard.
Type Control Panel in the search box and hit on enter key.
Go to the Firewall Settings.
Click the "Allow a Program option and select "QuickBooks" to include it in this list.
At last click Ok button and reboot your system.
Causes for the QuickBooks error message 80070057?
There can be the following reasons that may cause error code 8070057:
The company file can’t be read because its extension got changed.
Your system’s firewall or Internet security settings is not configured for QuickBooks desktop.
Sometimes antivirus blocks the ports between computers are also responsible for this error.
You are attempting to open a portable file while the QuickBooks application isn’t open.
Windows file extension type is wrong for the QuickBooks application.
When you are trying to open a file that is stored on a USB flash drive.
You are accessing the QuickBooks company file via the shared folder.
Your company file has some damage that is detected by QuickBooks at the time of installation.
QuickBooks not installed completely.
Due to corruption of the network data (.AND) file, you may face the error. Generally, this happens when you are trying to delete .AND files on the server or host PC.
Noticeable Signs and Symptoms of QuickBooks Error 80070057
You can check out the below signs, so as to successfully identify such errors:
You can also identify such an error if the program Windows crashes repeatedly.
If the system freezes.
Error 80070057 can also be identified if the company file collapsed suddenly.
We arrive at the conclusion.!
We hope that after following the solutions included in this article, you were able to fix the QuickBooks Error Code 80070057. If the issue persists or you need any additional assistance related to QuickBooks, you can call our 24x7 QuickBooks support and speak to our experts at 1-888-368-8874. Feel free to call us anytime as our experts are available 24/7 to help you out on all the QuickBooks related issues.
Here are the reasons and solutions of QuickBooks Error 6000 83:
QuickBooks is an invaluable tool for small and mid-sized businesses, empowering owners and accountants to efficiently manage complex accounting tasks like bookkeeping, invoicing, cash flow management, growth tracking, and tax preparation. It's designed to save both time and money, making sophisticated financial operations accessible without the need for extensive staff or external services.
However, like any robust software, QuickBooks can encounter technical glitches. One common issue users face is QuickBooks Error Code 6000, 83, a company file error that typically prevents you from accessing your crucial company file or performing essential backup and restore operations.
This guide will dive deep into QuickBooks Error 6000, 83, exploring its causes and providing detailed steps you can take to fix it. Get ready to regain seamless access to your QuickBooks company file and keep your business running smoothly.
What Is QuickBooks Error Code 6000, 83?
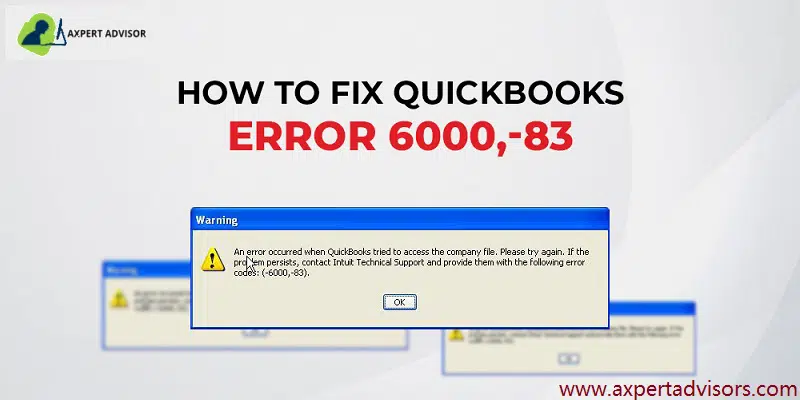
QuickBooks error code 6000 83 is one of the 6000 series company file errors that can cause great damage to your company file data. You may get such errors when trying to open, restore or perform backup operations on your company file in QuickBooks. Thus, you may face frequent crashes and application failures. When this error occurs you may see the following error messages on your computer display:
Error
Description
Warning
You do not have sufficient permissions to the specified folder. To use QuickBooks in a multi-user environment, you must have read/write access and create/delete rights to the folder where the company file is stored.
Warning
An error occurred when QuickBooks attempted to access the company file. Please try again. If the problem persists, contact Intuit technical support and provide them with the following error code: (-6000, -83)
Warning
Unable to access company file error: - 6000, -83
Error
We’re sorry, but QuickBooks can't open your company file.
Solutions to Troubleshoot QuickBooks Error Code 6000 83
There are many solutions to fix the QuickBooks error code 6000, -83. Before taking any steps first we need to know the actual reasons behind the error. When we know the reasons of this error then we should take suitable steps to fix the issue. Here we are giving some solution on the basis of the condition. You can follow to fix them.
Condition 1: Open the QuickBooks company file stored on a Windows Server
The QuickBooks File Doctor tool will scan the company file problems and fix it.
Now, restart the computer.
Solution 2: Turn off hosting on all Workstations that access the file over the Network
In case you use QuickBooks Desktop on multiple systems, configure just one to host the company file. Here are the steps that you can follow to turn off hosting on computers.
Open QuickBooks Desktop and move to File menu.
Here position your cursor over the Utilities tab.
Then select Stop Multi-User Access Hosting option.
If you see the “Host Multi-User Access” option and Stop Hosting Multi-User Access is not listed, do not select “Host Multi-User Access”.
Configure your system Firewall and other security software settings
Important: Intuit does not provide any support service for firewall related issues.
You need to configure the firewall and internet security settings for QuickBooks and also network access to view the exceptions needed.
Perform the instructions from the firewall maker's website to configure the firewall to allow internet access to QuickBooks files on the entire system.
Verify the permissions to access the QB company file
For confirming that permissions are arranged correctly, you need to see the setup folder & file permissions to share the company files.
In case you want to place permissions, then move to the set Windows access permissions to share the company files.
Furthermore, head to QuickBooks database server manager screen and hit a click on Add folder.
Search the folders that have QuickBooks company files.
After the QuickBooks folders are added, then select Start Scan tab.
Now, under the QuickBooks company files, you need to Check the files.
Lastly, browse to the files and folder that have the company files. Ensure that the qbw and .nd file was created or built for each of the company file.
Check the hosting on the systems
You need to open the QuickBooks application and move to the file and select Utilities tab.
From the list:
If the Host multi-user access option is present, then it indicates that the system is not hosting the company file.
Else, Stop hosting multi-user access should be selected.
Open the company file from a different location
At first, you need to host the system to open the company file.
Move to the system where the company file is saved.
If the only system that stores or installed the server is hosting the system, then you should move the company file to some other location.
Now open the software and also the company file that is facing the issue.
In case you are capable of opening the company file, then check the company file.
Else, move to the other step.
If you are getting instructions from the software to rebuild the company file, then do the same.
Now copy the QuickBooks file to another location.
At first, access the folder having the company file.
After that, right-click on File name and hit on Copy tab.
Now right-click on the Empty area and Paste tab.
Turn on QuickBooks and open the company file on the desktop.
In case the QuickBooks company file opens, then copy the file back to its original location.
Make sure that the original company file name is renamed before copying the file that is freshly opened from the system.
Solution 4: Edit the Windows Hosts File
To complete the following steps, you must have administrator access to the server and any computers connected to the server.
Editing Windows host file
Initially, you need to close QuickBooks on both the server computer and the workstation.
On the server computer open the Windows Start menu and select Computer.
Then move to the following location:
C:\Windows\System32\Drivers\Etc
C:\Windows\System64\Drivers\Etc
Furthermore, you need to double click on Host file.
Now choose Notepad.
In the next step, enter the computer name after the IP address use the Tab key to give a space.
Enter the workstation's IP and computer name on the server computer.
On the workstation enter the IP and computer name of the server computer.
Click the File menu in Notepad and select Save.
Type “Hosts” (including the quotation marks) as the file name.
Select the Desktop as the location to save the file.
After saving the file right-click on it and select Copy.
Browse to the file location you used in step 2. You can go to C:\Windows\System32\Drivers\Etc or C:\Windows\Syswow64\Drivers\Etc.
Find the hosts file, right-click it, and select Rename.
Rename the hosts file to “hosts old” and select Continue.
In last, press the Ctrl + V keys to paste the copied file, then select Continue.
Get the IP address and computer name of the server and workstation
Press Window and R button key together to open the run box.
Now enter cmd on the run box.
Type ipconfig /all at the command prompt and press Enter key.
Here on the black screen is your server name and IP address note it down.
Repeat these same steps for other workstations.
Condition 2: While Restoring your company file
Solution 1: Check if the file name and the file path are leading to the error
QuickBooks keeps every file name and path at the time we try to restoring the backups. You need to make sure that the file name should not contain any special characters in the file and the path.
Not acceptable: Business\Lina\Lina’s Documents\My Business $.Business – The quotation mark (‘) and the dollar sign ($) are special characters. The Lina’s Documents folder and the My Business $.qbw file should both rename.
Solution 2: Review your Backup file name
Click on Start menu and search file explorer and hit to open it.
Find the folder that contains your backup company file with the .qbb extension.
To rename your company file right-click on the company file name and then select Rename.
Next, restore your company file.
Solution 3: Restore from a Backup
Open QuickBooks and go to the file menu.
Now select Open or restore company and then restore a backup copy.
Click Next and select the Local Backup option.
Browse to the company file backup on your hard drive and click Next.
Follow the prompts to complete the restore process.
Solution 4: Repair QuickBooks desktop
In the first step, you need to go to Control panel and open the Programs and Features option.
After that click on Uninstall a program tab.
Moving ahead, you need to select QuickBooks desktop from the list.
And opt for Uninstall / change.
In next step you need to click on continue > Next > Repair > Next > Finish.
Run QuickBooks. Try to open the company file.
Condition 3: While opening the QuickBooks Company file stored on a Linux server
Important Tip: The below given solutions should be performed by the system administrator with having good knowledge of using the Linux operating system. Additionally, you need to have complete insight of network operations and permission to install properly while configuring the QuickBooks enterprise solution Linux Database Server Manager.
Then, you must configure the database server manager and the directory in the Initord.conf file.
Finally, you must restart QuickBooks enterprise on your host computer.
Solution 2: Configure your host file
You can use the IP address and Linux server name, in order to Edit the host file from the workstation.
Open the start menu on any Network-connected workstation.
Type ‘CMD’ in the search box to open Command Prompt.
Type ‘ping [name of your Linux server]’ and press Enter.
Note the server name and IP address.
Ensure correctness on all workstations, starting with the one displaying error 6000,-83.
Close QuickBooks on all computers connected to the network.
Press Windows + E keys together and open Windows File Explorer.
Navigate to C:\Windows\System32\drivers\etc\hosts.
Right-click on hosts, select Open with and select Notepad.
Finally add the Linux server IP address, press Tab, and add the server name.
Save the file and close Notepad.
Open QuickBooks desktop and access your company file.
Condition 4: When your are creating a backup of the company file in new folder
If QuickBooks Error message 6000, -83occurred while creating a backup of the company file, you can perform the following troubleshooting steps.
Important Tip: Before performing the steps, ensure that if you have stored the company file on a server, then you need to move it to the local hard drive first. Once the error fix done, move back the company file to the server.
At first, go to File menu and select close QuickBooks desktop.
Next, click on Windows Start menu.
Then type File Explorer into the search bar and click to open it.
Select This PC from the navigation bar and open C: drive.
And further, create a new folder and rename it as “QB Test Folder”.
You can scheduled backup as automatically uploaded or you can create it manually every time. (It is recommended schedule automated backups).
Now go to File menu and click on switch to Single user mode.
Again click on File menu and move the cursor to the Backup Company option.
After that click on Create Local Backup and Next.
Simply click on Browse on the Local Backup section and select the location to save the backup for the company file.
Optionally, you can also set the number of backups you want to keep.
You can schedule backup reminders in the online and local backup sections.
Now click on Full verification and let the test backup run. Then confirm with OK.
Next, click on Select it now and schedule future backups and then click on Next. If you don't want to upload a backup right now, you can alternatively select only schedule future backups.
Select the “Automatically save a backup copy when I close my company file” checkbox and choose the number.
What are the causes behind the QuickBooks error code 6000, 83?
There are several causes which can trigger the QuickBooks error code 6000, 83. Here we discuss some of the common causes after that we discuss the solution to fix this error.
If your company file is damaged it can trigger the error 6000, 83.
There might be missing installation files from the QuickBooks installation directory.
Windows security software prevents QuickBooks from accessing the company file stored on the server.
If your company files have the incorrect file extension like .qbw.adr or .qbm.
The Windows user account has not been granted sufficient permissions to access the server or the QuickBooks database service.
There may be multiple computers in the network hosting company files are also trigger this error.
If you update the company file stored on the server with latest version then it might be the reasons of this error.
Due to network connectivity issues, the client’s workstation cannot connect with the server hosting the company file.
There are Insufficient permissions for your network server, Windows user, or QBDataServiceUserXX
This error could be due to an incompatible version of QuickBooks Desktop.
You are using the wrong path to set up QuickBooks desktop on the client's computer.
The company file is being hosted by more than one workstation.
Access to the company file is restricted by the server.
Your antivirus is restricting access to QBDataServiceUser.
More than one computer trying to host the company file.
The chances are high that you have set up a different language on Windows other than English.
Users who use a “non-US” or “non-Canadian” version of Windows may also experience this issue on their PC.
On Linux servers:
If there is no qbdir.dat file exists or if qbmonitor function is not monitoring the QuickBooks company file in the directory.
Another trigger can be if the system is unable to ping the server name.
Common Symptoms of QuickBooks error 6000, -83
The error code appears on the screen and the program window crashes.
Windows respond slow to the keyboard inputs.
The system freezes repeatedly.
Conclusion!
In this segment we learnt about the how to fix the QuickBooks error code 6000 83 with the help of the solutions entailed in this article. We also discussed above the major causes of this error and solution to fix it. However, if you have any doubts and you need any technical guidance then you contact our QuickBooks enterprise error support team at 1-888-368-8874. Our experts are available 24 x 7 to provide you with complete support.
A Quick Guide to Install QuickBooks Desktop Like a Pro and use the same to solve your accounting challenges
Manually keeping and managing accounting records is a very typical task, no doubt the introduction of QuickBooks software has changed this traditional approach. This software has made it possible to maintain financial records easily for millions of small and large businesses with its intuitive UI and extensive feature set. If you are one among the innumerable buyers of this impeccable software, then you have made a commendable decision by choosing it, as your bookkeeping and accounting partner.
You must now be looking for convenient ways to install QuickBooks Desktop software. Before we take a big leap to download and install QuickBooks software, it becomes imperative that you check if your system is compatible with the software. Having reassured that your PC meets the requirements, the rest of the process is a cakewalk if you adhere to this article. If you have any questions about the installation or other problems, feel free to consult with our support team. Our cordial QuickBooks experts will be more than happy to assist you.
Convenient Steps to Download the QuickBooks Desktop Software
The process to downloadQuickBooks Desktop requires you to visit the official website of Intuit and download the preferred version. The entire procedure has been made quite easy for your convenience. Just follow the steps below:
While the downloading ensues, a dialog box will apper on the screen. Here, you are required to fill in 3 options:
Select the Country.
Choose the Product version of the QuickBooks Desktop.
Opt for the version of your preferred choice, that is compatible with your system.
Now, click on the Search button.
The download page will show up, click the download buttion.
Once the file is ready for download, save it to a convenient location in your system.
The process is quite simple but the necessary prerequisite is that you need to have a stable internet connection.
Steps to Install QuickBooks Desktop on Your System
This section shall explain the process in the form of uncomplicated steps.
The first step is to access the folder in which you downloaded the QuickBooks.exe file in your system.
In the second step, start the installation process by double-clicking.
If you are using a CDfor installing the QuickBooks software, then there is no need to go through the download process. Just double click the .exe file after moving to the CD drive folder to initiate the installation process.
While proceeding ahead with the process, go through the Terms and conditions, and provide consent to the same, followed by clicking on Next.
The next step is to enter the License and Product keys that you got at the time of the product purchase.
Subsequently, you are required to hit on Next and let the installation proceed.
In the subsequent window, you shall be prompted to choose from one of the two installation types. The following section throws some light on these installation types.
Deciding on the type of QuickBooks desktop installation
You will get two options when you install QuickBooks Desktop, namely: ''Express'' or ''Custom and network.''
Express Install:
This type of installation is recommended in specific scenarios such as first-time users, reinstalling QuickBooks, using QuickBooks on a single system, etc.
Steps to Install QuickBooks using the Express Install:
The steps involved in the Express Install type are as follows:
In the Intuit QuickBooks installer window, you need to opt for the Express option and then click on the Next tab.
Follow it up by choosing the Install option.
Finally, proceed ahead with the Open QuickBooks option to start with.
Custom and network install:
This type of install is recommended when installing QuickBooks desktop somewhere other than the default location, or also when you host the company files on a server, or for setting up a multi-user network.
Steps to install QuickBooks Desktop using thecustom or network Install:
Choose the Custom and network options and click on the Next tab.
In the window that shows up next, you are required to make a choice from the following:
I will be using QuickBooks on this computer.
I will be using QuickBooks on this computer, and I'll be storing our company file here so it can be shared over our network.
I wont be using QuickBooks on this computer. Also, I will be storing our company file on this computer so it can be shared over a network.
Choose one of the three options as per your requirements and hit on Next to go ahead.
Now, opt for the Change the install location option.
Hit on the Browse option to decide where to put the QuickBooks folder.
The majority of the users put it in the Programs folder.
Then, tap on the Next tab to start the Installation process.
After the installation is complete, tap on the Open QuickBooks option.
After going through and implementing all the above-depicted directions, you should have successfully installed the QuickBooks software. The next step requires you to activate the QuickBooks Desktop software.
Steps to Activate QuickBooks Desktop for Windows
The final step in the process requires you to activate the QuickBooks Desktop software. Before proceeding ahead, take a note that you can check the activation status of your QuickBooks by hitting on the F2 key, and then checking the status. Obviously, as a new QuickBooks user, your status must be showing up as Not Activated. Now, follow the procedure below:
First, open the QuickBooks Desktop software.
Next, click on the Help tab.
Now, choose the Activate QuickBooks Desktop option.
Carefully follow to the subsequent instructions that apper on the screen. The QuickBooks Desktop product should be activated.
You can now reopen QuickBooks and verify the activation status by hitting the F2 key .
It should be showing Activated status now.
That's all. You are now ready to use the QuickBooks software and let it handle your accounting and bookkeeping operations.
Essential points to note before you proceed
Before going ahead with the download and installation process for QuickBooks Desktop software, it is essential that you keep a note of the following:
You can install the QuickBooks Desktop software from the original CD or through the official Intuit website.
The later option requires you to download the .exe file from the official website of Intuit.
Close all the background programs before initiating the process.
After concluding the installation process, don't forget to activate the QuickBooks Desktop software.
Make sure that you use a stable internet connection while downloading the QuickBooks software.
Winding up!
We hope that you found this article helpful to download and install QuickBooks desktop software. Just be a little patient with this innovative software, learn to use its features, and it will turn out to be a game changer in your business.
If you have any more queries or need any assistance regarding QuickBooks software, you can contact us and speak to our QuickBooks enterprise support experts. Our helpline (1-888-368-8874) is available 24/7 and we have successfully catered to clients across the globe. So, without wasting another second, give us a call and reach out to our certified professionals.
This piece of writing shall apprise you of the convenient methods to move Quickbooks Desktop file to online:
Do you want to migrate your QuickBooks desktop file to QuickBooks online? We are here with a guide to walk you through the process to successfully move/export your company file to QuickBooks online. It is very much important to check whether you should migrate to QuickBooks online or not. Both online and desktop are powerful versions, but it all depends on your requirements. Large companies generally have complex company file, and therefore they aren’t a good candidate for migration.
If you are a small or medium-sized company and using QuickBooks Desktop, Premier, Pro, etc. then you can simply migrate to QuickBooks online. Here is what all you would have to do!
Steps to Move/Migrate Your QuickBooks Desktop File to QuickBooks Online
Checkout these updated steps to move your QuickBooks desktop company file to Online:
Step 1: Prepare for Migration
Are you all set to migrate? Have you made the necessary preparations? Before you start with the actual migration, there are certain steps that you should follow:
(a) Backup your company file
If you are currently operating in multi-user mode, navigate to the File menu and select the Switch to single user mode option.
Next, go to File menu and click on Back up Company and choose Make a Local Backup.
Click on local backup and hit Next.
Now click on browse option and select location where you want to save the backup company file.
Set the number of backups that you want to keep.
A test would run to ensure that your backup file is appropriate.
Go for the Yes option to bring them over and specify the starting date.
Pick No option, if you want to set up the new items later in QuickBooks online.
After conversion is complete, you will get an email, where you have to click on complete your setup tab.
Sign in to your QuickBooks online account.
Choose the company file that you want to open.
This will open the QuickBooks online dashboard.
QuickBooks desktop enterprise
Log in as admin of the company file you want to import.
Press the Ctrl + 1 keys to access the product information window.
Now, press the Ctrl + B + Q keys together and hit OK button.
Opt for start your export on the export window.
Sign in as admin to QuickBooks online company.
Just in case you track inventory in QuickBooks, then perform the below steps:
Choose the Yes tab to bring them over and specify the as of date.
Choose No if you want to set up new items later in QuickBooks online.
Go for the choose online company drop-down and pick the QuickBooks online company to replace.
Select the continue tab and hit enter on agree tab and choose replace.
At last press yes, go ahead and replace the data and click on replace.
Step 3: Move your Lists
In above steps you have moved your lists from QuickBooks, so as to import them in QuickBooks online. You will have to perform the necessary steps for chart of accounts, products and services, customer and supplier individually.
Steps to set up inventory
At first, setup inventory by heading to the settings menu.
Then opt for account and settings.
Select the sales option there.
Further, go for edit tab in the product and services section.
Turn on the show product/service column on sales forms.
Turn on both track quantity and price/rate and track inventory quantity on hand.
Choose the save tab and click on done.
Step 4: Connect to QuickBooks Online and Import Your Data
Log in to QuickBooks Online by entering your credentials, agreeing to the terms of service before selecting the sign-in option.
Just in case you have inventory in your file and are trying to import from QuickBooks Desktop 2016 or later, you might see a different screen; otherwise, you can skip to the next step.
Want to import inventory? If Yes, then you will have the Plus or Advanced Edition of QuickBooks online. Note that Simple Start and Essentials don't have the inventory tracking feature. However, if you have an extensive inventory, then in such a scenario, you can track the product item quantities on hand in Plus or Advanced.
3. Now you are required to pick the QuickBooks Online company that you wish to import your data into, or create a new one.
Note : Make sure, if you have already created a QuickBooks Online company, then you need to avoid creating a new company. You just have to do is select one you created from the drop-down.
4. At last go for the ok, got it option.
You would be getting an email confirmation, after the import process completes. Whereas, this could also take up to 24 hours.
Step 5: Do it Before Using QuickBooks Online
Once you are done with the above steps, there are a few tasks that you would have to perform before starting with the QuickBooks online software. Before you make your mind for any changes to the data or enter the new transactions, it is recommended to complete the following steps. Users are suggested to go through the below checklist after migrating, so as to ensure that all of the data transferred as expected, and also for importing information that wasn't included in the migration.
1. Start off with checking the data by comparing the reports: You are supposed to compare the below reports in QuickBooks Online and in QuickBooks Desktop, so as to ensure that the data was transferred properly.
2. Checking the company settings: Even though you are able to move the accounting data into QuickBooks online, the information like the company name, address, and email related information isn't carried along. It is recommended to enter the information manually.
3. Configuring the sales tax settings is the next step: It is very much essential for you to set up QuickBooks Online with the appropriate CRA business number and filing frequency before starting with its use.
4. Connecting bank and credit card accounts: Most important point to be noted here is that the bank and credit card information isn't transferred when migrating from QuickBooks Desktop to QuickBooks Online.
5. Cleaning up bank reconciliations: It should be noted that it is assumed that no bank transactions have been reconciled, as you haven't yet performed a bank reconciliation in QuickBooks Online.
You are supposed to convey QuickBooks to mark all transactions up to the conversion date as reconciled, so it only considers the future transactions for reconciliation.
6. Linking payments and credits for opening invoices: You might come across the names having zero balances in the A/R and A/P aging reports, this is due to the transactions downloaded into QuickBooks Online didn't link invoices with the respective payments. You can link credits and payments for opening invoices with much ease, by simply turning on the automatically apply credits preference.
7. Reviewing the account's detail types: Once the conversion takes place, the software will keep the sub account hierarchy. Whereas, it will also make use of an additional level of account typing which can be named as detail type. This basically permits to be more specific with the account organization. The process of conversion will assign detail types of accounts where the detail is obvious. For the accounts, where you are unsure of the detail type, the conversion process will assign them a generic detail type, which can be like Other Miscellaneous income. You can correct this later on.
8. Carrying out the payroll setup: However the transactions and payroll accounts are converted to balance the books, but the details behind the transactions which includes the payroll item breakdown or employee year-to-date numbers, aren't a part of it. Moreover, the liability refunds, adjustment transactions nd opening balance transactions that hamper the accounts, are converted to journal entries
9. Linking the payments account: In this particular step, you would have to note that you won't be able to transfer the existing payments to QuickBooks Online, rather you would have to create a new one.
10. Adding users: It is very much essential to keep in mind that the users you wish to add in QuickBooks Online, should have proper access. Moreover, you can also view the current users by opting for the settings gear icon and the manager users tab respectively.
11. Inviting an accountant: You can call upon up to two of the accounts, so as to work along with you in the QuickBooks Online company.
Conclusion
After reading this blog you should be able to move your data file from QuickBooks Desktop to QuickBooks Online. As always, if you have any concerns, please connect our QuickBooks Support Team today! They work round the clock to provide the best possible QuickBooks Desktop Support Services. So, do not hesitate in calling us anytime and seeking for assistance! We will be more happy to help you.
? 1")
? 2")
? 3")
? 4")
? 5")
? 6")
? 7")
? 8")
? 9")
? 10")
? 11")
? 12")
? 13")
? 15")
? 16")
? 17")
? 18")


? 34")
? 37")
? 38")
? 39")
? 42")
? 43")
? 46")
? 47")
? 48")
? 49")
? 50")
? 51")