Ended up with the QuickBooks desktop error 6177 and don’t know what to do? If that is the case, then reading this article can be of great assistance for you. This error can be seen with an error message that states “QuickBooks is attempting to open this company file”.
This type of error indicates that the software is unable to use the path to the company file. Moreover, it is also seen when a user uses QuickBooks in multi-user mode. At the time when the user tries to access the company file, the error pops up on the screen successfully.
To know more about the process of how to fix QuickBooks error message 6177, 0, keep reading this article ahead is suggested. Or you can also contact our team professionals and let our team will ensure to provide you with immediate tech assistance.
What leads to QuickBooks error code 6177?
One can end up in the QuickBooks error message 6177 due to the following reasons:
One of the major reasons can be if the system files mistakenly deleted that are related to QuickBooks.
Another reason can be if there is any virus or malware attack.
If the QuickBooks desktop doesn’t use the path to open the company file.
One can end up with this issue if there is an incomplete installation or corrupted download.
Viable Solutions to Resolve the QuickBooks Error Code 6177
The user can try to fix the QuickBooks company file error 6177, 0 by performing the solutions below:
1stSolution: Update the file location
In case the user keeps the company file on a server, an external hard drive, or in the cloud, the user should change its location. Just perform the steps below to move it to the local drive back again to where it was.
Step 1: Moving the company file
You are required to perform the following steps on the server system. In case the user doesn’t have the access to it, then it’s fine. You can also follow the steps on one of the workstations.
Initially, open the Windows start menu on either the Server system or workstation.
Afterward, type in File Explorer into the Search and open File Explorer.
The next step is to Search for and open the QuickBooks folder. Tap on the F2 key.
Find the company file that ends with .qbw extension.
You should now write down the Drive name and location. The user will put the file back here later on.
The last step is to Move the company file from the folder to C: drive and move the file, not the whole folder.
Step 2: Make a portable company file and restore it to the server
The initial step is to open the QuickBooks desktop on the system to which the company file is moved.
And then, choose Open or Restore an existing company.
The next step is to Browse for and open the company file you moved to C: drive.
Create a Portable company file. This will create a portable version of the company file that also resets the file location data.
Now, choose the File menu and opt to Quit QuickBooks.
After that reopen QuickBooks.
And move to the File menu and choose Open or restore company.
The next step is to hit on the Restore a portable file and opt for the Next tab.
After that, find and select the Portable company file you created.
And also choose the Open and Next tabs.
To restore location, opt for the Drive originally moved the company file from.
Hit on Save. This will put the company file back on the network.
Choose the File menu and opt for Quit QuickBooks desktop.
2ndSolution: Update the QuickBooks desktop
In case the user hasn’t updated the QuickBooks desktop yet, then it is suggested to update QuickBooks immediately.
3rdSolution: Reopen the QuickBookssoftware
Initially, launch the QuickBooks desktop.
After that opt for Open or restore an existing company instead of choosing a Company from the list.
Next step to pick the Open a company file option and then hit on the Next tab.
Now open the Portable company file (QBM) that you have moved to the new folder.
4th Solution: Reset multi-user hosting
In the beginning, open QuickBooks on your server computer.
Afterward, choose the File menu and head to the Utilities option.
Next, choose Stop Hosting Multi-User Access and then hit on Yes to confirm it.
Then, choose the File menu and opt for the Quit QuickBooks option.
Thereafter, open your QuickBooks again, (Note: It should be noted that you do not need to open your company file)
Afterward, hit on the File menu and proceed to the Utilities option.
The next step is hit on the Host Multi-User Access option and Yes to confirm.
Lastly, hit on the File menu and then choose Quit QuickBooks option.
5thSolution: Manually fixing the file path
Step 1: Process to Locate the .ND file
The first step is to open the File Explorer on the server system and look for the QuickBooks folder.(File Explorer can be accessed by tapping the Win + E keys together).
After that, Find the file with the Company name and .ND at the end.
Also, right-click the '.ND' file and choose the Delete tab.
After that, open the Windows Start menu on the server system.
Later on, type in 'Database' into the Search and open QuickBooks database server manager.
Choose the QuickBooks folder holding the company file.
Afterward, hit on the Start scan and also opt for the Close tab.
Set the folder permission to share the company files.
Summing Up!
By now, you might be able to fix the QuickBooks error 6177, 0 successfully. However, if the error persists for some reason, then in that case it is highly recommended to reach out to our Axpert Advisors team professionals at 1-888-368-8874, and let them rectify the issue on your behalf.
Our experts have years of expertise and have offered indomitable support services to clients all around the globe. To complement the foregoing lines, we can be reached 24/7.
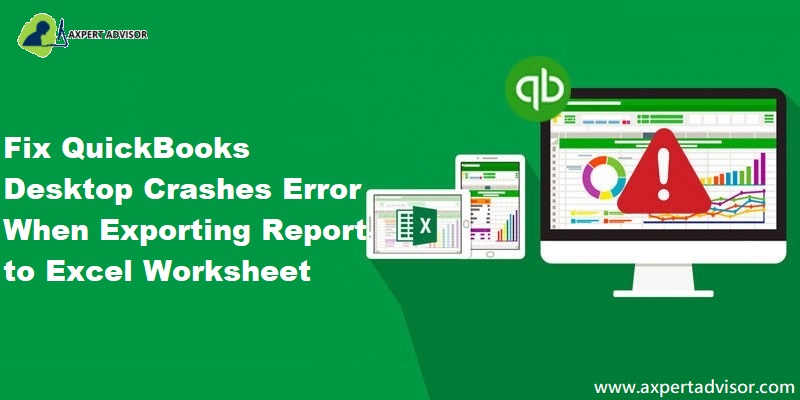
These 4 solutions will help you fix QuickBooks Desktop Crashing Error when Exporting Report to Excel Worksheet
QuickBooks is an innovative accounting and bookkeeping software. Its developers keep introducing new features and updates to keep it free from technical glitches and sluggishness. The users, however, do find the software crashing in some instances. A common instance is when reports are being exported from QuickBooks to excel. QuickBooks accounting software may just crash or stop responding. There may be multiple reasons causing the QuickBooks desktop crashing error, which may hamper the software’s performance and hamper the users’ productivity.
Some of the instances when you may receive this error are:
When you try to send an email or invoice
When you open or update the QuickBooks company file
QuickBooks Desktop Crashes When Exporting To Excel - Plausible Causes
The older versions of Microsoft Excel support 256 columns and if your reports have more columns – the export will not be successful and QuickBooks may crash. Below are some of the most common reasons behind QuickBooks Desktop Working Error:
The QuickBooks version you are using isn’t compatible with Microsoft Excel.
The installation of either QuickBooks or MS Office is corrupt or damaged.
Your data or report may be problematic and thus you are facing trouble in exporting to Excel.
File registry is not functioning appropriately.
Solutions Steps for Fixing QuickBooks Freezes During Exporting to Microsoft Excel
You can fix QuickBooks Desktop crashes when exporting report to Excel worksheet Error by looking into its causes. Following are some steps to fix this error:
Solution 1: Check if MS Office is Compatible With the QuickBooks Version you are Using
If QuickBooks desktop software is crashing because of the incompatible application and MS Office, you should fix the compatibility issue. For example, if you are using QuickBooks 2016 (or a later version), check the system requirements to avoid any compatibility issues later. Make sure that you have Windows 10 installed with the 64-bit edition. If you receive the QuickBooks crash error again, move on to the next solution.
Solution 2: Update QuickBooks to the Latest Version
Navigate through the main menu and press “Update QuickBooks
Allow the update process to finish
Make sure that your Internet connection is stable before you start the update process.
If the issue persists, try the next solution.
Solution 3: Repair QuickBooks Desktop
Keep the QuickBooks Desktop Installation CD closed before you start repairing QuickBooks Desktop. You must also back up your company file so that you don’t lose your important data while solving the QuickBooks crash error. Once you are prepared, go to Programs & Features in QuickBooks and uninstall any unwanted program.
Opt for QuickBooks and tap on the Uninstall/Change option. Follow the instructions you receive on the screen until the repair process is over. If QuickBooks Crashes again while exporting to excel, even after you have followed all the above-mentioned solutions, use Verify and Rebuild Data Utility.
Solution 4: Use Of Verify & Rebuild Data Utility
This QuickBooks utility helps you to determine if any data damage exists in your QuickBooks company file. Rebuild Data helps you fix many of the common data damages in QB and carry on with your work. After using the Rebuild Data tool, you should run the Verify Data to ensure that all the damages have been repaired.
While you may have to perform all the solutions mentioned in this post to fix QuickBooks desktop crashes error, you must also ensure that the QuickBooks software you are using is updated to the latest version. Also, close all the applications before you instigate fixing this problem.
Summing Up!
This was all about the QuickBooks Desktop crashing issue and the various avenues of rectifying the issue. We hope that you were able to get rid of QuickBooks crashes while exporting reports to excel using the solutions provided in this article. In case the issue persists even after performing the troubleshooting steps herein, you may contact our 24x7 QuickBooks error technical support Team via our helpline i.e., 1-888-368-8874.
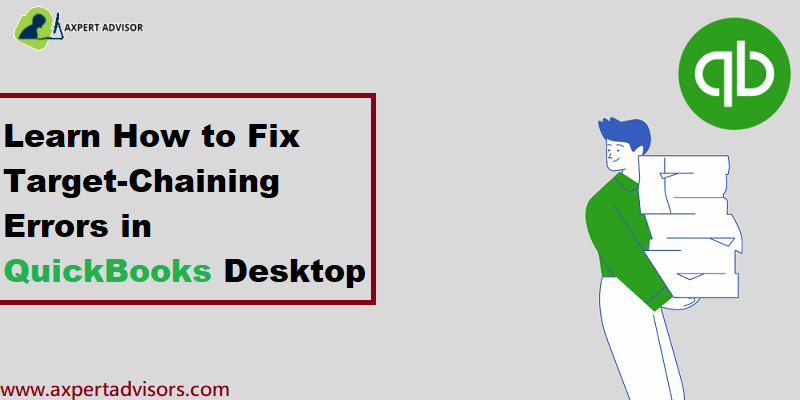
Learn how to fix target chaining error when running QuickBooks rebuild utility:
No matter how many new updates the QuickBooks software gets equipped with, different types of assorted error codes keep showing up, and annoying users. Did you encounter a peculiar target chaining error when running QuickBooks rebuild utility? Well, after rebuilding the company file in QuickBooks desktop enterprise, the QBWIN.log file displays the target chaining errors. These errors come up with an error message stating:
Error
Description
Verify.c (4620):
CHECKPOINT: 1104: Thu Jul 14 15:36:39 Target Chaining: Target ###### in transaction ######, points to 'next' target ###### which is NOT in that transaction
Verify.c (4747) :
CHECKPOINT: 3544: Fri Jul 01 11:25:45 Target Chaining: Next target pointer error in transaction #####
The user might also get an unrecoverable error message in a couple of instances. At the time when the company file contains these chaining errors, your bills, and payments get unlinked, and also the corresponding payments do not have names. The user might also see Version 2.0 in the Entered/last modified column, instead of the actual date of affected transactions, when running the Audit trail or the transaction detail reports.
To know more about the target chaining errors in QuickBooks company file while running rebuild utility, make sure to read this article carefully till the end. Or you can also get in touch with our technical support team, our experts and certified accounting professionals will be always there to assist you.
What factors cause the target chaining errors in QuickBooks?
There are several factors that may embolden this error code. These include the following:
Insufficient system RAM
The Verify & Rebuild utility malfunctions.
Damage caused to the Company file.
Using a poor internet connection.
Using an old data file.
Easy Approaches to Fix Target Chaining Error in QuickBooks Company File
Before you start, note that this error occurs due to an insufficient RAM allocation during the verify/rebuild. In case the company file is more than 2GB, then get in touch with our team of professionals.
Condition: In case the company file is less than 2GB
At first, the user needs to run Rebuild.
Important note:
The user need not to run the Rebuild over the network. The user needs to ensure that he/she is running the Rebuild from the location where the company file is stored. He/she can also copy the company file to another location to run the rebuild locally.
The user should restart the Workstation/server before rebuilding. Also, ensure to free up the memory.
Also, run the Rebuild where you have the most RAM available.
The user needs to navigate to the QuickBooks file menu and then choose the Utilities tab. Afterward, opt for the Rebuild data
Now, choose OK tab and then wait for rebuild to finish.
The user should note that, in certain cases, the view results screen immediately following the rebuild will show incorrect results in the errors we couldn’t fix section.
Afterward, Run verify to ensure there are no additional errors.
After that, the user needs to move to the QuickBooks file menu and also choose Utilities tab and also opt for Verify data.
And then, choose OK tab and also wait for the Verify to finish.
In case these steps didn’t work in fixing the issue, then it is recommended to restore a backup created prior to the rebuild that might turn into the target chaining error. If you are doubtful of the backup to restore, then try opening the company file and press F2 to bring up the product information screen. The user needs to check the RB date, in the versions used on file section.
Now, on the restored company file:
The user needs to hit on the F2 key or Ctrl+1 on their keyboard. And on the Product information page, the user needs to ensure that there is no RB date or the RB date is not close to the day when the issue arise.
Also, run the Rebuild utility, and choose Verify. In case you failed, then the user can continue to have issues with the Bills/Invoices and payments or if case you identify Version 2.0 in transaction detail reports, and check for another backup.
To Wrap it Up!
Once you are done with the steps above, the target chaining error while running QuickBooks rebuild utility might not trouble you. In case it does, make sure to get in touch with some professionals, who can help you in resolving the error with much ease. Make a call at our toll-free QuickBooks customer support number i.e., 1-888-368-8874, and leave the rest on our team of certified QuickBooks professionals.
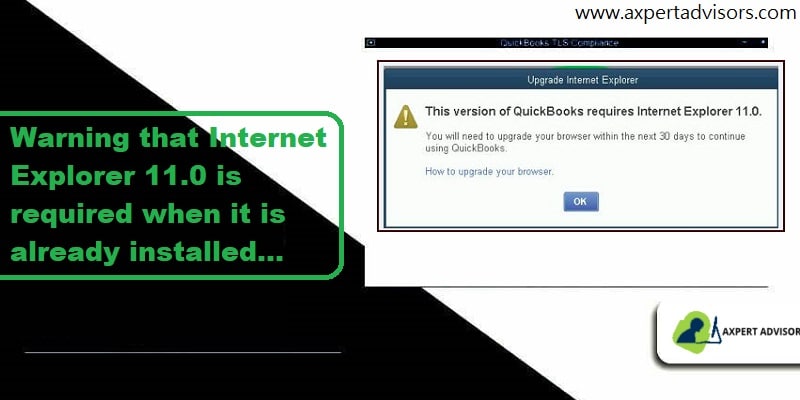
QuickBooks Desktop is exemplary and unmatched accounting software that has attested to its usefulness by delivering innumerable accounting services to small and medium-sized businesses. However, what cannot be overlooked is the spate of ever-evolving and recurring technical snags encountered while working with the QuickBooks software. One such error in QuickBooks shows up when the Internet Explorer is required when it is already installed on your system, which usually requires you to upgrade the Internet Explorer browser.
Such error can be extremely annoying, leading to unwelcome delays in the submission of work and forcing you to wander on the net in search of troubleshooting avenues to fix the same. However, we are here to assist you in the most convenient way. This blog shall make sure that this error gets resolved in the next couple of minutes. Make sure to read it carefully till the very end.
If you feel that the contents require technical proficiency and you cannot implement them on your own, then reach out to our technical support team through the helpline i.e., 1-888-368-8874. As an alternative, you can also reach out to our team through the live chat option available on our website. Our team will perform the troubleshooting on your behalf. So, without wasting any time, let us march forward.
Internet Explorer is Required Warning: Causes Behind the Warning
Some conspicuous causes may trigger the error. These include:
Internet Explorer browser is not updated to the latest version.
Damaged/Corrupted essential QuickBooks files
Poor internet connectivity
Effective Steps to Fix Internet Explorer is Required When it is Already Installed Warning in QuickBooks
This section entails all the practical troubleshooting steps arranged sequentially. As a necessary prerequisite, you must follow all the steps in the same sequence.
Step 1: Check the current version of Internet Explorer on your computer
In the inception, you need to make sure that you have the latest version of the browser installed on your system. If not, then it is the principal cause behind the error and requires you to upgrade the browser to its latest version. Follow the steps below to check your version of the Internet Explorer browser:
First, launch the Internet Explorer browser.
Subsequently, hit on the Gear icon. As an easy alternative, you can hit the Alt + X keys together on the keyboard. This shall open a drop-down list.
Choose the About Internet Explorer option.
From the dialog box that shows up on the screen, check the version of the browser. If you have a version older than Internet Explorer 11, then update the browser. To let the browser update automatically in the future, hit on the Install new versions automatically checkbox.
However, if you already have the latest version (Internet Explorer 11), then follow the subsequent step.
Step 2: Edit the qbw.ini file using Notepad
Close the Internet Explorer browser.
Afterward, proceed to the destination ‘C:\ProgramData\Intuit\QuickBooks.’
Herein, locate the qbw.ini file and hit a right-click on it.
Choose the Open With option.
From the list of programs to open, hit a click on Notepad and subsequently choose OK.
Upon opening the file through Notepad, you are required to scroll down and search for the [Misc] section.
Once located, you need to delete the following line: IEVersionOverride=600
After deleting the portion, hit on the File menu, followed by choosing the Save option.
All the changes are thus saved. Follow it up by closing the Notepad.
Step 3: Make use of the QuickBooks Tool Hub
The QuickBooks Tool Hub is a commendable tool that has far-reaching benefits when it comes to rectifying an innumerable number of technical intricacies and error codes in the QuickBooks software. It can also assist in fixing the Internet Explorer required when it is already installed warning. Follow the steps below to use this exceptional tool:
Upon downloading the file, save it to a desirable location.
Double-click on the QuickBooksToolHub.exe file to initiate the installation process.
Follow the on-screen instructions and conclude the process by accepting the Terms and Conditions.
Once the installation is finished, launch the tool by double-clicking on its Desktop icon.
Head to the Program Problems tab.
Follow it up by choosing the Quick Fix my Program option.
Let the scan initiate and check for any issues related to the QuickBooks software. The process may take a while.
When completed, restart the computer and open QuickBooks Desktop.
Verify if the error got fixed.
Concluding lines..!
Although Internet Explorer 11.0 is required when it is already installed error doesn’t involve any technical proficiency to get it wiped off from your system. However, there may still be an instance wherein you may feel a need for technical assistance. Reach out to our QuickBooks technical support team for indomitable customer support.
Our team of certified experts endeavors to make the QuickBooks software error-free. So, reach out to us through the helpline, 1-888-368-8874. We offer 24/7 support services to our revered users.
Often when working smoothly in QuickBooks desktop, you get interrupted by some sort of issue, which can create a lot of hassle. One of the common errors which we shall be elaborating on in this segment is the QuickBooks error message 15243. This error basically appears when you try to download the latest payroll software updates. In addition to that, the issue may also pop up in case the FCS Service is turned off or is not working properly. When such sort of issue appears, you will get notified about the update patches that aren’t integrated into the software.
You might see the following error message on your desktop screen:
To understand it simply, the QuickBooks payroll update error code 15243 is related to the file copy service. If you are stuck on the same issue, then it is highly recommended to cling to this piece of information, as we will be discussing in detail this problem, its causes, and also the steps that can be performed, so as to shun off this issue. For additional support and assistance, you can reach out to our Customer Support Team.
What Triggers the QuickBooks Error 15243?
Although there are several reasons that may instigate this error, the chief ones are listed below:
If there is any virus or malware attack on the Windows system files or QuickBooks-related program files.
Another reason can be if the QuickBooks files get maliciously or mistakenly deleted by another program.
FCS Service malfunctioning.
You might come across this error if there is corruption in the Windows registry that happened due to any activity performed on QuickBooks.
Common Signs and Symptoms of QuickBooks Error 15243
The following are the conspicuous signs and symptoms of the QuickBooks error code 15243:
One of the signs can be crashing the active program window.
Another symptom can be if the error message itself appears on the screen.
You might be facing this error if the system freezes periodically for a few seconds.
The Windows runs extremely slowly and sluggishly.
Methods to Follow to Shun Off the QuickBooks Payroll Update Error 15243
To outcrop this QuickBooks update error 15243, we should directly lay focus on the steps that will assist in curbing the causes of this error, as already mentioned above. All such fixes have been discussed elaborately below:
Method: 1 Repair the Registry Entries
In this method, you need to hit on the Start tab.
Look for the Command tab in the Search area.
Avoid hitting on the Enter key.
And then push and hold Ctrl + shift keys.
The open box that is with the permission dialog box, will be seen where you need to hit Enter key.
Click on the dialog box with the blinking cursor.
Type in 'Regedit' and hit Enter tab.
Back up the registry editor files and opt for the error 15243 and choose the Export option from the File menu.
Opt for the folder to Save the backup in a save-in list.
Type the name for the backup file and ensure that the Branch is selected in the Export range box and save the files.
Lastly, save the file with a reg file domain.
Method 2: Restore the Windows System to Reverse Recent System Changes
Initially hit on the Start tab.
Type in 'System Restore' in the search box and hit Enter key.
Open the system restore window. Hit on the Next button.
Perform the steps in the wizard to opt for a Restore point and backup the system.
After your PC gets restored, launch QuickBooks and see if the error got solved.
Method 3: Perform a Full Malware Scan
You can perform a full malware scan of the system if the error is seen due to any sort of malware infection. The malicious intruders might harm the files. Performing a scan can resolve the issue at large.
Method: 4 Remove Junk Files From the System With Disk Cleanup
At first, you would have to hit on the Start tab
And open the Start tab and look for the Command in the Search area.
Avoid hitting the Enter tab.
Press and hold the Ctrl + Shift keys
Open the box that is with the Permission dialog box. You will be prompted to hit Enter tab.
You will see a blinking cursor on the screen,
After that write Cleanmgr and hit Enter key.
The Disk cleanup will start to calculate the Disk space to recover.
And a dialog box will be seen with a bunch of checkboxes,
Check the boxes of the section that you wish to clear and hit the OK tab.
Method 5: Update the System Driver
You can simply update the system driver and try to fix the issue.
Method 6: Check the Internet Explorer Options
To alter the Internet Explorer options, all you need to do is follow the brief procedure laid down below:
Initially, tap on the Gear icon in Internet Explorer after opening it.
Thereafter, hit on the Internet options.
Opt for the Security tab.
From the drop-down menu, choose the Trusted sites.
The following URLs should be typed into the box after choosing the Site option. Add the domains "*.quickbooks.com" and
Add ''*.intuit.com" if you are using QuickBooks in the US.
Add the domains "*.quickbooks.ca" and "*.intuit.ca" if you are employing QuickBooks in Canada.
Afterward, hit on the Close button.
Hit on Apply, followed by tapping on OK tab.
Method 7: Go for Repairing the QuickBooks Software
The first step requires you to hit the Win+R keys in order to launch the Run Window.
After that, type in Control Panel in the Run box.
Then, hit on OK.
Opt for the Programs, followed by Programs and Features.
After choosing "QuickBooks" from the list, hit a click on Uninstall/Change.
Afterward, hit on Next, followed by hitting on Repair tab.
Tap on Next and then finally hit on Repair to start the process.
Your QuickBooks Desktop may require some time to be repaired.
Method 8: Turn on QuickBooks File Copy Service (FCS)
If the QuickBooks FCS service is disabled, the QuickBooks Error 15243 may show up when updating QuickBooks. As such, the service should be enabled, by performing the steps given below:
Start by opening the Run command window by using the short key “Windows + R” on the keyboard.
When the Run window appears on the screen, the next action to take is to type the command “COMPMGMT.MSC” in the Run text box and then subsequently, press the Enter key.
This will unravel the Computer Management window.
Within this window, the user should make a move to the Services and Applications option, and then tap on Services.
Within the Services list, the user needs to search for Intuit QuickBooks FCS and follow up by double-clicking on this service.
Next step involves clicking on Manual under the Startup Type section.
Once done, conclude the process by hitting on the Apply button, followed by clicking on Ok.
Method 9: Uninstall and Reinstall QuickBooks
If none of the above methods have helped you in tackling out the QuickBooks update error 15243, then performing the steps below and uninstalling and reinstalling QuickBooks will be of great help.
On Windows 7 and Vista
Being a Windows 7 and Vista user you would have to hit the Start tab and open the Programs.
Select the Control panel side of the menu.
After that hit a click on Programs.
Look for the QuickBooks update issue related program in the name column.
Hit a click on QuickBooks associated entry and hit Uninstall tab.
Follow the on-screen options and complete the process.
On Windows 8
If you are a Windows 8 user, then you would have to open the Start menu.
Further, you should choose the Program and Features.
Next, search for QuickBooks error related program in the name column.
Now hit on the QuickBooks-related entry and also hit on the Uninstall option.
The last step is to pay heed to the on-screen instructions and complete the process of QuickBooks uninstallation.
Summing Up!
Shunning off the QuickBooks error code 15243 becomes pretty much easy, once you are thorough with the steps that we have scribbled above. As always, if you have any query, comments, or concerns, call us at 1-888-368-8874! We, Axpert Advisors will be more happy to assist you.