A Quick user guide to get started with QuickBooks Web Connector Error QBWC1085 or Exception TypeError: Unknown name
The QuickBooks Web Connector, powered by Microsoft Windows, is a vital tool for bridging your online applications with your offline QuickBooks Desktop products (like QuickBooks Enterprise Solutions or Point of Sale). It facilitates the seamless exchange of qbXML and qbposXML data, enabling crucial data integration for organizational analysis and goal setting. For successful integration, QuickBooks Desktop must be actively running on the same device where the Web Connector is installed.
However, improper installation or missed steps can lead to the frustrating QuickBooks Web Connector Error 1085. This error commonly appears when opening QuickBooks enterprise solutions or even upon starting your computer. Don't worry, this comprehensive guide will delve into the possible causes of this error and provide you with quick, effective solutions to get your Web Connector back on track.
Web Connector Errors: Either it’s QBWC1085 or Exception Type Error
In case you try to use QuickBooks Enterprise solution on your desktop, the following errors may occur and leave you confused or worried.
QBWC1085: QuickBooks was unable to write to the log file. QuickBooks will open without writing to the log file.
QBWC1085: There was a problem with the log file. QuickBooks Web Connector will continue without the log file.
Exception TypeError: Unknown name
Mostly, the type error is also detected due to the distortion or disruption of the data log file, QWCLOG.TXT, which was originally meant to be used by the QuickBooks Web Connector to integrate the data. This error occurs when the QWCLOG.TXT file used by the Web Connector program becomes damaged or cannot be accessed.
Avenues to resolve QuickBooks Web Connector Error QBWC1085 or Exception Type Error
The purpose of the QuickBooks Web Connector is to share the log files between the third-party applications on the internet to the QuickBooks products on the desktop, as we have explained above. But, in case you have not at all connected the QuickBooks desktop product with your third-party application before using the QuickBooks Web Connector, then obviously, it wouldn’t work. Check out the measures that can be taken to rectify the QBWC1085 issue:
Avenue 1: Rename the QWCBLOG.TXT File as a Solution to The Type Error
Firstly, you need to access the taskbar and right-click the QuickBooks Web Connector icon.
Next, hit on the exit tab.
You are now required to access the Windows file manager.
Head over to this path: 'C:\ProgramData\Intuit\QBWebConnector\log folder.
Once done, you are supposed to right-click on the QWCLOG.TXT file and also choose the rename tab.
In the next step, you need to make changes to the name of the QWCLOGOLD.TXT file and then hit on the save tab.
After that, restart the web connector program.
Conclude the process by rebooting the system and also reopening the software.
Avenue 2: Eliminate Web Connector From the Startup Menu
Under this particular method, log in on the system as the Windows admin.
Navigate to the command ''C:\Program Data\Microsoft\Windows\Start Menu\Programs\Start Up.''
For Windows XP: Follow the path: ''Documents and settings\All users\ Start Menu\ Program \ Start Up.''
Move ahead in the process by deleting the QuickBooks web connector file.
And restart the system and open QuickBooks.
Avenue 3: Connect the Company File to a Third-party Program
You need to first tap on the Windows + R keys.
You will now see the Run window on the screen.
Type in MSConfig and also hit the OK tab.
Tap on the startup tab.
Mark the checkbox for the QuickBooks Web Connector.
Hit on Applyoption and push the ok tab.
Sum up the process by restarting the system.
Avenue 4: Renaming the Web Connector QWCLOG.TXT File Manually
You are supposed to go for this option only when your company file was connected with the third-party application via the web connector.
Later on, close all the QuickBooks Desktop sessions along with 'QuickBooks Web Connector'. It shouldn’t be running in the background. [If you are unsure if they are properly closed or not, open the task manager and end the tasks for both the applications to be on the safe side]
You now have to head to the C://ProgramData/Intuit and also choose QBWebConnector on the next screen.
Furthermore, hit on log and also rename the QWCLOG.TXT to QWCLOGOLD.TXT.
Reopen the web connector
Reboot the system.
Some Other Common Web Connector Errors are as:
QBWC1005: QuickBooks Web Connector failed to run
QBWC1006: QuickBooks Web Connector failed to run
QBWC1007, 1008 or 1009: An error occurred when connecting to QuickBooks
QBWC1011: The application named [AppName] does not exist in the registry
QBWC1016: No application was selected for update
QBWC1018: No application available to select at this time
QBWC1085: QuickBooks was unable to write to the log file. QuickBooks will open without writing to log file
QBWC1020: There are scheduled jobs. Web Connector will not be able to run these jobs if you exit
QBWC1022, 1023, or 1024: An error occurred when connecting to QuickBooks
QBWC1030: Password is not available for application
QBWC1035: DNS.Resolve(localhost) failed due to exception.
QBWC1033: QB web connector failed to initialize the QWCLog.txt file and will not run
QBWC1032: Could not find application [AppName] in the registry to complete scheduled update
QBWC1037: Application sent the following error or warning message when checking the version of the QB Web Connector. Update aborted.
QBWC1038: User canceled from master key input. Need master key to continue
QBWC1040: Web Connector did not provide a valid username and/or password
QBWC1048: QuickBooks Web Connector could not verify the web application server certificate
QBWC1019: No application available to un-select at this time
QuickBooks found an error when parsing the provided XML text stream
Signs and Symptoms of QuickBooks Error QBWC1085
There can be numerous signs and symptoms of QuickBooks web connector error QBWC1085 that can assist you to identify the error. A few of these signs are listed below:
In case the functions of the web connector program are not working accordingly.
If, the QuickBooks accounting software is not functioning properly.
In case the QuickBooks software gets frozen for some time.
If you are not getting any response from the windows, then this kind of issue could be seen.
What can Lead to QuickBooks Web Connector Error QBWC1085? (Prominent Causes)
One of the most common factors can be when the QBWCLOG.TXT file of the web connector is damaged.
Another reason can be if there is any kind of damage to the components of the QB web connector.
Moreover, if you are unable to access the QBWCLOG.TXT file on the web connector.
You can also experience a similar issue if you didn't connect to the third-party program with QuickBooks.
To Conclude!!
Your problem must have been resolved by following the above-mentioned solutions. Though, for a better implementation, you need to restart your device and then use QuickBooks desktop by connecting it to your third-party online application for a successful exchange of files and data head. We hope this was a quick walk-through for your QuickBooks Web Connector error QBWC1085. You can also contact our QuickBooks enterprise error support team if the issue persists.
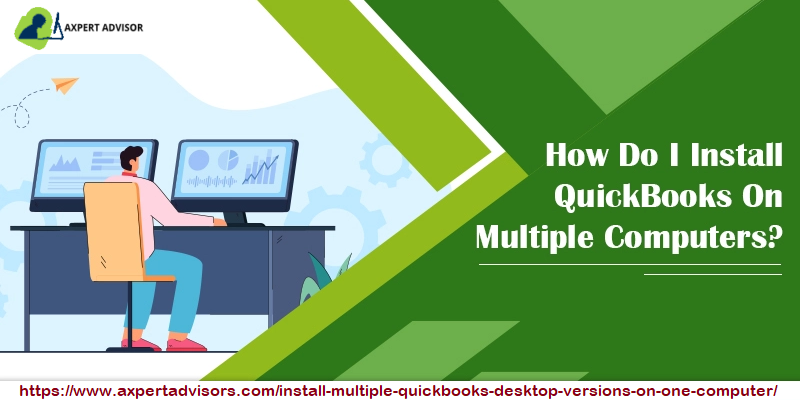
Here is how you can Install multiple QuickBooks versions on one Computer:
Are you looking to run different versions or editions of QuickBooks Desktop on a single system? While it might seem intricate, installing multiple QuickBooks Desktop versions on the same computer is entirely possible. This comprehensive guide is designed to simplify the process, providing you with a complete set of step-by-step instructions.
We understand the unique needs of users who require access to various QuickBooks functionalities or different fiscal year data. This article will walk you through the precise steps to install each version or edition one at a time, ensuring a smooth and successful setup.
For the best results, we recommend reading this entire guide. If you encounter any challenges or require further technical assistance, our dedicated tech support professionals are always ready to help.
Steps for installing multiple versions of QuickBooks Desktop
You can either install the same versions of the various available editions or successfully download multiple versions of the same or more editions. The process is quite simple to follow but equally important. Therefore, pay due attention to sail through it with no hassle.
In case you haven’t, download the version or edition and save the file where you can find it easily.
Open QuickBooks.exe you downloaded.
Perform on-screen prompts.
Select custom and network options. Avoid selecting express.
You need to opt for a custom network option. In case you plan to use QuickBooks only on this system and not share the files over a network, then choose I’ll be using QuickBooks desktop on this system. In case you are setting up a multi-user network, then either go for I’ll be using …. And or I will not be using, as per your setup.
When installing multiple versions or editions, QuickBooks will ask if you wish to replace what’s currently on the system. Avoid replacing anything, unless that’s what you want to do.
Head for the browse option and also right-click the window and create a new folder.
Avoid opting for the existing QuickBooks folder or any folders that have QuickBooks info.
Pay heed to on-screen prompts.
Perform the same steps for each version and edition.
Viable steps to install 2 versions of QuickBooks on the same PC
Check out the following steps to install the QuickBooks desktop versions on one computer.
1st Step
Do you have the QuickBooks CD with you? If yes, it’s an ideal choice to download and install the same version on the CD onto your desktop, otherwise, you can always install the already downloaded version of QuickBooks on your desktop.
2nd Step
Wait for some time, mere seconds, or max a minute or two before the installation procedure starts. In case there is any halt in processing, don’t fret. You always have an option to click the installation method manually.
3rd Step
While you are aiming to download the same version of QuickBooks of a different edition, after the installation window pops up, change the location of the software to save it elsewhere. Though, the methods will vary whenever you are trying to install different versions of the same software.
For instance,
If you have QuickBooks 2009 or older version, these steps are applicable:
As the Select Installation Folder flashes on your screen, click on the first and foremost option, that is, Install QuickBooks desktop (which version you have currently) to Folder C:\Program Files\Intuit\QuickBooks (the version you have and want to install).
Similarly, if you have QuickBooks (version 2010 and more), follow these steps:
Choose the Custom and Network Options.
You will be given an installation option, select the ones which you think suit your need.
As soon as the Upgrade or Change Installation Location checkbox appears on your screen, tick the option which says Change the Install Location.
4th Step
If you are comfortable with manual changes, you can click Browse or Change icon and select a new folder or different location where the installation will be stored.
5th Step
Press the Next button to step forward.
6th Step
You will be given a set of instructions, pay attention and apply them word-for-word for successful installation of QuickBooks versions on a single desktop.
7th Step
As all the steps mentioned are followed correctly, QuickBooks creates a desktop icon. You can browse that shortcut folder to open the installed version you desired of QuickBooks desktop software.
That’s All!
Isn’t it easy?
Though, we would like to guide you through some of the important points to be taken into consideration whenever you are following the above-mentioned steps for another version to be installed catering to your organizational or individual business needs.
These essentials are as clarified below:
In respect of the QuickBooks Desktop premier and pro or enterprise, please keep in mind that they both have namesake installation files as well as folders. Therefore, the same version of both the editions should not be installed on the same desktop location.
Various versions of QuickBooks Desktop can co-exist on your Desktop device.
Also, it’s to be taken notice that the dataset files of one version or edition cannot be shared or exchanged with the other version or edition. So, please be careful while operating QuickBooks on different editions or versions as you wouldn’t be able to merge or shift them from one version to another.
As an endnote, QuickBooks installation is fairly simple and it is a must-have enterprise resource planning software for unstoppable documentation.
Essential pointers to note before you install multiple QuickBooks versions
You are suggested to consider the below set of pointers, so as to install multiple QuickBooks versions on one system.
You can work in multiple versions of QuickBooks at the same time. In case you are using premier 2019, then open premier 2018. You can only open the same version of premier and enterprise if you use the accountant edition.
Note that, you can install the same version of QuickBooks desktop pro or premier and enterprise.
It should be noted that QuickBooks desktop pro and premier make use of the same install files. Also, you won’t be able to install the same version of pro and premier on the same system.
You can only install one industry-specific edition of QuickBooks for each version. This basically means that you can either have QuickBooks desktop premier 2018 retail or premier 2018 contractor.
One can’t mix and match different regional versions and editions of QuickBooks.
In case you need multiple regions on the same system, use a virtual machine or a web hosting service for creating an environment for each region.
Also, you can’t easily share data or company files between QuickBooks desktop enterprise and pro or premier.
The crux!
By the time we drive to the conclusion of this segment, we expect that you might be able to successfully install multiple QuickBooks desktop versions on one system. Despite that, if you aren’t able to install multiple QuickBooks versions, then in that scenario connect with our QuickBooks desktop support professionals.
A Quick guide for beginners to use QuickBooks enterprise features
For countless small and mid-sized businesses globally, QuickBooks is the trusted choice for streamlined bookkeeping and accounting. Among its diverse product offerings, QuickBooks Enterprise stands out as a robust solution designed to meet the more complex demands of growing organizations.
This article will delve into the core functionalities that make QuickBooks Enterprise an indispensable tool. We'll highlight the most impactful features of QuickBooks Enterprise and explore how this advanced Intuit product is best utilized to elevate your business operations. Discover why QuickBooks Enterprise is the go-to platform for businesses ready to scale and optimize their financial management.
Security and Productivity Tools in QuickBooks Enterprise
QuickBooks Enterprise allows you access to a specific security feature in order to protect their important company data. This feature allows you to incorporate different levels of authorizations to ensure that specific information can be restricted to specific users. It also enables you to change its views in a well-organized manner, for example, you may have a view of custom fields, pending invoices, sales orders, and sales receipts that improve your work productivity.
A Few Basic Features of QuickBooks Enterprises
Warehouse Inventory Management
Advanced Inventory
System to Track Bin Location
Barcode Scanning System
FIFO Costing System
Multi-location Inventory Management system
Maintain purchase and vendor data
Maintain Payroll and Employees data
Field Service Software
Create Work Order
Billing and Mobile Payment Module
Automate Accounting & Finances Reporting
Subscription-based Advanced Pricing Feature
Create Quantity Discounts
You can Create specific Manufacturer Markdowns
Create customized Pricing by Classification Price Changes by Class.
QuickBooks Desktop Enterprise Solutions: New Features
Checkout the following features of QuickBooks enterprise and learn how to use them.
Accountant Tools
QuickBooks Enterprise includes a wide selection of accountant tools.
Client Data Review
Batch Enter Transactions
Batch Reclassify Transactions
Write-off Invoices
Bulk Clear Send Forms
Use this feature to clear transactions that have been concluded. Also, mark them as “Send Later” in bulk manner.
Batch Delete/Void Transactions
This Enterprise feature will enable you to delete invoices, checks and bills in batch. Use it for error correction.
Bill Tracker
Introduced in QuickBooks Enterprise 2014, this feature is Income Tracker’s counterpart. It lets you view and organize all Purchase Orders, Bills and other Vendor-related transactions.
Auto Copy Ship-To Address
An immensely useful feature for companies, Auto Copy Ship-To Address allows you to convert sales order to Purchase orders through "DROP SHIP" feature.
This Fiscal Year-to-Last Month report filter
Let's you select a common date range to find the report.
Rebuild Data and Verify Data Updated
Used when the company file is verified/ rebuilt data, this feature generates a significant report about the items that’s been fixed and not been fixed.
Custom Field Filtering on Item Reports
You can use custom fields as filters in the inventory items reports. Also, this feature can be used for creating Inventory categories without using sub items.
Label Printer Support
This Enterprise feature is used to print labels on a single roll. Also, on continuous labels rather than being limited to just regular printers.
Now you can find better exciting ready-to-use templates.
Enhanced Assembly Shortage Report
Generate a report to identify inventory issues during the assembly process with this feature.
The updated
The old "IPN system" has now been replaced with E-invoicing and provides you with smoother electronic payment process in order to pay Invoices.
Improved Subtotal Item
Using this feature, you can multiply Amount, Price as well as any Custom Field which may help you calculate the total weight.
Conclusion
We would like to wind up this article by concluding that the QuickBooks Enterprise solutionis just the right accounting software you may require for your expanding organization. You can upgrade to software to breeze through most of intricate bookkeeping and accounting related tasks. If you have any question or query, you can reach our round-the-clock QuickBooks enterprise support team.
Learn easy ways to Fix QuickBooks Error 3371: Could not initialize license data.
QuickBooks users occasionally encounter technical hurdles, and Error Code 3371 is a common one that can prevent you from opening or activating QuickBooks Desktop. This frustrating error often stems from system reconfiguration issues, damaged license data, or even corrupted company files (sometimes linked to the QuickBooks 6000 series errors). These factors, individually or combined, can lead to the "QuickBooks could not load the license data" message.
This comprehensive guide will provide you with a full insight into QuickBooks Error 3371. We'll delve into the various reasons behind its occurrence, helping you understand how to avoid it from recurring in the future. Furthermore, you'll discover the top solutions and professional strategies to effectively fix QuickBooks Error 3371, getting your software back up and running smoothly.
Methods to Fix Error 3371: Could not initialize license properties
You can try the following resolutions to get rid of Error 3371: QuickBooks could not load the license data:
Method 1: Delete the .ecml file
Deleting the ECML file is considered the most effective measure to rectify this error related to license data. Although renaming the same is also an alternative, as it prevents QuickBooks from accessing this file, it is preferable to get it deleted. Upon restarting QuickBooks, a new ECML file shall be automatically created, which may also root out Error 3371 in QuickBooks. Afterward, you will need to register the product once again.
Access the Run command (hit the "Windows key + R" keys on your keyboard).
Find the .ecml file and soon after Delete it.
Try to Run QuickBooks normally and register the product.
Method 2: Update Windows OS to the latest if you could not load the license data
If the issue persists after trying the previous method, continue to the next step.
Hit the button with the Windows symbol on your keyboard.
Then, tap on All Programs and visit the Windows update section.
Now, proceed to Check for updates.
Download all the available updates and restart the PC to proceed with the installation of these updates.
The issue should probably be fixed by now. On the off chance that the problem continues, you can try the following method.
If all the previously discussed methods fail to resolve the error, then one viable approach is to clean install QuickBooks. An elaborate yet effective method, it requires users to uninstall the QuickBooks Desktop software and, after that, rename the QuickBooks folder. Subsequently, set up the accounting application on the system once again. Apart from the manual procedure, users can also conform to the QuickBooks clean Install Tool. This process requires uninstalling QuickBooks and reinstalling it using clean install.
How to clean Install QuickBooks manually?
For your clear understanding, we have split the procedure into three steps. Follow the below-given instructions to go for a clean installation of QuickBooks.
1st Step: Uninstall QuickBooks
Important Note: Before proceeding with the uninstall process, open QuickBooks, press the F2 key, and in the Product Information Window, takenote of your license and product keys. You will require them during the re-installation of the product. When you are done, you can move to the next step.
To kick start, hit the "Start Menu".
From the Start menu, head for the "Control Panel".
Access "Programs and Features" and then pick the option to "Uninstall a Program".
2nd Step: Rename the QuickBooks folder.
Navigate to the QuickBooks folder by right-clicking on the QuickBooks icon, following the Properties option, and then clicking on the option to Open File Location.
Right-click the QuickBooks folder and then choose the Rename option,
Change the folder name of the QuickBooks folder. It is recommended to add '.old' at the end for your easy recognition in terms of differentiating this folder from the original QuickBooks folder.
3rd Step: Reinstall QuickBooks Desktop
The last step demands re-installing QuickBooks. For this, you can use the original CD/DVD or download the .exe file from the official website of Intuit.
Method 6: Use the QuickBooks Tool Hub
Follow the step-by-step walkthrough below for setting up the Quickbooks Tool Hub and use it to resolve license data issues in QuickBooks.
1st Step: Run Quick fix my program using the QuickBooks tool hub
2nd Step: Run the 3371 error fix from the Tool Hub
Double-tap the icon on the Windows Desktop to open the tool hub.
Hit on the installation issues tab
Choose the 3371 error fix
Click on the ok tab and launch QuickBooks to access the file.
Different forms in which Error 3371 may show up
It’s pretty simple to identify this error as it appears as an error code on the screen. When you activate or open QuickBooks desktop, you see one of these error messages:
Could not initialize license properties. Error 3371: QuickBooks could not load the license data. This may be caused by missing or damaged files.
Could not initialize license properties. [Error 3371, Status Code -11118] QuickBooks could not load the license data. This may be caused by missing or damaged files.
Could not initialize license properties. [Error: 3371, Status Code -1] QuickBooks could not load the license data. This may be caused by missing or damaged files.
The message may read – “could not initialize license properties: QuickBooks could not load the license data.”
Note: This error oftentimes occurs when a QuickBooks file is damaged or missing. This error type may hold you back from meeting your deadlines and be very frustrating. Thus, we will learn the ways to get rid of this bug. Let’s first discuss the reasons for this annoying error.
What enforces QuickBooks Error 3371?
Some of the major causes of this license error in QuickBooks are:
QuickBooks Stopped working appears when you try to copy the company or computer data on C:/ drive to a hard drive.
The first major cause could be damaged license file namely “Qbregistration.dat”, or corruption of the license related data.
Your MSXML component is damaged and since it is required for running your computer (as the component is provided by Microsoft).
Firewall may have labeled the license ECML file as a potential threat
The QB files got accidentally deleted.
ECML or Entitlement file got damaged
Anti-virus program blocks QuickBooks desktop, which stops the sync with the important windows components needed by QuickBooks.
Failed or incomplete windows updates can also keep the windows components outdated, which can lead to more problems for QuickBooks desktop like:
Signs related to QuickBooks Error 3371: Could not load the license data
Below are the major signs and symptoms related to Error 3371:
One of the most common signs can be if you are unable to open the company file in QuickBooks.
If the system gets hanged somehow or QuickBooks crashes.
You can also spot the issue if you get notified of a mysterious HTML file.
Or at the time of the cloning process from C:\ drive to another new hard drive.
Summing up!
We hope that you find this article helpful in fixing Error 3371: QuickBooks could not load the license dataor Could not initialize license properties. If you need further assistance, contact us at our 24x7 QuickBooks error support line, i.e., 1-888-368-8874.
25 Reasons Why You Should Upgrade to QuickBooks Enterprise from QuickBooks Pro/Premier
Is your business experiencing significant growth, leading to increased revenue and plans for expanding your team? Or perhaps you're an accountant aiming to deliver even greater accuracy and comprehensive results for your clients. In either scenario, if you're currently using QuickBooks Pro or Premier, the moment might be right to consider an upgrade to QuickBooks Enterprise.
QuickBooks Enterprise is designed for businesses that have outgrown the capabilities of Pro or Premier, offering a robust suite of advanced features built to handle higher transaction volumes, more users, and complex accounting needs.
This blog post will highlight some of the most powerful and popular features of QuickBooks Enterprise. Read on to discover if it's the opportune moment for your business to unlock the enhanced scalability, advanced inventory management, detailed reporting, and granular user permissions that QuickBooks Enterprise provides.
Reasons to Upgrade QuickBooks Enterprise from Desktop Pro/Premier
Understand why you should upgrade QuickBooks desktop enterprise from QuickBooks Pro/Premier:
QuickBooks Desktop Pro and Premier may get sloppy if you have to open or work on the file size of "250 MB" or more. On the other hand, QB Enterprise can easily handle files of much larger sizes.
While QuickBooks Pro and Premier have a limitation of list name (maximum 14,500 customers, vendors, employees, items and other names), QuickBooks Enterprise enables you to add as many names as you want.
While QuickBooks Pro is limited to 3 and Premier to 5 users, QuickBooks Enterprise host as many as "30 users" at the same time. Besides, the Latter also enables you to set up particular roles for every user and task-based security access.
You can create up to "15 custom item fields" and 12 custom name fields with QuickBooks Enterprise. However, Pro is limited to 5 and Premier to 7.
Intuit built QuickBooks Enterprise with "Windows Terminal Services" in mind, and therefore, it works great with multiple users connected to one "Windows Server", no matter locally or remotely, with MS Windows Remote Desktop function.
You can also configure QuickBooks Enterprise to accommodate data field format input specifications and drop down menus in custom fields. The added "Custom fields" can further capture more data to search or filter on custom reports.
QuickBooks Enterprise makes it simple to search for items within transactions like "Purchase Orders and Invoices". You can use numbers, description or both to find a specific item from a large item lists.
This tool allows you to consolidate reports from various QuickBooks files into one financial statement in MS Excel.
A feature called "Enhanced Inventory Receiving" separates the receiving process from the accounts payable process and enables you to maintain a separate receipt date of inventory from the bill date.
With "Automatic Price Markup", you can "configure the MARGIN" or the "MARKUP" of an item to be fixed, and the software will itself update the sales price in case the cost changes.
You can use "Automatic PO," to create a Purchase Order to stock up to recommended levels. It also enables you to track both minimum and maximum reorder points.
Its Default Classes let you assign a class in transactions to an account, item or name (Customer/Vendor/Employee).
In Vendor Transactions, for example, Checks, Bills and Credit Card Transactions, you can use a "Sales Rep" and "Custom Fields".
With QB Enterprise, you get "WIP Summary Report" (Contractor Edition) along with the percentage of completion calculation. And Committed Costs by "Job Report" (Contractor Edition) displays estimated costs of open purchase orders as well as time sheets assigned to jobs.
With Enterprise you can automatically build assemblies with sub-assemblies. Also, remove or replace discontinued entries and auto-calculate the cost of assembly items based on "Bill of Materials".
It prevents negative quantity on items by catching inventory errors and restricts users from selling items through invoice or sales receipt that have less amount than what has to be sold.
Make use of options to hide "opening balances" on items and customers and vendors. Also, prevent users from putting in opening balance information.
Keep from selling to overdue customers with "Optional feature" that would disallow users from creating invoices for customers who have any unpaid invoice post due date.
You receive "Shortage Report" for inventory assemblies. It show the items needed to build an assembly that falls short and is highlighted as pending.
An "Inventory Shortage Detail Report" consists of all pending builds and items required to complete the assembly.
You can subtotal item quantities and custom fields, sort items by any column, print footer on the last page, and compose alternate gray lines when "Printing or creating PDF" transactions.
QuickBooks Enterprise enables you to see the item’s cost in the sales forms, sales orders, invoices and sales receipts, which used to be available on Estimates only.
Use "Advanced Reporting", a fully customizable pivot-style advanced reporting.
Delete checks, invoices or bills in batch to save time and rectify errors.
Enterprise automatically upgrades to the latest versions. But for this, you need to have an active subscription.
Summing up!
In the end, we see why businesses should upgrade to QuickBooks enterprise solutions that can help you manage your business faster and more accurately. If you have any doubt or you need any assistance, you can connect with our 24x7 QuickBooks Enterprise Support team.