QuickBooks is a powerful accounting software designed to simplify bookkeeping, but users can sometimes encounter technical hurdles. One common and frustrating issue, particularly when operating QuickBooks in multi-user mode, is the "QBDBMGRN not running on this computer" error. This error prevents QuickBooks from properly accessing company files across a network, halting collaborative work.
This comprehensive guide will delve into the primary causes behind the QBDBMGRN error and provide clear, actionable steps to resolve this same error.
We've outlined essential technical troubleshooting steps below to help you fix the "QBDBMgrN not running" error. For a faster and more assured resolution, consider reaching out to our dedicated technical support team. Our experts can save you valuable time and effort, ensuring the error is rectified as quickly as possible.
Efficacious Methods for Troubleshooting the QBDBMgrN not Running on This Computer Error
There are several methods that can assist you in resolving the QBDBMgrN not running on this computer problem. these methods include the following:
Method 1: Reboot your Computer System
Log off from your QuickBooks account.
Close 'QuickBooks Desktop'.
Shut down your 'QuickBooks account'.
Restart your computer.
Open QuickBooks and then try to login to your account.
Method 2: Updating your Windows Firewall can Fix the Issue
First of all, you need to tap on the 'Windows + R keys', on your keyboard. this will bring up the Run Window.
After that, once the 'Run' window shows up, type 'Control panel'.
Next, hit on 'Enter key' and then choose 'System and Security option'.
After that, head to the 'Windows Firewall' option that is under the 'Update your Firewall Settings' section.
Now, opt for 'Check for Updates'.
If there is an update available then hit on 'Update Now'.
Finally reboot your computer and open your QuickBooks.
Method 3: Repair QuickBooks Desktop
Firstly, hit 'Windows + R keys' on your keyboard.
After that, hit on the empty box in the 'Run' window and type 'control panel'.
Now, hit on 'Enter' key.
After that, move to the 'Programs and features' section.
Search the QuickBooks in the installed programs.
After that, hit a click on QuickBooks and opt for 'Uninstall/Change'.
Now, proceed ahead by hitting on 'Continue' and then 'Next > Repair > Next'.
It will take some time to complete the process.
Once the process is done, restart your system.
Method 4: Restart QuickBooks Database Server Manager Services
Hit on the 'Windows + R' keys on your keyboard. This will access the RUN dialog box.
In the 'Run' command box, type 'MSC' and hit 'Enter' key.
Scroll down your mouse and search for 'QuickBooks Database Server Manager' named as one of these 'QuickBooksDB28, QuickBooksDB27or QuickBooksDB26'
Now, make a right-click on 'Service'
Finally, launch your QuickBooks desktop.
Method 5: Clean Installation of your QuickBooks can Resolve the Issue
Operate this software and it will diagnose the network which is made to solve the error like QBDBMgrN error. It prints a report plus it automatically repairs the error.
If in case your hosting mode is turned off then it indicates you to turn on QuickBooks hosting so that company file could open.
You need to set up access permission in Windows for the user to get permission when the result indicates that the folder has non-writable read only company file.
You have to grant permissions in Windows and make the folder shareable only if the folder has non-shareable company file.
Now you need to run 'ipconfig' when there is no network connectivity.
Note: Each computer has it's own IP address and if various adapters are in use then for only one adapter you have to specify a one IP address.
Set up exceptions in 'Windows Firewall' for QuickBooks if the firewall is blocking QuickBooks.
Set up a firewall to open 'Dynamic DB port' for QB File Doctor and other 'QuickBooks apps' and do this on both client and server computer systems, if QBDMGRN is not running. Ensure that the hosting on the server is turned on and that you can ping the server.
Causes Behind QBDBMGRN not Running on This Computer Problem Issue
One of the major reasons that incite the qbdbmgrn not running on this computer problem is because your firewall is preventing the connection of QuickBooks desktop to the server of Intuit. In such a situation, it is recommended to update your firewall, followed by configuring exceptions and ports to overcome the issue. In QuickBooks, QBdbmgrn.exe is a utility for multi-user access. The QuickBooks Database manager program takes the care of networking the data file on the host computer. So, any issues with it can lead to some serious repercussions. Let us jump into the possible causes behind this error. these include:
The configuration of the firewall is incomplete or incorrect
Your QuickBooks Database server manager (QBDBSM) is not updated
There is QuickBooks Network file (.ND files) problems
There is an Incorrect installation of the database server manager
3rd party firewall software is blocking your QuickBooks to access
Your internet is creating problems
Wrapping up! In case the issue still prolongs, contact us!
We hope that the steps mentioned above to repair QBDBMgrN not running on this computer has helped you a lot to repair this error. And even after implementing the above steps if then error still persist then feel free to seek help which we provide round the clock from 24/7 QuickBooks support. Thanks for giving us your valuable time. We hope that reading this blog post might help you to fix the error without any further problem.
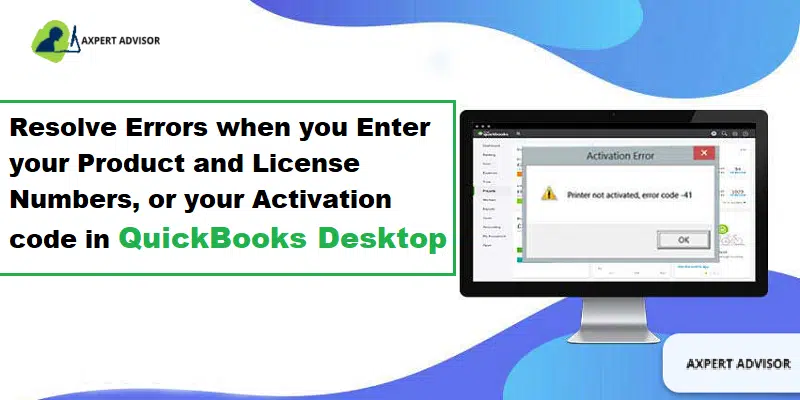
Simple tips to resolve QuickBooks desktop activation errors & validation, and registration errors:
QuickBooks Desktop is leading accounting software used by millions of mid and small-sized business owners from all around the world. However, both old and new users time to time keep receiving some errors and glitches that interrupt their work, causing them to miss deadlines and at times lose data. Also, the errors may appear at any time, even while installing/activating the software.
You are here on this page probably because you received an error that says: – Validation code is incorrect or the service is temporarily unavailable. But don’t be confused, we have listed some of the easiest steps for you to try out and get your QuickBooks Enterprise Activation Issues. First, you must check all of these:
Is your QuickBooks account already active?
Have you listed the correct license number or the activation key that was given to you at the time of purchasing your QuickBooks account? To check the same, it will be either on the CD envelope or in your inbox under the confirmation mail.
Now even after checking the above bullet points, you are in the middle of nowhere to solve your issue, let’s begin to dig deeper. However, you can also get in touch with our support team for any further information. Our team of experts and certified professionals will help you to fix the bug in no time.
What are Activation, License, Validation, and Registration Errors in QuickBooks Desktop
There are many common errors that a user can face when they try to activate the QuickBooks desktop after installing it. These errors arise with some error messages on the screen. The Error messages include the following:
"Error: The validation code is incorrect or the service is temporarily unavailable when activating."
"Message: You cannot use Online Banking because QuickBooks is not registered."
"You must subscribe to the accountant's copy file transfer service"
The Sync License Data Online option is grayed out.
How to Fix Error: You have Entered Incorrect License/Product Numbers?
You need to check if the license number and product code match. This can assist you in rectifying any quickbooks desktop activation errors.
If you purchased the QuickBooks Desktop from Intuit official website then you need to see in the purchase confirmation email you received from Intuit.
If case you purchased the QuickBooks from a retail store then you can see the brightly colored sticker on the original CD envelope box.
How to Fix Error: The Validation Code is Incorrect or This Service is Temporarily Unavailable?
Check out the following steps to fix the following error from your QuickBooks:
Solution 1: Verify that your OS is up to date with appropriate settings, suitable for QuickBooks Enterprise Account to work
First of all, you must close the QuickBooks application.
Go to your 'Windows Task-Bar', at the bottom right corner, date and time are displayed. Right-click on it and tap on 'Adjust Time/Date' option.
Choose the 'Date & Time tab' and make sure you choose the 'current date' only.
To make the changes applicable, hit on 'Apply' and then tap on the 'OK' button.
Once again, launch the QuickBooks desktop accounting software. Then, visit 'Help > Active QB > Begin Activation'. (in case, you have a Canadian version of the application, try this out: 'Help> Register QB> Begin Registration')
Type in your 'Active validation code' and hit on the 'Next' tab.
Solution 2: Just reset the .ecml file to resolve the QuickBooks desktop activation errors
Basically, when your QuickBooks Enterprise encrypted filesare erroneous or corrupted somehow, no matter how many times you enter the validation code to try and activate your account, it wouldn’t work. For the purpose to solve such an irritating and unknown problem, it is mandatory to remove the entitlement file and re-enter your given license or validation code with the essential product information.
Find your entitlement file first by:
Ensuring that QuickBooks is closed in the background and nothing related to it is processing in the back.
Hit on the 'CTRL+ SHIFT+ ESC' keys to access the 'Task Manager'.
Tap on 'More Details' to show the 'Task manager'. (Applicable to Windows 10)
Right-Click to enquire which operating system you have and then proceed further for applying solution number 3.
Now, For 64-bit operating systems: register the MSXML file with 4 easy steps.
Type 'CMD' in your start menu and tap on the run as administration by right-clicking the 'Command Prompt search result'.
When the prompt is open, type in 'incd \ windows \ syswow64'.
Then, type in 'regsvr32 MSXML4.dll' and then hit on the 'Enter' key.
Hit on the 'regsvr32 MSXML6.dll' and push the 'Enter' key.
For 32-bit operating systems: Try activating QuickBooks MSXML with this quick method that will be done within ten minutes:
Type in 'Win Key + R' to access the Run tab at the bottom left corner of your desktop screen.
Type in 'CMD' before hitting on the Enter key.
Now, type in 'regsvr32 MSXML4.dll,' then tap on the 'Enter' key.
Afterward, type 'regsvr32 MSXML6.dll' and push the 'Enter' tab.
Solution 4: Run QuickBooks Install Diagnostic Tool
The QuickBooks Install Diagnostic tool is a holistic tool that can go a long way toward QuickBooks desktop activation errors. This tool is quite convenient to use and can be employed to fix a myriad of issues in the QuickBooks software.
It’s completely safe and easy to run. It will be around '200 MB' in size. So make sure you have enough disk space in your drive.
This tool helps to identify what seems to be the most genuine problem regarding the validation code error that you are encountering.
It acts like QuickBooks software's own troubleshooting processor.
Solution 5: Creating a new Windows admin can fix the QuickBooks desktop activation errors
For Windows 10
You need to initially choose the start and tap on the settings tab.
Furthermore, hit on the accounts tab and also family and other users.
Then, hit on add another person to this PC under other user.
Moreover, click on I do not have sign in information for this person.
You now have to tap on add users without a Microsoft account.
Type in the name of new account.
You are then required to tap on finish by default and then set the new account as the standard user.
Heading forward, tap on the account type.
Choose admin from the drop-down menu, hit on the ok tab.
Sign out from windows and sign back in as a new user.
End the process by accessing the QuickBooks desktop and choosing help to head to the activate QuickBooks option. Also, choose start activation.
Windows 8
Under this process, you need to press the Win + E keyboard buttons to access the File Explorer window.
Moreover, visit Mycomputer and hit on open control.
Heading forward, choose user accounts and hit on manage another option.
In the next step, you need to choose the add a new user option in the PC settings tab.
Now you are supposed to type in the username and domain name and tap on next tab.
Next, choose admin access for the new user and then hit on the ok tab.
After that launch the QuickBooks software and head to the help menu.
Towards the end complete the process by opting to activate QuickBooks and also choose start activation.
Windows 7
This process requires you to visit the start tab and also opt for control panel.
Furthermore, go for user accounts and choose manage user accounts.
You now have to enter the username and domain name and click on next tab.
Choose the admin access for the new user.
You are also required to open the QuickBooks desktop.
And also move to the help menu and opt for the activate QuickBooks option
Finally, tap on the start activation option.
Solution 6: Run Quick fix my program from QuickBooks tool hub
Any issue with QuickBooks background processes might prevent the activation process from completing. Therefore, you are simply suggested to download the QuickBooks tool hub and also run a quick fix my program tool to close any open background processes, thereby fixing the QuickBooks Desktop activation errors. The steps below can be implemented:
You need to save the file where you can easily access it.
Also, note that if you have installed tool hub before, then find out which version you have.
Choose the home tab.
The version will be seen on the bottom.
You now have to open the file you downloaded.
Perform the on-screen prompts to install and agree to the terms and conditions.
Once the install is complete, you need to double click the icon on the windows to open tool hub.
Step 2: Run quick fix my program
You need to now choose program problems in QuickBooks tool hub.
Furthermore, choose quick fix my program.
After that tool completes the process, you need to start the QuickBooks software and open the company file and try to activate it.
Solution 7: Perform a Clean install of QuickBooks desktop
Performing a clean install should be the last option, when the all of the above methods fail to work. A clean install won't affect the accounting data as the company file and the information stored in the file aren't involved in this process.
Conclusion!
After reading and applying the above-mentioned troubleshooting steps, if you still getting QuickBooks activation errors, you can either contact the official 24/7 QuickBooks support team or on phone call at 1-888-368-8874. Our QuickBooks support team have vast years of experience in serving QuickBooks organizations.
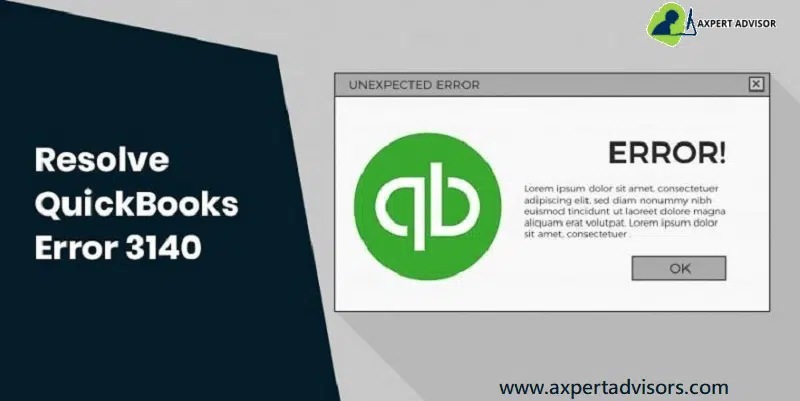
Use These Useful and Foolproof Methods to Fix QuickBooks Error 3140
QuickBooks is an innovative, fast, and easy-to-use bookkeeping and accounting software primarily built to empower small and mid-sized businesses in managing their finances and achieving their goals. While it offers seemingly infinite benefits, it's not uncommon to encounter occasional issues and glitches.
This guide will illuminate one such common QuickBooks errors, the QuickBooks Error Code 3140. This error frequently arises when QuickBooks users attempt to sync data or if the software experiences corruption during the download process. We'll delve into the causes and provide effective solutions to help you overcome this technical snag and ensure your QuickBooks operations run smoothly.
You may see the following error message on your desktop screen:
Latest Steps to Fix the QuickBooks Error Code 3140
The troubleshooting process of resolving QuickBooks error 3140 is time-consuming. Following the below-mentioned steps will help you resolve the error and related issues.
Step 1: Repair Registry Entries Associated With Error 3140
Find all the Registry entries related to QuickBooks error code 3140 and repair them. Take aid from your IT professional if you are not comfortable performing this step on your own. Below are the steps to create a backup of QB-related registry entries.
You need to first hit on the Start tab and type in 'Command' in the Search box without pressing the Enter key.
Furthermore, hit the Ctrl + shift keys and tap on the Enter key.
Now, opt for Yes on the permission dialog box.
You will see a black box with a blinking cursor.
Heading forward, you need to type in 'Regedit', and tap the Enter key.
In the registry editor, you are suggested to choose the error 3140 related key that you need to Create a backup.
Pick the Export option in the File menu.
Now, you need to choose the folder to Save the backup from the save-in list.
Provide a name to the Backup file in the file name box.
Ensure that you have marked the Selected branch in the Export range box.
Opt for the Save option and Save the file with .reg file extension.
End the process, by saving the Backup of registry entries related to QuickBooks.
Step 2: Conduct a Malware Scan of Your Computer
Malware attack is one of the most common reasons for the QuickBooks error code 3140 occurs. It is important to check whether the system is infected with Malware or virus by performing an in-depth scan through Anti-virus software.
Step 3: Perform a System Clean-up Check
You can use the Disk Cleanup (cleanmgr) to remove all the unwanted junk files from the temporary files and folders and clean up your computer. You need to clean system junk files:
Initially, head to the Start tab.
Now, on the Search bar, insert 'CMD' on the keyboard.
Press and hold the Ctrl + Shift keys and hit on the Enter tab.
When you got a pop-up dialog box on the screen, then you need to opt for the Yes tab.
On your screen, a black window will open, insert 'cleanmgr' and hit on the Enter tab.
When the process is completed, a Disk cleanup box will initiate with checkboxes on the screen. You need to opt for the checkboxes that you need to clean.
Finally, hit on the OK tab.
Step 4: Update your System Drivers
Update your computer system’s drivers to the most recent version.
You need to hit on the Settings tab and choose the Update and security option.
Furthermore, opt for the Windows update and hit on the Check for updates option.
Step 5: Restore Previous Setting
Utilize Windows System Restore to "Undo" Recent System Changes by setting set the windows system to a specific restore point so that you can undo any changes that take place.
Step 6: Uninstall and Reinstall the QuickBooks Program
You can ensure that all the applications and files related to QuickBooks software are working in pristine condition by uninstalling and reinstalling them again. The process to uninstall and reinstall is also called the clean installation of QuickBooks desktop software.
Step 7: Check for Errors Using the Windows System File Checker ("sfc /scannow")
Initially, reveal the Run window by hitting on the Win + R keys.
Subsequently, type in 'cmd' to show the command prompt.
Run the process of File Checker on the Windows system by typing “sfc /scannow" in the Command prompt window.
Hit the Enter key and let the process finish scanning and rectifying your PC for any errors.
Step 8: Install Windows Updates
Keep the Windows Operating System updated to the latest version and with security patches. To update your Windows to the latest version, follow the below-given directions:
Hit on the Start menu and type in 'Update' in the Search box.
After that, pick the Windows Update option.
Afterward, opt for the Check for updates option and mark all the relevant updates that show on the screen,
Start the process of downloading these updates.
Once completed, restart your PC and let these updates install successfully on your computer.
It is pertinent to know why the problem exists and what the effective ways are to resolve this annoying issue.
You can face this issue when starting up or shutting down your PC. You may also encounter the problem when conducting the Windows operating system. It is recommended to make a note of how and when this error is appearing to guide you in troubleshooting this error code.
What Causes QuickBooks Error 3140?
The QuickBooks error code 3140 occurs when the program installation is incomplete or the download is corrupted.
Another reason is recent changes in QuickBooks software that corrupt the Windows registry.
Due to Malware infection or virus-infected computer system which damages the important files of Windows and QuickBooks.
Additional, new or old programs removed the QuickBooks-related files by mistake.
Effects of QuickBooks Error 3140
You may face multiple problems when the error 3140 occurs on your screen.
The active program functioning on the windows crashes.
The desktop on which the software is being utilized crashes with the error message 3140.
Windows and hardware devices like the mouse and keyboard also respond slowly. There is a lag time between the input and the output.
The periodic screen freezes occur for a few minutes or seconds at regular intervals.
Sometimes, you may experience a continuous starting up and shutting down of Windows.
Need assistance? Our team is accessible 24/7 to help you out.
The above-mentioned method should help you resolve the QuickBooks error code 3140 issue without any hassle. Now, this error shouldn’t appear again, but if it does, you can contact our 24X7 QuickBooks error support team and speak to certified technicians. They will take care of the issue and ensure that the error gets rooted out from your computer.
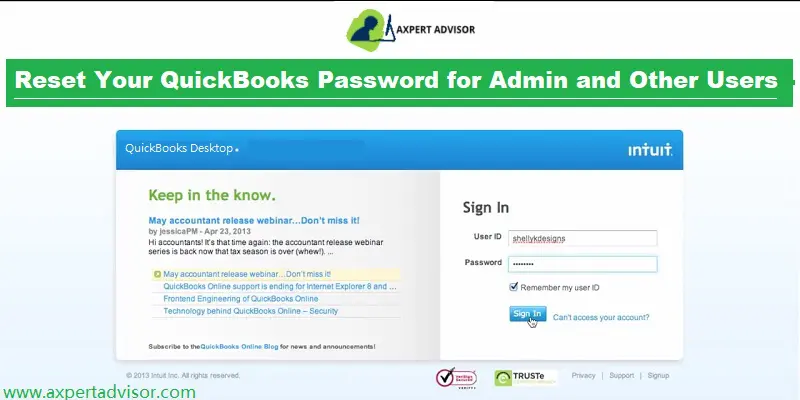
Learn the easiest ways to reset QuickBooks desktop password for Windows:
Have you forgotten or lost your QuickBooks admin password and are locked out of your crucial business data? You've landed on the right page! Maintaining a strong admin password is vital for protecting your business from unauthorized access, but occasionally, forgetting it happens.
This comprehensive guide provides a step-by-step process to reset your QuickBooks admin password for both QuickBooks Desktop for Windows and QuickBooks Desktop for Mac. We'll walk you through the necessary procedures to regain access to your accounting files quickly and securely. Don't let a forgotten password halt your operations – learn how to reset it now!
Convenient Steps to Reset the QuickBooks Desktop Admin Password
Just in case you forgot your password, you can perform some steps and try retrieving your admin password successfully:
Steps to Follow for a Misplaced Admin Password:
You should note that there is no need to Enter a username, as when logging in, you only would have to Enter a password.
Moreover, your User name will be admin, or other Admin user names that you created at the time of creating the admin user,
There can be two scenarios for changing the Admin password, either you want to change it for security reasons, or you have forgotten the password.
In case you are not an admin user, then your QuickBooks admin can reset your password for you. You need to contact your admin and have them follow the steps in the "Reset a user password" section below:
Steps for Resetting password for QuickBooks desktop 2020 or later versions
You will first have to Login the company login window and select the option stating I forgot my password.
Now, in the drop-down list, go for the Next tab and a token will be Emailed to reset the password. It should be noted that if you are unable to see the email address, then you are supposed to go for the option stating Don’t see your email in the list above? And perform the onscreen instructions.
You are then required to Insert the token that you received in the email address. You can also check the spam or junk folder if the email is not visible in your inbox.
Steps for Earlier Versions of QuickBooks Desktop 2019
If you are using the earlier version, you are supposed to Start the QuickBooks desktop first. And choose ''I forgot my password.''
Later on, enter all the information in the form:
The License number of the QuickBooks version that you are using is to be entered, which can be found by tapping on the F2 key.
Fill in the Accurate name, email address, phone number, and ZIP code you formerly used at the time of purchasing the software.
Just in case the information recorded is accurate, then you will Get a code on the original email listed in the CAMPS. Moreover, emails from Intuit sometimes can be marked as spam, so you can check the spam folder.
QuickBooks will guide you through the process to create a new admin password.
You will now see a screen where you can enter a new password and choose a challenge question for safety purposes.
After creating your new password and entering a challenge question you will be navigated to the login screen.
Now, enter your latest created password to login into your account. Here you will another window where you will see the 'Change QuickBooks desktop password' message. You need to fill in all the information asking it is and then push the OK tab.
Now you will get a message i.e. "Your password has been changed". Hit on OK to close it.
Important
In a scenario, when none of the methods to reset QuickBooks Desktop password work out, then you can perform the below-illustrated steps:
Cross-checking the information that you provided is recommended. Also, we suggest you verify that the information you catered matches with the info you registered in CAMPS.
You must meticulously adhere to the instructions given below in order to use this tool:
1st Step: The QuickBooks Desktop Version Needs to be Verified.
To verify your QuickBooks Desktop version, follow the steps listed below:
Press F2 to open the Product Information window, and then go through it.
View the QuickBooks version.
Now, Select Reports after launching the QuickBooks program.
Select QuickBooks Report writer and then select Help.
Go to the About QuickBooks Report Writer menu.
Next, look for the QuickBooks version in About window.
For QuickBooks Basic and Enhanced Payroll, Proceed as Follows:
Go to the Payroll centre by selecting Employees.
Next, select the Payroll tab.
For QuickBooks Point of Sale:
Select Help from the menu, then select Product Information.
Look up the release and version of QuickBooks.
2nd Step: To Open the Company File, Select an Earlier Version.
Download QuickBooks Automated Password Reset Tool first onto your computer first.
You must save the file to your desktop after downloading it, then execute it by following the on-screen directions.
Next step is to confirm your registered mail address because a message with a password reset token will be sent to that address.
Resetting the new password requires the token.
Pick the Product from the drop-down menu.
Select the file that you wish to reset the password for now.
Make sure the company file you select to reset the password for is the correct one.
Create a new password and type it in again.
In order to complete the operation, you must now click the Reset button.
Resetting Password in QuickBooks Desktop for Mac
Following are the quick steps for resetting your admin passwords if you are a QuickBooks desktop for Mac user:
Steps for QuickBooks Desktop Mac 2019 or Earlier Versions
If you are a QuickBooks desktop mac 2019 user, then you will require a QuickBooks license number for resetting the admin password and also will need an email address, phone number, zip code, and the name that you use to purchase and register the product. You can get all the information on the CAMPS website.
You can head to the login page and choose Forgot password.
Furthermore, you should Enter all the information on the form and hit the OK tab.
You will then receive a password Reset code or link on the registered email id. Where you can insert the code and tap on the ok tab.
QuickBooks will cater to you with the instructions to Create a new admin password.
Steps for Resetting Admin Password in QuickBooks Desktop Mac 2020 and Later Versions
Well, if you are using the Mac 2020 or later versions of QuickBooks, then you would require the following steps:
Start with selecting the Lock icon from the password field. Moreover, you will see a pop-up menu listing the Recovery email address.
Further, you would have to choose an Email address that you have access to and hit the OK tab.
You will get an email from QuickBooks itself, within a short period of time that would state the further steps for Creating new admin password.
Reset a Non-Admin Password in QuickBooks Desktop for Mac
These steps are only for limited users. Only the company file admin can reset a password for non-admin users.
Firstly, sign in to the company file as the admin.
After that, from the Company menu, choose Users and Passwords opt.
Furthermore, choose the user you want to Change the password, and then choose the Edit option.
Now you need to select the Lock icon, then enter the new password.
Last step to perform is to choose Save.
Points to Keep in Mind Before you Reset QuickBooks Desktop Password
Before you head to the process of resetting the admin password, we have got certain pointers for you to consider and ponder on:
The most important point that you should keep in mind is that the password shouldn’t contain any spaces. Also, you are supposed to re-enter the password without spaces, in case any spaces are found.
Moreover, always try to create a complex password. You can take into consideration the instructions which include having at least 7 characters, i.e. letters, numbers, special characters, and at least 1 number and upper case letter.
Another important aspect is that the password might be blank, as a few of the users wish to leave the admin password blank.
You should also keep in mind that your keyboard should be functioning properly, as at times it might happen that your keyboard might not be functioning properly.
One more aspect to be considered is that you might be seeing an incorrect login screen. As a login screen that asks for a password but doesn’t ask for a username is the admin login screen and you have a non-admin login, then try closing QuickBooks and reopening it.
Before you head forward, also check if the caps lock is turned on.
The final words..!
That was all you need to know about how to reset QuickBooks desktop password successfully. As always, if you have any queries, then you can get in touch with our QuickBooks desktop support team via our toll-free i.e., 1-888-368-8874. Our team will provide you with the best possible information in a single call.
Get the latest steps to track your cash flow in QuickBooks Desktop:
QuickBooks accounting software is renowned for its powerful features and tools that revolutionize financial management. Among its most critical functions is the ability to monitor cash flow—the lifeblood of any business, representing the movement of money both into and out of your bank accounts.
Maintaining a clear, real-time picture of your cash flow in QuickBooks Desktop is essential for understanding your current financial health and accurately forecasting future business finances. This comprehensive guide will walk you through the precise process for tracking cash flow in QuickBooks Desktop.
Dive in to discover the straightforward steps that will empower you to effectively manage and optimize your business's financial liquidity.
Check Out Your Financial Position Using the Below Steps
Here are some simple steps that you can execute so as to track your company’s financial position. Explore the steps by scrolling down carefully.
Step 1: The first step to track your cash flow in QuickBooks is to ensure that data is accurate
The very first thing that you should ensure is that the books of accounts are appropriate and accurate. All the reports will make use of the data in QuickBooks, thus, it is very much important to have a clean starting point.
You are required to ensure that you have entered all the transactions into QuickBooks.
Just in case you have set up bank feeds, download the transactions and match them to the transactions in QuickBooks.
Reconciling the accounts in QuickBooks is the next step you should perform and ensure to match them with the bank and credit card statements. Just in case you need any assistance in reconciling the account, it is a good idea to consult an accountant.
In case, you reconcile report tallies with the bank statement, then you are all set to start running reports. If not, then you can check the process to fix beginning balance issues in QuickBooks.
Step 2: Make use of the Financial Reports to See how much you have made
The profit and loss report and balance sheet report will display how your business is doing based on the data in QuickBooks. Thus, you can run a profit and loss reportfor the past 3 months and get a better insight into the average income and expenses for each month.
Head to the reports menu and then the company and financial option.
After that, choose the profit and loss detail.
Set the date range for the past 3 months.
Also, note that if you wish to change what appears on the report, then choose to customize report and customize it based on the data you want.
Once done, print, email, or export the report to excel.
When you check the income, make sure to see the top sources of revenue. For expenses, you can pay attention to things such pay payroll, rent, insurance, and marketing expenses to see where you can reduce your spending.
Running a balance sheet detail report
You can run a balance sheet report to get the financial snapshot of the company as of the specific date. This will calculate the business worth by eliminating the money your company owes from the amount you own.
You are supposed to head to the report menu and then the company and financial.
Choose the balance sheet detail.
And pick the customize report and customize it according to the data required.
Once done, print, email, or export the report to excel.
Steps for Optimizing the Cash Flow in QuickBooks
You can perform the below steps for optimizing the cash flow:
Step 1: To Track your cash flow in QuickBooks, start by setting up a cash flow projection
Making use of the upcoming bills and cash on hand, you can check the cash flow looks for the next six weeks by creating a cash flow projection.
Step 2: Looking for the top-selling items
You can use the company snapshot, and see what the customers are buying the most. Run the best-selling item report by performing these steps:
Head to the company menu and opt for the company snapshots.
Select add content and choose the arrow on the right.
Look for the best selling items and select add.
Double click each product to see a detailed report.
In case you wish to change what appears on the report, go for the customize report tab and alter it depending on the data you need.
Print, email, or export the report to excel.
Step 3: Identifying the customers having upcoming or overdue invoices
By using automated invoice payment reminders, QuickBooks will be able to spot the customers with upcoming or overdue invoices. After it is set up, you will see a notification that you have payment reminders ready to send. You can review and approve them before they go out.
Step 4: Look for the Bills you wish to pay
With the help of the bill tracker, you can spot the pending and unpaid bills and pay them directly in QuickBooks.
Step 5: Check where you can cut down the spending
You can use your company snapshot and see what your top expenses are and see what you can do to cut down your expenses:
Run the expense breakdown report, by heading to the company menu and select company snapshots.
Choose the add content and select the right arrow.
Look for the expense breakdown and select add.
Double click the wedge on your expense breakdown.
And print, email, or export the report to excel.
Concluding step: Also check for the top vendors by expense
Just in case the cash flow is causing a delay in paying the vendors, you can negotiate the payment terms or delay paying bills till you have the cash. In QuickBooks, you can also run the report to see the vendors you spend the most. You can run the report using the steps below:
Move to the company menu and choose the company snapshots.
Choose the add content and tap on the right arrow twice.
Hit on add from the top vendors by expense.
Double-tap the vendor on your expense report to see a detailed report.
Print, email, or export the report to excel.
Get instant support 24/7
That was all you need to know about tracking cash flow on QuickBooks desktop. As always, if you are still puzzled to opt for the right option, then you must get in touch with our QuickBooks desktop support team of technocrats to make your development choice clear. Our team comprises certified and experienced professionals who have served the industry for several years and have attained unfathomable skills in troubleshooting evolving issues encountered while working with the Quickbooks software. For assistance on various issues pertaining to Quickbooks, you can reach us out on our helpline, or through the Live chat option.