Learn the procedure to enter transactions by batch and delete them in QuickBooks Desktop.
Struggling with individual data entry in QuickBooks Desktop? Unlock peak efficiency by mastering batch entries for invoices, checks, deposits, credit card charges, and credit memos. This comprehensive guide provides step-by-step instructions on how to enter and delete transactions by batch in QuickBooks Desktop, ensuring your financial records are always accurate and up-to-date.
Need expert assistance? Our dedicated support team is ready to help! Contact us directly at 1-888-368-8874 for personalized QuickBooks Desktop solutions.
Steps to Enter and Delete Transactions by Batch in QuickBooks Desktop
Follow the below-listed steps to enter and delete transactions by batch in QuickBooks Desktop:
Easy Process to Enter Transaction by Batch in QuickBooks Desktop
QuickBooks Online Banking Services can save you the data entry time by enabling you to add multiple transactions at a single point in time. We have jotted down the steps that you need to follow:
QuickBooks users can access the "Batch Enter Transactions" from the banking option on the Accountant menu bar.
Hit on the "transaction type" and later tap onto "Transaction Type" and "Account".
After that, access the spreadsheet carrying the transaction you want to record in QuickBooks Desktop.
The next step requires you to classify the columns in the spreadsheet to authenticate the arrangement of columns in the batch transaction screen.
Now, hit the “Ctrl + A” keys and right-click on the screen, and hit the “Copy” option from the drop-down dialogue box appearing on the screen.
The final step is to right-click the first date field and tap on "Paste" in the "Batch Enter Transaction" screen.
Note: The name and the account will show red color, if they are presently not listed in the company file. Click the name or account and then select Quick Add or Set Up.
Unleash the steps to add multiple split lines on my transaction
Split transactions basically allow the users to enhance a single or more secondary split line to a transaction, which can be achieved by following the steps listed below:
The very first thing is to pick the transaction that you wish to add split lines.
In the next step, you need to tap on the "Split" button.
Then moving further, you are required to type the essential details for each split on a separate line.
Now, click "OK" to return to the main "Batch Enter Transaction Screen".
Lastly, repeat this step for each of the transaction with manifold split lines.
Monitor the steps listed below to use the class in QuickBooks Desktop
You can modify your columns to add “Class” by entering batch transaction screen.
In the organization for class to remain allied with an item in a transaction, the item must be selected proceeding to selecting the class.
This also relates to all forms and transaction entries. It should be noted that if a class is chosen earlier to an item, the class will be replaced when the item is chosen.
After that, tap on the “Save transaction” option and again tap on “Yes” on the “Confirm Account” screen.
Step 2: Deleting Transaction by Batch in QuickBooks
Having apprised you of the lucid steps to enter transactions by batch, let us now learn the steps to delete transactions by batch in Quickbooks Desktop. Presently, only QuickBooks Premier Accountant, enterprise solutions 16.0 and QB Enterprise Accountant 2016 and the latest versions, possess the aptitude to delete transactions by batch. In this section, we will be discussing the workarounds that the users can use to accomplish the same task.
QuickBooks Premier Accountant, QB Enterprise Solution 18.0, and QB Enterprise Accountant 2018 and newer.
QuickBooks desktop pro or premier 2018, QuickBooks Enterprise Solution 18.0 and earlier:
Tap on “Ctrl + D” ((Edit > Preferences > General > My Preferences) keys to delete more quickly.
You can also do this from the account register.
Next, visit the Intuit Marketplace for a third-party application that can remove the unwanted transactions at once, in case you are attempting to replace all the transactions.
Follow the Steps Below to Delete the Transaction by Batch
Initially, find out whether the Single-User mode is applied or not. If you found yourself in Multi-User Mode, then your immediate step is to head to the File Menu > Switch to Single User Mode.
After that, visit the Accountant menu and choose the Batch Delete/ Void transactions.
Now, choose the transactions you want to delete or void from the Available Transactions list.
After that, choose Review & Delete (or Review and Void option).
After performing the above steps, on the review batch, delete (or Void) transactions Screen, tap on the option to Backup and Delete (or Back Up & Void). Note that you can also skip backing up.
On the confirmation window, opt for “Yes” and then proceed.
Lastly, once the transactions are deleted or voided, you will get the option to "View Deleted/ Voided Transaction" Report.
Steps to file a batch invoice
You need to head to the Customers tab and opt for Create Batch Invoice.
Ensure the terms, sales tax rate, and dispatch method are up to date for all customers you send batch invoices to by opting for each customer.
Double-tap the customer and open the additional info tab and change the information needed.
Locate the customers you wish by searching or opting for the billing group.
Hit the next tab.
Choose the desired line item and template.
To enter a custom message, hit the next tab.
Review the list of invoices to be created, and choose create invoice.
Print or email as appropriate and hit the close tab.
Otherwise, the users can also opt for the Intuit Marketplace, in order to install a third-party app, which would assist them in deleting the unwanted transactions in a single take. In case you are considering to eliminate all the transactions, all you need to do is click on the “Remove all transactions using condense data utility feature”.
Points to Remember Before We March Forward
Before you start with entering transactions by batch, you are required to consider specific points. Let us together have a look at those points:
The very first thing that you need to remember is to create a backup before performing the steps that we will be discussing later on in this article.
“Copy multiple transactions from one company file to another”, if you wish to export transactions from another company file.
Also, remember that, if you have QB desktop accountant 14.0 and the later versions, then you can merely make batch entries of checks, invoices, credit memos, bills, credit card charges, and bill credit.
Features of Entering and Deleting Transactions by Batch in QuickBooks Desktop
Following are the features and benefits of entering and deleting transactions by batch in QuickBooks Desktop:
1. Batch Enter Transactions Feature
The first step is to choose the order in which you want to display the data of columns and from the multiple data fields.
Then, you need to enter the transactions into a personalized data entry grid.
Lastly, paste more than 1000+ transactions from Excel and save them at one place.
2. Batch Delete Transactions Feature
You are required to hide or show transactions having other linked transactions. In all other storing systems, it is generally unattainable to see whether an invoice has a payment attached to it, which makes this better than others.
We can also filter by date range, based on Last Modified Date OR Entered Date (i.e. the original creation date). This is a new filter that we never had access to in QuickBooks.
A cleared column is also great to ensure that you makes the right decision about whether you can actually want to delete or not.
List of Entering and Delete Transactions by Batch in QuickBooks Desktop
Checks
Payees including Customers, Jobs, Vendors, Employees and other names
Sales Tax Payments
Paychecks
Deposits
Credit Card Charges/ Credits
Transactions in a closed period
Inventory Adjustments
General Journal Entries
Bank Transfers
Bills and Bill Credits
Invoices and Credit Memos
Payroll Liability Payments
Down Payments
Wrapping up!
We end this article with the hope that the contents gave you a better insight into the topic enter and delete the transactions by batch in QuickBooks Desktop and also a clear view of the facts related to it. The above-discussed procedure might help you in entering and deleting the transactions. If by any chance the above-given steps don’t work best for you, then feel free to get in touch with the 24X7 QuickBooks Support team, and clear all your clouds of confusion.
Your guide to fix QuickBooks Error 80029c4a Like a Pro
From keeping track of spending to generating invoices and filing taxes, QuickBooks is a vital tool for managing company finances. It may, however, experience bugs that disrupt with your workflow, just like every other software.
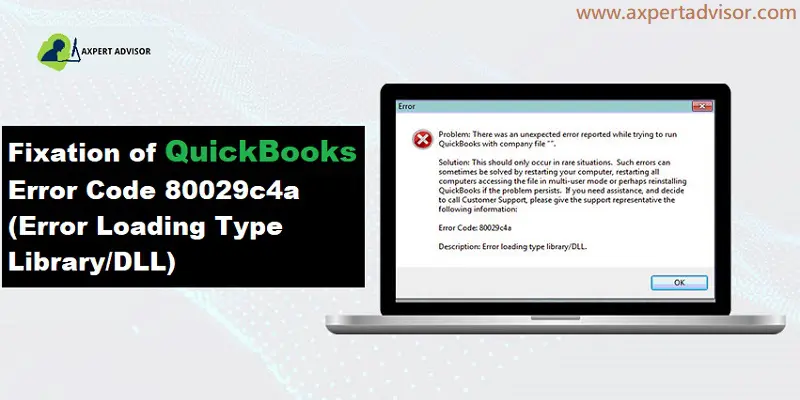
QuickBooks Error 80029c4a is an error that frequently shows up with the error message "Error loading type library/DLL can't load a dynamic link library." It is basically a warning error that implies a damaged or corrupt company file.
Don't let this error hold you back! We'll walk you through practical ways to restart QuickBooks.
You might also see another message on your desktop screen:
QuickBooks users often encounter Error 80029c4a, a common issue linked to Dynamic Link Library (DLL) files. These crucial files enable various programs to share functionalities within your system. When a DLL error occurs, typically during setup or while using specific QuickBooks features, it can lead to system freezes and significant workflow disruptions.
This guide will provide you with the complete procedure to troubleshoot and resolve QuickBooks Error 80029c4a. For immediate assistance, feel free to connect with our accounting professionals via our tech support number.
What is QuickBooks Error Code 80029c4a?
QuickBooks Error Code 80029c4a is an error that can occur when you try to open QuickBooks Desktop. It indicates that the Dynamic Link Library (DLL) file that QuickBooks needs to run has been corrupted or is missing. This error can be caused by a variety of issues, including a virus or malware infection, an incomplete installation of QuickBooks, or an outdated Windows operating system.
Updated Walkways to Follow to Troubleshoot QuickBooks Error 80029c4a
Now that you know what QuickBooks Error 80029c4a is and what causes it, let’s check out some solutions. The troubleshooting steps are simple and can be executed with the very basic knowledge of computer and QuickBooks accounting software. You can implement the following solution steps to fix this error:
1st Process: Scanning the System for Possible Malware
Many a time, antivirus detects QuickBooks files as an infected program. You shall refer to your entire virus software files and contract support for assistance.
Herein, you need to use the Windows virus and threat protection for possible virus and malware attacks.
You can go for externally installed antivirus software.
2nd Process: Run Windows System File Checker
Under this process, you would have to tap on the Start tab and type in Command tab.
Furthermore, you are supposed to push the ctrl + Shift keys and hit Enter key.
Now hit a click on to Yes tab, when the permissions dialog box appears.
Enter SFC/scannow and hit enter key.
Wait till the system file checker performs the scanning process.
3rd Process: Perform Windows Repair of QuickBooks
You would first have to select close QuickBooks and hit on the windows tab.
Access the control panel and choose to uninstall or change program.
You further will have to choose QuickBooks from the program list.
Now, tap on uninstall and next tab.
The QuickBooks installation window will appear and hit next.
You will then have to tap on the repair radio tab and hit on the repair tab.
Pick the finish tab.
Reboot the PC and open QuickBooks to check the issue.
Please make sure that that you have QuickBooks desktop download file and installation CD and license number with you before you uninstall QuickBooks and perform a clean install of QuickBooks desktop.
Under this process, you are supposed to gather all QuickBooks product information.
Furthermore, download the installation.
You would require the license number, which can be spotted on packaging.
Note down the product year and version.
Uninstall QuickBooks desktop.
Navigate to the Windows start menu.
Look for control panel and open the same.
Head to the programs and features tab and then tap on the uninstall a program option.
Choose version of QuickBooks from the list.
HIt on uninstall/change and remove options.
Tap on next and carry out the on-screen prompts.
Lastly, re-install QuickBooks.
5th Process: Update QuickBooks Desktop to Latest
This particular process requires you to move to the File menu and tap on close company or log off.
Further, hit on the file and hit exit.
Now, ensure that you are using system as admin.
Verify that there is no company open file on the system.
Now, tap on reset update and hit the get updates tab.
After you update, a screen stating update successful might appear on the screen.
Hit the Alt + F4 keys or esc and close QuickBooks.
Launch the QuickBooks software.
Hit the yes tab.
Further reboot the system.
6th Process: Updating the Security Software
Under this, you would have to update the antivirus or security software to latest version.
And add the program component exceptions as per the manual.
End the process by reopen QuickBooks.
7th Process: Run Reboot.bat
Close QuickBooks Desktop from your computer’s screen.
Go to the Folder where “reboot.bat file” is saved.
Do a right-click on QuickBooks icon on the screen and choose Properties.
Tap on Open file location.
Right-click the reboot.bat file and choose the Run as Administrator option.
The file may be listed as reboot or reboot.bat, depending on the setting of your Windows Folder Options.
A black window/box will appear with scrolling filename. Don’t close that manually and Allow the reboot.bat file utility complete.
Restart your computer.
8th Process: Uninstall and Reinstall the QuickBooks File/Program
If none of the above-mentioned solutions work, you can uninstall and reinstall the QuickBooks file/program related to error 80029c4a.
In Windows 7 and Windows Vista:
Firstly, pick the Start button on the desktop and head to Programs and features.
After that access the Control panel.
Proceed to programs and then Programs and Features.
Find “QuickBooks Pro error code 80029c4a” associated program.
Now, choose the QuickBooks Pro related entry.
Afterward, hit on Uninstall.
Follow the onscreen directions.
In Windows XP:
At first, sail to the Windows Start button and dive into the Programs and Features.
Next, access the Control panel and then Add or remove Programs.
Look for “QB Pro error code 80029c4a” associated program in the list.
Choose the QuickBooks Pro related entry.
Hit a click on Remove.
Follow the on-screen directions.
For Windows 8 & 10 users
Take your cursor to the bottom left of your screen over the Windows button and do a right-click.
Opt for Programs and Features in Windows 8 and Apps and Features in Windows 10.
Find ''QuickBooks Pro error code 80029c4a” associated program.
Now, hit a click on the QuickBooks Pro related entry.
Tap on Uninstall/Change.
Follow the on-screen directions.
What Instigates the QuickBooks Error Code 800294a?
You can bump into this sort of issue, as a result of the following factors:
One of the major factors can be if the QuickBooks system files are corrupted.
The QuickBooks application download corrupted or not correctly installed.
Furthermore, corrupted Windows registry entry from a recent QuickBooks related software modification like install.
Maliciously deleted QuickBooks related files.
Antivirus or firewall blocking QuickBooks
There is an issue with Windows registry.
When the Windows startup or shutdown occurs during installation of windows OS.
Your antivirus mistakenly marked a QuickBooks Desktop file as being infected with a virus.
Third-party software has mistakenly deleted QB Pro-related files.
Symptoms of QuickBooks Error 80029c4a
The following can be the options to identify the error with much ease:
In case the error appears on the screen with the error message.
If the error appears on the screen and crashes the running program window.
The system crashes frequently.
The windows run sluggishly or the system freezes on a regular basis.
Winding up!
That was all you require to learn for fixing the QuickBooks error 80029c4a. As always, in case of any queries, comments, or concerns, contact us at our QuickBooks error support team! Give us a call anytime, and leave the rest on us! We are a team of professionals, who do not leave any stone unturned to provide the best possible support services.
FAQs related to QuickBooks error 80029c4a
This error is an error that occurs when QuickBooks is unable to load a dynamic link library (DLL) file. This error can prevent QuickBooks from opening, and it usually occurs after a Windows update or after an antivirus program has removed a QuickBooks file as a false positive.
Here are some steps you can take to fix this error:
Make sure QuickBooks is updated to the latest version
Run a full virus scan on your computer to check for any malware or viruses that may have caused the error
Add QuickBooks exceptions to your antivirus software
Try to uninstall QuickBooks and then reinstall it.
You can use the QuickBooks Diagnostic Tool to diagnose and fix any errors in QuickBooks.
The error message that appears in QuickBooks typically reads:
"Error loading type library/DLL".
This error message indicates that QuickBooks is unable to load a Dynamic Link Library (DLL) file, which is a shared library of code that QB uses to perform certain tasks. This error can prevent QuickBooks from opening and may occur after a Windows update or after an antivirus program has removed a QuickBooks file as a false positive.
Are you struggling with QuickBooks Error 12157 and finding yourself unable to update your payroll or QuickBooks Desktop? This common issue, part of the QuickBooks 12000 error series, typically signals underlying web connectivity problems within your Windows operating system, often related to the Microsoft Win32Internet (WinInet API).
QuickBooks Desktop relies on the WinInet API to facilitate internet protocols like FTP, HTTP, and Gopher, which are essential for downloading and applying critical updates. When Error 12157 strikes, it usually means your software is encountering difficulties connecting to the internet to complete these updates. This can prevent you from getting the latest features and tax table updates, potentially disrupting your payroll and other QuickBooks functionalities.
If you're encountering this frustrating error message, you've come to the right place. This guide will walk you through the common triggers behind QuickBooks Error 12157and provide you with effective, step-by-step solutions to get your QuickBooks back on track. Stay with us to successfully troubleshoot and resolve this error!
Methods you Need to Rectify the QuickBooks Error 12157
The best part about QuickBooks software is that any errors that are seen in this software can be resolved with much ease, using some unique set of steps. You can perform the below-stated set of steps, so as to get rid of the error code 12157 permanently. Let us explore each of the set of steps one by one:
Method 1: Restoring the System
The first method you need to opt for is to restore the system. Herein, you are supposed to perform the steps listed below:
At first, you would have to hit on start the system option.
You further need to log in as the system admin.
And hit start to catch and opt for all applications, accessories, and computer tools, and later on, choose the system repair tool.
You are further required to tap on the restore point and after that hit the next tab, and also choose the advanced system to restore the point.
Hit on the next tab and also on the confirmation window.
Lastly, you need to reboot the system.
Method 2: Add QuickBooks and its Additional Processes to The Exception of Firewall
There can be situations when the firewall or internet security settings aren’t configured in a proper manner, then in that case you would have to ensure that ports 80 and 443 are active. You are required to have access of the following files:
QBDBMgrN.exe
QBServerUtilityMgr.exe
AutoBackupExe.exe
FileManagement.exe
FileMovementExe.exe
IntuitSyncManager.exe
QBGDSPlugin.exe
QBW32.exe
Dbmlsync.exe
QBLaunch.exe
QuickBooksMessaging.exe
DBManagerExe.exe
QBCFMonitorService.exe
QBDBMgr.exe
Method 3: Change the Internet Connection Settings
In certain situations, inappropriate internet connection settings might trigger this error. The steps to be performed to rectify this issue can be as follows:
Start off by opening QuickBooks.
You need to then advance to the help menu.
Furthermore, choose the internet connection setup.
Choose ''use my computer’s internet connection settings'', so as to establish a connection when this application accesses the internet.
You are then supposed to hit on the next tab.
And furthermore, steer to the advanced tab.
Next, tap on the restore advanced settings tab.
Now you would have to hit the ok tab and then hit on done.
Method 4: Reset the System’s Date and Time
One of the major reasons behind the occurrence of such an error can be the misconfigured date and time of the computer system. This can also be resolved using some set of steps. So as to rectify the issue by configuring the root cause, you are supposed to perform the below set of steps:
You need to start off by visiting the clock on the right bottom of the system’s screen.
The next step is to right-click the mouse.
You are further required to pick the adjust date and time option that would appear after you perform the steps stated above.
Heading forward, you would have to specify or select the current date, along with the current time.
Under this method, you would further have to close the screen. This can be done by hitting the OK tab, once the date and time are configured to the current time.
Once you are done with these steps, close the QuickBooks desktop software.
You further need to reopen the QuickBooks.
At last, run the QuickBooks update again and observe whether the error 12157 got rectified in a proper manner.
Method 5: Restoring Advanced Settings
Initially, one has to close the QuickBooks desktop.
Furthermore, open internet explorer.
Later on, opt for the tools tab, and from the drop-down choose internet options.
Hit on the advanced tab.
Choose the restore advanced settings tab and close the window and you are done.
Method 6: Make Sure Not to Use More Than One Version of QuickBookson Same PC
Several times, users install more than one version of the QuickBooks software on their system. Such action may contribute to the QuickBooks error 12175. Proceed with the steps below to make sure that you only have one version of the software installed on your system.
Visit the Downloads and Updates page of QuickBooks.
Now, choose your country.
Afterward, opt for the Product (i.e., QuickBooks)
Then, opt for Version and move to Search.
Now, opt for 'receive the most recent updates.'
Now, set up the latest version of the QuickBooks software.
Once it is established that you only have one specific version of the software set up on the system, try launching the QuickBooks software to ascertain that the error 12157 got wiped out.
What Factors Instigate the QuickBooks Update Error 12157?
As we stated earlier, the QuickBooks error 12157 can be instigated due to the following factors, which include:
One of the major factors behind the occurrence of such an error can be, just in case the date and time are not configured correctly.
If there is any restrictive setting of firewall or internet security applications.
That was all you need to learn about QuickBooks error code 12157. As always, in case you have any queries or concerns, feel free to contact us via our helpline i.e., 1-888-368-8874! However, if by any chance this error continues to trouble you, then do not hesitate in speaking to our QuickBooks error support professionals and certified experts.
QuickBooks has revolutionized accounting for businesses, offering powerful features like electronic funds pre-authorization and employee time tracking. However, like any sophisticated software, users can encounter technical glitches. One common errors is QuickBooks Banking Error 9999, often reported as a script error that disrupts the crucial connection between your bank and QuickBooks Online.
This article provides a complete guide to understanding and resolving QuickBooks Banking Error 9999. By following our detailed steps, you can quickly get your banking connection back on track and ensure seamless financial management.
What is QuickBooks Banking Error Code 9999?
Error code 9999 in QuickBooks Online pertains to the script error. It impacts your internet connection and impedes the connection between QuickBooks Online and the Bank. Additionally, your computer begins to freeze or reacts to your requests slowly. It consequently has an impact on your company's operations and may lead to the deletion of your essential company files. A faulty installation of QuickBooks is the main reason for such a mistake. Let us get to the depth of the issue and know the various causes and ways to resolve it.
Error
Sorry, we can’t update your account. Please try updating again later. (Error 9999)
It is the banking error 9999 in QuickBooks Online, and whenever you identify this error, you should immediately contact your bank partner or take help from an expert.
Ways to Troubleshoot the QuickBooks Error Code 9999
The main cause behind this error is when QuickBooks Online cannot establish a seamless connection with the Bank. You may experience this issue with several banks. Follow the methods listed below to get rid of the QuickBooks Banking Error 9999.
Method 1: Clear Browser's Cache Files
For Google Chrome
Launch Google Chrome and proceed to 'Settings,' followed by hitting the 'Clear Browsing Data' option.
Afterward, head to the 'Cached Images and Files' option.
Hit on the 'Clear Data' button.
The cache files will be deleted.
For Firefox
Type 'About: preferences#privacy' in the address bar and hit on the 'Enter' key.
Choose the 'Clear Recent History' option.
Finally, hit on 'Clear Now' after choosing 'Cache' from the list.
For Internet explorer
Hit on the 'Ctrl+Shift+Delete' buttons together.
From the 'Delete Browsing History' page, proceed to the 'Temporary Internet files and website files.'
Finally, hit on the 'Delete' tab.
For Safari
Hit on 'Develop' from the top menu.
Choose the option 'Empty Caches.'
Method 2: Report the Issue to your bank
Once the concern is dealt with, you will certainly receive an email straight from the team that settles banking errors, not from the customer care team.
Method 3: Clean Off Any Junk Files
When you remove files from your PC, it could leave temporary or trash files behind. This, in turn, causes a conflict between various programs on your system. You might also be unable to connect to your bank account because of these junk files. As such, it is mandated that you delete the temporary files from your PC to prevent any further conflict.
The Disk Cleanup tool is quite useful for this. The steps are as follows:
Hit on the 'Win + R' buttons together to show the 'Run' box on your screen.
In the 'Run' box, type 'cleanmgr.exe.'
Hit the 'OK' button or press the 'Enter' key.
Subsequently, choose 'Clear up system files' in the 'Disk Cleanup' window.
Hit on the 'Yes' button after that. You will be given a list of files that will be deleted as a result of the process.
Now, hit a click on 'OK' after marking each item on this list.
Next, choose 'Delete Files' from the menu.
Wait until the Disk Cleanup tool removes the temporary files from your system. Your system's cache will be quickly cleared by conforming to this method. This shall also allow you to continue managing your bank account uninterruptedly.
Method 4: Disconnect and Reconnect Bank Account
Follow these procedures to disconnect your bank account from QuickBooks Online:
From the left side, first, choose the 'Banking' tab.
Afterward, hit on the 'Edit' option next to the account you want to disconnect from.
Subsequently, opt for the 'Disconnect this account' option from the 'Account' window.
Hit on 'Save and close.'
Afterward, follow these procedures to reconnect the bank account to QuickBooks Online:
Hit the 'Add Account' option under the 'Bank' tab.
Enter your bank account login information now, and then choose 'Continue.'
Then, click on the 'Bank' option after choosing 'Securely connect.'
Choose your account from the 'Account type.'
Next, choose a credit card or bank account.
Lastly, hit on '+Add new' and then tap on 'Connect' if you don't already have an account.
Method 5: Log in to the Bank's website From the Web Browser
You may no longer link your account to the Bank for security reasons. As a result, your Bank must perform additional verification. Choose a web browser of your choice, and then proceed to the website of your Bank. Subsequently, sign in to your bank account using the security credentials. Enter the OTP that the Bank sent you or respond to any security inquiries for validation. Try updating your Bank feeds in QuickBooks Online after logging in successfully.
If you still face the QuickBooks online error 9999 even by logging into the Bank's website, then proceed to Method 6.
Method 6: Update Your Bank Account
If you update your bank account a few times, the error might get fixed. To update your Bank, follow the instructions below.
Launch QuickBooks online and follow up by choosing the 'Banking' option.
Subsequently, hit on 'Update.'
Repeat the same action number of times.
Implement the next method if upgrading your Bank doesn't fix the problem.
Method 7: Manually Import Transactions
You can visit the Bank's website. Subsequently, download the transactions in the '.QBO' format, and thenimport them into QuickBooks Online. This step can be performed if none of the methods mentioned above for fixing the error code 9999work out.
Method 8: Repair the Registry Files
The Windows Registry is essential for running several functions. It thereby becomes necessary to fix any damaged Windows registry files at the earliest. You can use the command line to fix the Windows Registry files. Just follow the below-mentioned steps:
Advance to the 'Start' menu.
In the Search box, type in 'Command.'
While holding down the 'Ctrl + Shift' keys, hit on the 'Enter' key.
If prompted, hit on the 'Yes' option.
In the 'Command Prompt' window, type in the 'Regedit' command.
Afterward, hit the 'Enter' key.
Right-click the 'key associated with Error 9999' in the 'Registry Editor.'
Proceed to the 'File' menu.
Afterward, hit on the 'Export' button.
The backup key should now be saved in the folder you selected.
Choose 'Selected branch' in the 'Export range' box.
Finally, hit on the 'Save' option.
Ensure that the '.reg file' extension is used to save the file.
Make a backup of the registry entry in the final step.
You can then check if the QuickBooks Banking Error 9999 got fixed.
Method 9: Use the System File Checker
You may easily check your system files with the Windows System File Checker. If you discover any troublesome files that are giving you issues, fix them right away. You can make use of the SFC command to complete this operation. The Command Prompt window can be used for this. For your convenience, we are assisting you with the following steps:
Initially, hit on the Windows key.
In the 'Search' box, type 'Command.'
Choose 'Run as administrator' by right-clicking on the 'Command Prompt' button.
Subsequently, type the following command in the command prompt: ‘SFC/scannow.’
Hit the 'Enter' key.
This procedure could take a short while. Restart your computer after the procedure is complete.
Later, check if this method fixed the QuickBooks problem 9999.
When using online banking, it can be incredibly annoying when an unexpected issue pops up and prevents you from continuing any further. The connection between QuickBooks and the Bank is disrupted due to the appearance of the error code 9999 in QuickBooks.
Why Does QuickBooks Banking Error Code 9999 Occur?
Numerous factors may contribute to the occurrence of the Banking error 9999 in QuickBooks. Following are a few of them:
The link between the Bank and Intuit Server is too slow due to a poor internet connection.
Antivirus or firewall application obstructing the connection between the QuickBooks server and the Bank's website.
Due to excessive browser cache files.
When Windows firewall or antivirus firewall blocks the bank website or Intuit server to connect.
Some problems at the Bank's end.
A corrupt and incomplete installation.
In case the QuickBooks files are mistakenly deleted.
Malware or virus-corrupted windows system files.
A variety of factors can cause QuickBooks error 9999, so it is vital that you should troubleshoot each of the possible causes to prevent it from recurring.
Primary Signs and Symptoms of the QuickBooks Error 9999
There can be various symptoms of QuickBooks error 9999, a few of which are listed below -
You will not be able to get connected to the bank.
The browser will slow down and your system will experience extreme lags.
You will get a dialogue box stating “Sorry, we can’t update your account. Please try updating again later. (9999)"
Wrapping up! Still, facing the issue? Just contact our Support Team,
In this article, we've tried to cover every aspect related to the effective methods for fixing this QuickBooks banking error 9999. We hope that this piece of writing served your purpose. However, if you are facing any such errors or any other problem associated with it or require any further assistance, reach out to our QuickBooks online error support team through our helpline i.e., 1-888-368-8874.
Learn Simple Steps to Fix QuickBooks Error Code 6189
QuickBooks users often encounter various errors, and QuickBooks Error Code 6189, 77 is a common one. This particular issue, part of the 6000-error series, is notorious for preventing access to your crucial company file. When this error strikes, you might see a message on your screen indicating that QuickBooks is unable to open the company file.
But don't panic! This comprehensive guide will walk you through the causes of QuickBooks Error 6189, 77, and provide step-by-step solutions to get you back to work efficiently. From common error like a damaged company file to more complex network issues, we've got you covered.
Message
Description
Error
QuickBooks is unable to open this company file. It may have been opened by another user. You should ask that user to switch to multi-user mode so you can both use the company file at the same time. The file could also be located in a read-only network folder. If it is, ask your system admin to make the file accessible. Error codes: (-6189, -816)
Warning
"An error occurred when QuickBooks tried to access the company file (-6189, -816),” don’t worry. There’s an issue with your multi-user network, not with your data file.
Read on this post to know how you can spot, avoid and fix QuickBooks error message 6189 by your own. However you can save your time and efforts by taking help from our dedicated support line to resolve this problem quickly.
Basic Procedures to Fix QuickBooks Error Code 6189, 77
Getting rid of QuickBooks error 6189 becomes a little easy with the steps scribbled below. Let us explore each of the measures that can be taken one by one:
Procedure 1: Reboot the system along with the server
Rebooting the system and the server can be one of the most basic fixes. Restart the systems having company files and along with that reboot the server and head forward till the issue is resolved.
Additional license is not required during the installation of the Database Manager.
Install the Database Manager if there is no QuickBooks database user.
Now, you need to restart your server after installation is complete.
Inside the QuickBooks Database Server Manager, browseto the location of your company file and then select Start Scan tab.
The database server manager will auto repair your Firewall permissions. After that hit a click on Close option once the scan process finishes.
After the installation process is complete, you are suggested to reboot the server and you are done with the process.
Procedure 3: Check if your data file is stored on a network drive
Ensure that your QuickBooks file is not stored on a NAS device or any other Removable drive.
These devices are not allowed to run the Database server Manager.
Sometimes this setup can trigger data corruption.
Procedure 4: Resolve .Tlg and .QBW file issue
Under this process, you need to open the system and browse the transaction log file. Name of the file will be similar to that of the company file, except .tlg extension.
You need to right-click on the transaction log file and go for rename option.
You now have to insert OLD after the company file, which would look similar to companynameold.tlg
Moving ahead, QuickBooks will regenerate .tlg files on its own.
Reboot the system and check if the issue is fixed.
Procedure 5: You can use encryption software on your computer
It’s not advisable to encrypt your company file.
Don’t encrypt company file in your computer.
Procedure 6: Run Quick Fix my Program from the QuickBooks Tools Hub
Basic symptoms of error code 6189, 77 in QuickBooks
It will be a little for you to spot the error, exploring the signs and symptoms listed below would surely help.
One of the basic signs can be each time you open the same program, you might witness your system crashing.
In case the system hangs for a couple of minutes.
If the warning message appears on the screen with an error description.
Also, in the event of an active window, the system crashes immediately on the arrival of the issue.
Another sign can be if the system slows down.
Summing up!
The above-mentioned methods should enable you to resolve QuickBooks error code 6189. However, these do-it-yourself methods don’t work all the time. In case the issue still persists after performing the given solutions, you should not waste any more time and immediately contact our 24/7 QuickBooks enterprise error support geeks.
Our tech professionals will surely come up with the most appropriate solution for you. We boast a team of experienced U.S based accounting professionals who can provide you with precise solutions in no time. So, get on a call with us and get all your QB-related doubts and queries sorted out.