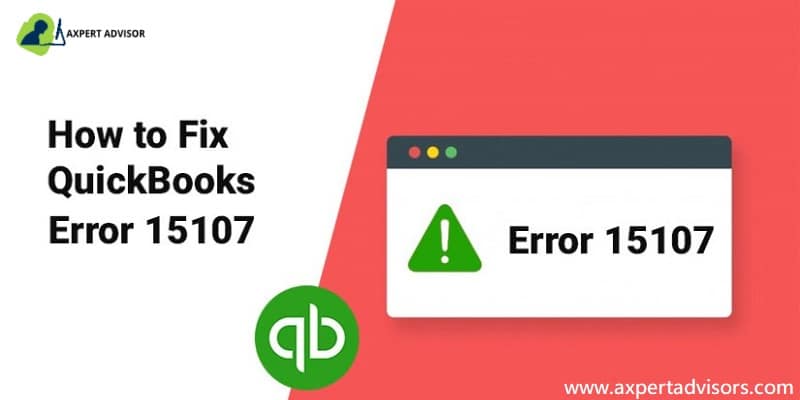
Here's we have explored the ways to resolve QuickBooks payroll error 15107
QuickBooks is an invaluable tool for businesses worldwide, streamlining financial operations and automating accounting tasks. Intuit consistently releases updated versions, ensuring millions of subscribers have access to the latest features.
However, like any software, QuickBooks can encounter errors that disrupt your workflow. One common issue is QuickBooks Payroll Error 15107. This error can prevent you from efficiently managing your payroll, leading to significant delays and frustration.
This guide provides comprehensive solutions to help you resolve QuickBooks Payroll Error 15107 and get back to business. For immediate assistance, don't hesitate to connect with our dedicated support team. We're here to answer all your queries and provide step-by-step guidance.
What are the Workable Solutions to Resolve QuickBooks Error 15107?
Below are discussed in detail different solutions that can be implemented for permanent resolution of Error 15107 in QuickBooks.
Solution 1: Reboot your computer system
The very first solution is to restart the computer system. This is one of the basic methods that one can opt for in order to deal with this error. When we restart the device, the error is compelled to reset and also move out of the way of the screen. Thus, it is suggested to restart the computer. Also, when any device is restarted, it works in a more efficient way. This is one of the basic and simplest solutions, and in case this solution does not work, one can move on to other solutions listed below.
Solution 2: Downloading the QuickBooks updates again
Another solution that one can opt for is downloading the QuickBooks update again. The steps that one needs to follow in this method are scribbled below:
First step is to shut down the QuickBooks software.
Next step is to visit the “C:\Documents and Settings\All Users\Application Data\Intuit\QuickBooks <version>\Components”
Then search for the folder by the name “DownloadQBxx”, where the xx is the version of QuickBooks.
Then tap on “Reset the updates” and check box to roll back the update.
Now, download the newest update again by simply hitting on the “Get updates” button.
The next step is to wait for the download to finish.
Finally, install the update by tapping on the “Install Now” button.
Solution 3: Running Reboot.bat file
In some instances, running the batch file named “Reboot.bat” in the QuickBooks folder can effectively resolve the ongoing error, and other update errors belonging to Error code 15xxx family. The steps for running the file are:
Make a move to the QuickBooks folder. For you reference, you can right-click on the QuickBooks icon, and then tap on Properties to choose Open File Location tab.
Once in the QuickBooks folder, look for the Reboot.bat file and once located, right-click and opt for Run as administrator tab.
Wait for the culmination of the process.
Finally, run QuickBooks and try the update process again upon hitting on the Help tab and then choosing Update QuickBooks Desktop option.
Solution 4: Perform a QuickBooks Clean Installation
In order to get any kind of assistance, one can use QuickBooks clean install tool. This is one of the most effective tools that can be utilized to get rid of this error. All you need to do is to follow some steps.
The basic step is to download the tool named “QuickBooks Clean Install” and then save it on the desktop.
Next step is to double-tap on the “QuickBooks_Clean_Install_Utility.exe.”, in order to open the setup file.
Once you have performed the above step, a new box will appear asking for permissions, then click on the “I Accept” option on the license agreement.
Then, you will be directed to another box. Hit a click on it and choose the “Continue” button.
The last step is to hit on the “OK” button.
Solution 5: Repair QuickBooks Desktop
Repairing QB Desktop can help in fixing Error message 15107 in QuickBooks. For this, follow the trails below:
Initially, open the Control Panel, and upon opening the window, opt for Programs and Features.
Here, the user should choose QuickBooks Desktop version which is facing the update-related issues.
Tap on the icon and follow up by hitting on Uninstall/Change tab.
Now, click on Repair tab and get the accounting program repaired by following the onscreen directions.
Later, once done, restart the computer, and try the update process again.
This should exterminate Update Error 15107.
Solution 6: Install digital signature certificate
You need to follow the path C:\Program files (x86)\ Intuit\QuickBooksXX (XX means the QuickBooks version being used)
You will see a Search bar, where you are required to insert QBW.exe. Herein, right-click the QBW32 and from the open list, tap on the Properties tab.
Look for Digital signatures and opt for Intuit from the list.
Head to the Details tab.
Choose the View certificate and hit on the Install certificate option.
Opt for Next till the Finish tab appears.
Restart the system to update the changes.
Try to download the update again.
Solution 7: Configure Internet settings
Initially, run the Internet Explorer browser, and make a move to the Internet Options.
From there, advance to the Connections tab.
Within the Connections tab, opt for the LAN settings and place a checkmark in the box besides “Automatically Detect Settings”.
Also, make sure that the Proxy server is empty. Follow up by hitting on Ok.
Now, shift to the Advanced tab, and therein, checkmark SSL 2.0 and SSL 3.0.
Make sure to unmark the option besides Check for Publishers certificate.
Also, checkmark TLS 1.2, and uncheck TLS 1.0 and TLS 1.1 checkboxes.
Once done with all the foregoing steps, try the QuickBooks update process once again. Error 15107 should no longer be showing up.
Solution 8: Switch to normal startup mode
For this, you need to access the run box by pushing the Windows + R keys.
Enter in 'Msconfig' and hit on the OK tab.
Look for Normal startup mode and also tap on it.
Hit on the Apply tab and also tap on the ok tab.
Reboot the system to save changes.
What factors trigger QuickBooks error 15107?
Well, throwing light upon the various causes of this error, it is generally believed that this error occurs while updating QuickBooks desktop or payroll updates. Certain other errors are also detected, including
Any damage or corrupt registry files may cause this error.
Cases when the payroll files are damaged or corrupted
Incomplete or intentionally closing QuickBooks updates may also cause such errors.
General Symptoms of Error Code 15107 in QuickBooks Payroll
QuickBooks payroll error 15107 is regarded as one of the most common errors, and certain symptoms can be observed that can help the users to detect this error in advance. The symptoms of this error can be as follows:
The message of error is being displayed on the screen.
If the proper update file cannot be accessed or started up in the software.
Also, if QuickBooks is not properly configured to deal with the newest versions of the file.
Conclusion!
The current discussion focused on the different solutions to fix QuickBooks error code 15107. If you need technical assistance of any kind, just give our QuickBooks payroll error support experts a call at the helpline, i.e., 1-888-368-8874.
Learn the Possible ways to resolve QuickBooks error code 1935:
QuickBooks is an comprehensive software for small to mid-sized businesses, offering the most amazing features and functionalities that streamline accounting and financial management. Despite its advanced design, users may occasionally encounter technical issues, such as QuickBooks Error Code 1935.
This error can disrupt your workflow and prevent crucial installations or updates. Understanding its causes and effective solutions is key to maintaining seamless business operations.
In this guide, we'll dive deep into the reasons behind QuickBooks Error 1935 and provide you with clear, actionable steps to resolve it. If you need further assistance or have lingering questions, our dedicated customer support team is always ready to help clear up any confusion.
What is QuickBooks Error Code 1935 & Why Does it Occur?
QuickBooks Error code 1935 takes place when your system is installed and turned off while running a program. The major reason behind this error is that Microsoft component, .NET Framework, is missing or not working. While trying to install the QuickBooks desktop or Microsoft .NET Framework on Windows, you may see one of the following error messages on your computer screen:
Error 1935: This setup requires .NET Framework
Error 1935: An error occurred during the installation of assembly
Solutions to Resolve the QuickBooks Error Code 1935
There can be a list of solutions that can work in order to get rid of QuickBooks Error 1935, out of which a few are listed below along with the steps to be followed in each of the procedures:
Solution 1: Download and Install QuickBooks Install Diagnostic tool
The first thing is to “Restart” your computer.
Next step is to log in to the system as “Administrator”.
Then connect the system to an internet connection.
Now double-tap on the “QBInstall_Tool_v2.exe” file and then close all the open programs which are running in the system’s backend.
Once the system’s diagnostic has completed, then all you need to do is “Reboot” your computer system.
The final step is to “Install” your QuickBooks software.
Solution 2: Repair or Reinstall Microsoft .NET Framework
In this method, the very first step is to access the “Run” window and then tap on the “Windows + R” keys on the keyboard.
Fill in “Control Panel” and hit the “OK” option.
Next step is to tap on the “Uninstall” option.
Now tap on “Turn Windows feature ON or OFF.”
After that, turn on .NET Framework 4.5 if not enabled. Also, close the Windows feature window and then reboot the computer. Now, press "OK" to repair the .NET Framework simply by unchecking the box and also rebooting the computer. Re-enable .NET Framework if already enabled, and reboot.
In this step also, you have to check ".NET Framework 3.5", by simply clicking the box.
Finally, opt for "OK" if not enabled, and then reboot the computer. Also, repair the .NET Framework just by clearing out the box and rebooting the computer.
Solution 3: Install the Latest Windows Updates
In this method, visit the “Start” button.
After that, type in “Update” and then hit “Enter”.
After this step, the Windows update dialogue box will appear.
Hit the “Install Updates” button if any updates are available.
Solution 4: Disable your Antivirus and Install QuickBooks
In this method, the first step is to restart the computer that has QuickBooks install error 1935 and then perform the installation process.
Make sure to stop the anti-virus program.
Install QuickBooks and .NET framework, in case if not present already.
When the QB and .NET Framework are successfully installed, restart the antivirus program.
Solution 5: Manually Repair the Microsoft .NET framework
First step in this method is to refresh the Microsoft .NET framework.
Tap the Windows + R keys and type 'msconfig', followed by hitting the enter tab.
Choose the normal startup in the general tab. Hit on OK.
Conclude the process by rebooting the PC.
What are the Symptoms Indicating QuickBooks Error 1935?
When it comes to the various signs indicating the onset of the Error code 1935, they can be diverse. A few of the most common factors are listed below:
The very first symptom is that the computer periodically freezes for a few seconds.
QuickBooks encounters a problem, and a message stating, “We apologize for the inconvenience” appears on the screen.
Error 1935: This setup requires .NET Framework to appear every time.
In your system the .NET Framework component is not installed, is damaged, or a third-party program is preventing the QuickBooks desktop installation.
Windows runs sluggishly and also responds slowly to keyboard as well as mouse input.
Corrupted system file entries, or there are few damaged Windows System Files.
Factors Leading to the QuickBooks Error 1935
You might wonder why this error actually happened. Thus, to answer your question, we have come up with some of the most common reasons. There can be numerous causes of QuickBooks Error code 1935; out of the huge list, we have enumerated below some of the most common factors.
The very first factor that may lead to this kind of error is when the Microsoft .NET Framework is not installed.
An outdated Microsoft .NET Framework.
Even the corrupted Microsoft .NET Framework software may end up causing such an error.
Incomplete installation of QuickBooks is another commonly encountered cause.
Also, this error can be detected when the QuickBooks Software that you downloaded is corrupted.
When some other program accidentally deletes QB files.
Even in the case of a virus or any technical infection affecting the Windows or any other software files.
These were a few of the factors that may end up in this kind of error. Let us now find out the solutions to tackle this error.
Wrapping up! Facing trouble? We are always there to assist!
We have discussed the effective and easy ways to flee away from the QuickBooks error code 1935 in the best possible way. Hopefully, the above-suggested solutions will definitely rectify the error for you. However, in case you are unable to resolve the error, simply get in touch with our QuickBooks enterprise customer support team.
Learn 9 east tips and ricks to navigate QuickBooks online more faster to make more profits:
QuickBooks Online is a powerful, user-friendly accounting and bookkeeping solution designed to simplify financial management for businesses of all sizes. While it's intuitive, unlocking its full potential can significantly boost your productivity. This guide provides practical, actionable tips to help you to navigate and utilize the robust features of the QuickBooks software more effectively. By implementing these strategies, you'll streamline your accounting tasks, save valuable time, and gain greater control over your finances. You'll learn to do things faster, like creating invoices and receipts, finding company settings and customer details, and tracking expenses, among many other useful features.
Read on to transform your QuickBooks Online experience and accelerate your workflow.
Steps to Navigate QuickBooks Online More Faster
This blog post includes steps to teach you how you can navigate in QuickBooks. Just follow the steps provided and navigate the software like a pro.
1. Know the Dashboard
Right after you log in to QuickBooks with your credentials, you will see the dashboard. It shows a quick overview of your business. You can find it in the navigation bar in the first left. It’s simple to use as all you are required to do is to click on the dashboard and read about your business. The dashboard offers crucial information that a must to know for every user.
2. Make Use of the Search Bar
Use the search tab (the magnifying glass on the top right) to find checks and invoices that you have created in the past. Type in unique credentials such as the check date, transaction number or amount to search them.
3. Learn About the Profit & Loss
You can also learn about profit and loss made by your business in the QuickBooks dashboard. Also, you can find bank account details, check balance, get the summary of sales, read customer’s overdue reports, and more.
4. Create Your First Invoice
In order to add sales or invoices, you can follow the below steps:
Tap on the Invoices tab and then head to the blue New Invoice button.
Type in the client details and Save them. The same customer details will show up in a drop-down menu. Later, when you will have to create invoices, the customer details will be auto-filled.
Enter price, quantity, and other product details. You will also have to select the tax percentage, required to be included or excluded.
Choose the Invoice option as per your convenience.
You may also include special conditions like delivery payment in the Terms Box.
Hit on Save after the invoice is complete or save it in the draft if it’s incomplete.
5. Add With the Plus Menu
Use the Plus sign to quickly add new items. This feature will enable you to create customers, add transactions, Vendors, Sales receipts or Invoices, etc.
6. Get Familiar With the Left Navigation Bar
You will find many useful sections in the navigation bar. Here, you can view invoicing reports of your customers as well as your business products, sales reports, and other varied reports that you may like to review.
7. Learn Uses of Gear Menu
The Gear Menu icon holds some seriously useful features. It offers information about your company profile and settings. In the top right corner, you can find the Gear icon is located at the top right. It’s used to manage, find details and make changes and corrections in the chart of account.
8. Read Reports
You can find the Reports on the left side of the screen, below the invoices. You can open it from here and also access the QuickBooks reports.
9. Use Advanced Accounting Tools
The Advanced Accounting Tools is used for budgeting, reconcile, Audit logs, importing data, and other crucial tasks.
Now, go ahead and test yourself and make more profits. See how much you have learned from this article.
Winding up!
In case you need personalized assistance you can dial our toll-free QuickBooks support number and speak to our certified experts. We will be happy to assist you. Our professionals have been serving clients across the globe and are well versed with all the technical complexities involved in troubleshooting the error codes. All you need to do is get in contact with our experts via phone call and let our experts handle the issue.
Learn how you can fix QuickBooks error 30159 like a Pro
For any business, maintaining accurate payroll records is paramount. That's why the feature of QuickBooks desktop is so vital for organizations worldwide. However, users occasionally encounter QuickBooks Error 30159, a common issue that surfaces when attempting to upgrade payroll.
This article will break down what QuickBooks Payroll Error 30159 is, explore the reasons behind its occurrence, and provide a range of effective solutions you can use to fix it yourself. While we'll guide you through the troubleshooting process, remember that our dedicated support team is always here to offer expert assistance and ensure you get the best possible resolution. Let's get your payroll back on track!
What is QuickBooks Desktop Payroll Error 30159?
If there is an improper file setup in the operating system of the computer that is being used to upgrade the payroll, then it will trigger QuickBooks Payroll Error 30159. It is an error message that appears on the screen when you are running windows compatible programs.
QuickBooks Error Code 30159 (Screenshot)
Updated Solutions to Fix QuickBooks Error Code 30159 easily
Check out the following solution methods in order to rectify the QuickBooks error code 30159:
Solution #1: Update your System
As we mentioned earlier, there are a number of methods using which you can solve the QuickBooks Error 30159. So, here are the step by step solutions that you can use to optimize the performance by fixing the Payroll errors of QuickBooks:
Your computer might have been running on a pretty older version. This can be the cause of Payroll error popping up. So, you can fix this by manually updating the system. Here’s how:
Log in to your system as an "Administrator"
Visit the "Start" button and then "All Programs"
Hit on "Accessories" and then on the screen, click on "System Tools"
On the new window, tap on "System restore"
Look for the option of "Restore my computer to an earlier time" and click on "Next."
Keep hitting on the "Next" buttons until the confirmation window appears
Once the process is complete, restart the computer, and that is it.
Solution #2: Performing Disk Clean-up
QuickBooks payroll error 30159 can also be resolved by simply cleaning up the disk on your system. For Windows 8 or 8.1 users, the steps to be followed are listed below:
First of all, the user needs to visit "My computer".
The next step is to look for "Settings" and then hit on the same.
Now, the user needs to look for "Control Panel" and then hit the same.
After that, choose the "Administrative tools".
And then tap on the "disk cleanup option".
Moving ahead, the user needs to move to the "list of drives".
And then, tap on the "drive" you want to clean by running disk cleanup.
The next step in the process is to move to the list of files to delete.
And then, the user will have to choose the "files" that they wish to clean by running the disk cleanup.
The last and final step in the process is to tap on the "Ok button" and hit "delete files tab".
For Windows 10 and 11, the steps involved are as follows:
First of all, type "disk cleanup" in the search bar.
And then, hit the "Enter" key.
The next step is to move to the "list of drives."
Moving ahead, choose the drive.
And after that, move to the "list of files" to delete.
Now, choose the files (to clean).
And then, the last step is to hit the "OK button" and the "delete the files button."
Solution #3: Scanning the affected programs
Open the "Program" and hit the "Scan" option. The program will start to scan the error.
Afterward, choose the Fix QuickBooks Errors option.
Restart the computer.
Solution #4: By Using System Restore in Windows
Open the search box and search for "System Restore"
Choose "System Restore" and enter "Administrative passwords"
Follow the steps explained in the wizard properly
Restore the system completely.
Solution #5: Adding up EIN to the company file
Firstly, log in to QuickBooks and Select the "Payroll" option.
Click on “Use my existing Payrolls Service”.
On the “Account Maintenance” window, click on Add file and mark the radio-like button which is present against Add EIN Number.
Check for the "Radio button" being disabled for correct subscription to EIN Number.
Hit on "Next" and review all the information provided in the wizard.
Return to QuickBooks Desktop.
Solution #6: Editing and reentering the payroll service key
Under this process, you simply have to move to the employees menu.
Furthermore, hit on the my payroll service.
You need to then tap on the manage service key and also hit on the account and billing information.
You are then required to find and select the payroll service key and also go for the remove tab.
Heading forward, you are required to tap on the add tab.
And enter the active payroll service key and choose the finish tab.
End the process by tapping on the ok tab.
Solution #7: Use Windows file checker
You are required to log in as a system admin.
Moving ahead, you need to hit on the Windows start tab.
Push the Windows + R keys and access the run box.
You are then supposed to type in CMD and hit on the enter tab.
You will see a black screen on the desktop.
Where you would have to type in 'sfc/scannow' and also tap on the enter tab.
This might take some time to complete.
Later on, perform the steps mentioned on the screen and try restoring the corruption issues of the system files.
Solution #8: Install your Windows Update
There are chances that the version of windows being used is outdated. It can be updated by the procedure mentioned below:
At first, hit a click on the Start Tab.
Type Update in the search bar on the screen and press Enter key.
The system will check for updates if any.
If it detects any update, continue with installing all the required updates.
Now restart the system and save the changes.
What are the Causes of QuickBooks Error 30159?
There is no single cause that results in triggering Payroll Error 30159. There are in fact, a bunch of them. The following are some of the most common and conspicuous causes behind the snag.
Corrupted QuickBooks Company file on the computer.
Window files are facing misconfiguration issues
Some hardware component removed in an improper manner
The damaged file system is conveying misleading and improper information
System affected due to a virus or malware attack
Windows version is too old.
How QuickBooks Payroll Error 30159 affects your system?
There are three known aspects by which you can point out that the system has been suffering from QuickBooks Payroll Error 30159. So, following are the three factors which if you are experiencing on your system, can definitely say that it has been dealing from this error:
The system runs very slowly and the performance takes a lot of hits.
Once the error pops up, all the running programs start to crash immediately.
The QuickBooks Desktop is facing constant error messages and crashing while running the programs.
Summing up!
So, these are all the methods that you can use to fix the QuickBooks Error 30159. Although, if you are still facing the same issues again and again even after trying all the methods mentioned above, you can contact our QuickBooks support team. We boast certified and experienced experts and offer swift solutions to all QB-related issues.
Learn how to fix QuickBooks error 20 while printer activation:
Are you encountering the frustrating QuickBooks "Printer not activated error 20"? This common issue often arises when there's a mismatch between your QuickBooks version and your operating system, or due to outdated software components.
This comprehensive guide will walk you through the solution of QuickBooks printing problems, specifically addressing QuickBooks Error Code 20. We'll delve into the technical compatibility issues that frequently cause this error, such as running older QuickBooks versions (e.g., QuickBooks 2009) on modern operating systems like Windows 10, where automatic updates may no longer be functioning optimally.
While Windows 10 receives frequent updates, QuickBooks' self-updating mechanism for older versions. This disparity can lead to the "Printer not activated error 20."
Reading this blog post till the end, will help you to learn the simple procedures to get rid of this QuickBooks printer not activated error 20. However, for further details, you can reach out to our tech professionals using our support line. Our team of certified professionals will help you to fix the bug in no time.
Solutions to Fix Printer Not activated (Error Code -20) in QuickBooks Desktop
First of all, you need to ensure that you do have the administration access in your desktop, otherwise, the solutions explained below will not be able to fix the QuickBooks printer not activated error 20.
1st Solution: Create a Registry Backup and System Restore Point
Go to the Search tab and type 'Regedit' and right-click it to hit the option Run as Administrator.
After that go the Computer section, click the file, and save it.
Now to create a System Restore Point in your Desktop (These steps majorly work for Windows 7, 8, 10 and the other versions of the latest windows.)
Once done with that, hit a right-click on This PC icon on your desktop window screen and then select Properties.
You now have to opt for System Protection from the left pane on the screen of the Properties popped-up window.
In the next step just choose the System Protection divider on the new pop up window and you will then see the option to Create new restore points. Then click on it.
Type in the Description of the desired restore point and again click Create. It will take merely a minute or two, depending upon the network connection and the processing speed of your operating system.
2nd Solution: Use Configuration of User Permission
Follow the same procedure as earlier, and find Regedit on the search option on your Windows PC.
After opening it with the Run as Administrator option, double-click on the HKEY_CURRENT_CONFIG folder on the left side window pane under the drop-down menu of the computer section.
Now, right-click on the Software folder to find the Permissions option to choose from the given menu.
When the window pops up, allot “Full Control” to the “Users” if in case it’s not already assigned and after doing so, simply click OK to move ahead.
3rd Solution: Check the QuickBooks PDF Capabilities with QBprint.qbp File & Repair It
Search the Control Panel from the Windows search and go to Programs and Features under it.
Scroll down the list of the programs installed on your desktop and find QuickBooks.
Right-click it to select Change option and initiate the repairing only to follow the lead by the given set of instruction to the end.
After the QuickBooks Repair, restart the computer device. Let the updates take place at a faster speed.
Now, try printing a document or save it as a PDF from the QuickBooks software you have installed or have been using till now. This probably will solve the notorious QuickBooks printer not activated error code 20 that hampers seamless printing of your important documents on time.
4th Solution: Check and Configure Print Spooler Service
Hit the Windows + R keys at the same time and type MSC in the window that pops up named Run Box.
Try the right-click option on the Print Spooler Service from the list of services shown to select the option of Properties later on.
Click on the Stop button to stop the Print Spooler Service.
Wait a few seconds and then pick the Start button to initiate the services again.
Close all the window pop-ups now and try printing a document or saving a PDF to print directly from the QuickBooks. Hopefully, QuickBooks Error Code 20 resolved.
5th Solution: Update Your Windows or/and Install QuickBooks Once Again
First of all, keep a note of your QuickBooks license and product number before carrying the steps mentioned below.
Go to the Control Panel and hit on the Programs and Features option.
Scroll down the list of the programs installed that you see and find QuickBooks amongst them.
Tap on Uninstall QuickBooks
Follow the remaining instructions while the uninstalling procedure runs.
Now, you have to download and install the windows updates, after which you will need to restart the computer.
After all that is done, insert the CD in the system or find the already installed extension file of the QuickBooks software to initiate the installation of QuickBooks again.
Follow any steps mentioned. You would need to follow these steps while you are re-installing the QuickBooks software. Also, keep in mind it will take a few minutes. So avoid running any other applications in the background.
Finally, when you should be able to print the necessary files after your software has been reinstalled as it resolves many errors automatically with the re-installation.
6th Solution: Checking the Microsoft Document Writer (Windows Pre-Installed Component)
Microsoft Document Writer facilitates Windows capabilities to support QuickBooks in saving information in any format like PDF. However, if this window component is not found, you will face trouble like QuickBooks Error Code 20 when you want to print a document from the QuickBooks software installed on your desktop. Here’s how you ensure you don’t face that problem:
Find the QuickBooks icon on your main window screen and right-click it to choose Open File Location.
Get to the Temp folder and look out for the folder matching the version of your current QuickBooks software.
Browse the cursor along that folder to further open the Third-Party folder inside.
Find the Exe file, double click it for installation.
Now, head back after the installation is done. Go to the main QuickBooks software and open it to register the license.
Though, if any case, the installation stops in the middle, you can start it again, there’s no issue with that.
Once everything said is done, try printing your desired documents from QuickBooks itself. You wouldn’t be facing the QuickBooks Error Code 20 anymore.
Solution 7: Fix Microsoft Document Writer
First of all, right-click the QuickBooks icon and then opt for Properties.
Hit on the Find Target option.
The next step is to double click the Install Application, or exe, to install the PDF converter.
Now, hit ok after the installation process finishes.
Moving ahead, tap on the Windows Start button and then choose Run or search.
Then, enter the Control Printers, pick the printers window, and hit OK.
Next step in the process is to right-click the Amyuni Document Converter and hit on print properties if you are a windows 7 user. Or Windows XP users can tap on the Amyuni Document converter and then hit on Rename.
The last step in the process is to depend on the QuickBooks version and release installed, followed by entering the correct name and hitting Enter.
8th Solution: Allow the Usage of Powershell Script
You need to update the registry key editor manually by offering authority to use the PowerShell script.
Tap on the start tab and type in cmd.
Choose the run as admin tab and hit on cmd.
Type in PowerShell in the command prompt and hit enter tab.
Ascertain to copy and paste the code in the command prompt.
The printer device itself isn’t working to support the QuickBooks printing system.
Issues, grown from the QuickBooks Windows Registry.
Your Application Key needs to be the latest and updated, which it’s not.
Winding up!
This article is created after consulting certified experts to help you troubleshoot the QuickBooks Printer not activated error 20. If in a rare case, none of the solution tasks mentioned above work, you must contact a professional for assistance. Our QuickBooks 24/7 error support experts boast years of experience and cutting-edge tools and technology in fixing a wide range of QuickBooks-related issues. You can contact us and expect quick and precise solutions for your accounting-related issues.


? 50")
? 51")
? 52")
? 53")
? 54")
? 55")
? 57")
? 58")
? 60")
? 61")
? 62")
? 63")
