Errors and bugs are extremely annoying, especially when it comes to QuickBooks, but all these errors can be rectified using certain set of steps and procedures. One such technical error is the Error code 7009. Talking about the QuickBooks error code 7009, it can land you into some mess and would also interrupt the way you operate your system. This is basically a sync manager error that can be seen when the company file is unable to sync properly with the version of QuickBooks being used.
Getting to the root causes of QuickBooks error code 7009 can help you in tackling through this error. If you are interested, then scroll through this segment with full concentration, else connect with our tech personnel.
Insight Into QuickBooks Error Code 7009
You might the following error message on your computer display:
Error
Description
Error Code
7009
Error type:
Sync manager error
Software:
QuickBooks
Basic Causes:
Using different QuickBooks version
Quick Solution:
Restart the system
What Drives you to QuickBooks Error Code 7009?
There are certain factors that can drag you to this error. These factors are shortlisted below, do check them out:
Version of QuickBooks being used can be one of the major factors triggering to this error.
If you are trying to open a company file from an earlier version on new version of QuickBooks, then due to compatibility issues this error can appear.
Just in case the sync manager is damaged or missing, then you can experience this error.
What Corrective Measures Can be Taken to Rectify the QuickBooks Error 7009?
The best part about QuickBooks can be that the errors can be fixed with much using some set of steps. And even QuickBooks error code 7009 can be eliminated using the below steps.
Measure 1: Reboot the System
Well, restarting the system as well as QuickBooks can benefit in resetting rogue settings. This can be done using the below steps:
Initially, you need to Close QuickBooks program.
Furthermore, you need to right-click the Taskbar and also open the Task manager.
You are later supposed to ascertain that QuickBooks or Google Chrome isn’t among the section of apps in the Processes tab.
Now, reboot the system.
You should then relaunch QuickBooks application or the browser for QuickBooks online and try syncing the files again.
Measure 2: Changing the Name of Sync Manager
If the issue isn’t fixed after performing the first procedure, then renaming the sync manager is recommended. At times the issue can be experienced due to sync manager itself. This can be rectified modifying the sync manager settings, especially changing the name of the sync manager folder. Perform the steps below to change the name of the sync manager:
This procedure requires you to close all open functions related to QuickBooks.
Furthermore, it prompts you to Close sync manager application also.
You would then be needed to Locate the sync manager folder in the drive.
Later on, alter the name of the Sync manager folder as SyncManager.old
You now have to open QuickBooks normally, as well as the Intuit Sync Manager Application.
To conclude the process, you are suggested to try Sync QuickBooks company file by clicking on Sync now.
Measure 3: Make Use of The Disc Cleanup Tool
This error can also show due to insufficient space in your system, particularly the C Drive. As such, it is highly recommended to utilize the disc cleanup tool to free space in your directory. Follow the trails laid down below:
Before you embark on the disc clean-up process, it is highly suggested that you perform a backup of essential files.
Afterward, access your File explorer window through the Win + E keys. then, right-click the C drive.
herein, you need to move to Properties and later on opt for the Disk Cleanup tab.
Now, choose the C drive and hit on the Enter key to start the process.
Once completed, re-open your QuickBooks software and inspect if the issue pervades.
Measure 4: Terminate Any Conflicting Processes in the Task Manager
If none of the above-enumerated methods help in fixing the QuickBooks error code 7009, you should terminate all the conflicting programs. For doing this follow the lead:
Initially, push the Ctrl + Alt + Del keys. Herein, tap on Open Task Manager.
Once the task manager window opens up, pick the Processes tab.
herein, you are required to choose all the suspicious programs one at a time and then tap on the End process tab.
Subsequently, check if the issue got sorted. You need to do this for all the programs.
Although the process is quite cumbersome, it can help in fixing the error code.
Summing up.!
Dealing with the QuickBooks error code 7009 can be tiresome, but if you need our assistance at any point of time, then we are just a call away. Feel free to contact us today as our QuickBooks error support experts will ensure to answer all your queries on an immediate basis.
Crashed into QuickBooks error code 40001 and can’t find an ideal solution to troubleshoot it off? Well, we have got you covered. You might land into such an error when trying to update direct deposit or when updating payroll. Error 40001 can be seen with a warning message “Error code: 40001: Something’s not right. We’re unable to complete your request at the moment. Contact our support team for assistance.”
In order to solve the issue, you will have to ascertain that you are running as admin to confirm that the activation procedure will go through. This segment is going to brief you with the steps that are to be followed to successfully resolve the QuickBooks error code 40001. However, if you aren’t interested in performing the set of steps manually, then in that case connecting with our tech personnel using our support line would definitely work.
What Causes the QuickBooks Error 40001 and Fixes to Chuck It Off?
There can be a couple of factors leading to such an error and related measures that can be taken to chuck the issue from its root cause. Scroll down to get a better insight.
Cause 1: The Internet Explorer Browser is Not Set as the Default Browser on your PC
Fix: Setting the Internet Explorer/edge as the Default Browser
Under this process, you simply have to launch Internet explorer and also hit on the Tools tab.
Next, choose Internet options and move to the Programs tab.
Heading forward, you simply need to head for the make default option and also opt for the Apply tab.
Also, hit the OK tab to save the changes.
After internet explorer is Set as the default internet browser, you need to try to Activate the direct deposit or Update the account info.
Cause 2: Corruption in The Company File can Trigger Issues Running or Activating Payroll as Payroll Data is Saved in the Company File
Fix 1: Diagnose and Repair Corruption in the Company Data
This process demands running QuickBooks desktop and heading to the File tab, where you will find the utilities drop-down menu.
Head to the Utilities tab and choose the verify data tab.
The QuickBooks software will Start verifying the data for corruption.
Just in case there is corruption in the data, the QuickBooks software will prompt you to Repair it.
Hit a click on the Rebuild data option and once the data repair is complete, you need to retry performing the same process.
Fix 2: Use QuickBooks Install Diagnostic Tool
Just in case the procedures listed above didn’t work in your case, then make sure to go through the below-stated steps:
Now, wait till it repairs the QuickBooks desktop installation damage.
Once the process ends, you need to launch QuickBooks and verify if the repair process fixes the issue.
Cause 3: QuickBooks Desktop or Payroll Tax Table are Missing the Latest Updates
Fix: Updating QuickBooks Desktop and Payroll Updates
You need to run QuickBooks desktop as an admin and head to the Help tab.
Furthermore, choose the Update QuickBooks desktop option, and when the Update QuickBooks windows pop up on the screen.
You need to Get updates option and reboot QuickBooks when the update download process completes.
Go for the Install updates tab and head to the Employees’ tab.
Choose the Get payroll updates option from the drop-down menu and also opt for the Download latest updates option.
After QuickBooks desktop and payroll have the latest updates, then you need to retry to Activate direct deposit to check if updating eliminates QuickBooks error 40001.
Cause 4: Not Using an Account With Admin Rights
Fix: Running QuickBooks with Admin Privileges
Herein, if you aren’t the Network admin, then you will need to ask your admin for the Windows admin account credentials.
Just in case you have the Admin account login credentials, you need to right-click the QuickBooks desktop icon and opt for the Run as admin option.
When asked, you need to enter the required Login credentials and click on Enter tab.
After the QuickBooks starts running with admin privileges, retry to Activate direct deposit or Send the updated account info to intuit.
Conclusion
Once you are done with the steps above, it is most probable that you will be able to troubleshoot the QuickBooks error code 40001. On the contrary, if you continue to experience the same issue, then, in that case, connecting with our tech personnel using our QuickBooks error support number would definitely work.
Here’s how you can fix the QuickBooks error 15263:
One of the most popular accounting and bookkeeping software, QuickBooks has unfathomably benefitted small and medium sized business. This application has robust features which streamlines business operations thereby saving a lot of time, money, and effort. The best part is the makers of QuickBooks, Intuit every year launches new updates to make the tasks a lot easier. Though this software has many perks, the users often face many errors which can affect the day-to-day operations.
One such issue is the QuickBooks error code 15263. This error generally occurs when you try to download the new available updates for QuickBooks Payroll. It is majorly caused due to the incorrect configuration in Internet Explorer.
What are the causes of QuickBooks error 15263?
Let us first go through the various causes that lead to this error. Although the causes instigating the error may be diverse and several, but below , we have earmarked the most primary ones. These include:
The drivers installed on the device are damaged or corrupted.
The Windows operating system or QuickBooks is not updated to the latest one.
In case you have Downloaded the latest updates from a suspicious web link.
An inappropriately configured web browser, especially Internet Explorer.
Misalignment of the settings of third-party anti-virus programs or the firewall.
Reliable Methods to Fix QuickBooks Payroll Update Error 15263
Having sailed across the various causes inciting the error code, we have now arrived at the most viable and effective solutions for wiping out the issue from your system. Checkout the following methods enumerated below in order to troubleshoot the QuickBooks error message 15263:
Method 1: Reinstate the Advanced Settings in the Internet Explorer
Begin the process by running the Internet Explorer from the Start menu. Follow it by heading to Tools.
Choose Internet Options from the gear icon menu.
After that, hit a click on on Programs and choose “Make Default,” and hit the OK button.
Once done, hit on the Advanced button and choose the “Restore Advanced Settings” option.
Now, hit a click on OK and then tap on Done.
After that, pick the settings and then head to the Security field.
Uncheck the “Do not save encrypted pages to disk” option and check the “Use TLS 1.2” option.
You now have to hit on OK and then on the Done tab.
Once you are done, head to the General section hit on the Delete button, and then “Temporary Internet data files.” Again, hit on the Delete tab.
In the final Connections field, hit on the LAN Settings, and then pick the LAN setup option.
Now, mark “Automatically Detect Settings” and unmark “Proxy servers.” Tap on OK.
After that, make sure to tick the SSL 2.0 and the SSL 3.0 options.
De-select “Check for publisher’s certification,” hit on Apply, and tap on OK.
Now, close the window and download the QB updates.
Method 2: Enlist QuickBooks in the exception list of the Firewall
The first thing to do is open the Windows Start menu and then type Windows Firewall in the search panel.
To move to a new window, hit on the Windows Firewall option
Now, choose Advanced Settings and then Inbound Rules.
After that, right-click on it and tap on New Rule. You will have to repeat these steps to create Outbound Rules also.
Once done, hit on the Program option and then on Browse. Opt for This Program Path and hit Next.
You will now be able to see a list of the executable files for QB. Simply choose any of them, and later create similar rules for all the remaining files.
Now, hit a click on the “Allow the Connection,” and then choose Next, and review all the profiles. They should be pre-selected.
Once done, hit on Next, and then name the rule as something like “QBFirewallException(name.exe)
Method 3: Ensure the correct Date and Timing on the PC; if wrong, rectify them
The very first thing to do is make an exit out of the QuickBooks Desktop window and then head to the home screen.
Now, proceed to the Date and Time section located at the bottom-right corner of your screen.
Verify if it shows you the correct Date and Time because if they are incorrectly set then it can affect the functioning of programs like QuickBooks.
After that, right-click on the section and then choose the Adjust date/ time option.
Now, set the accurate settings according to the time-zone you are currently working in.
Once done, save the changes and re-access QuickBooks Desktop to see if the issue got sorted.
Method 4: Update Windows and QuickBooks to the Newest Version
Firstly, open the Windows menu, and then in the search bar type QuickBooks Desktop.
Now, right-click on it and tap on Run as Administrator.
Once done, you will be directed to the No Company Open window. Tap on the Help tab and then pick the Update QuickBooks Desktop option.
Now, head for the Options section and choose the Mark All tab.
Hit on Save and then on Update Now. Look for the Reset Update box and mark it.
Finally, opt for the Get Updates button and install the available updates.
After that, update Windows by hitting on the Windows icon and then choosing the Security option.
In the following window, hit on the Update & Security option and then opt for the Windows Update.
Hit on the Check for Updates option and wait until the program finds the latest available update.
Finally, hit click on the Update Now button and reboot your device once the updates are installed.
Method 5: Review the Cipher length
At the start, launch Internet Explorer.
Now, head for the search box, and type in ‘https://www.intuit.com.’
Hit on the Alt key, followed by heading to Properties.
Move to the Connection tab and look for Bit encryption.
You are required to note the number beside it.
In case the number is below 128 bits, I.E is not running in 18-bit encryption.
Concluding!
Resolving QuickBooks error code 15263 is not that much of a hassle. But there are instances when you may get stuck. In such situations it is suggested that you take help from the QuickBooks error support service providers who are experienced, well-trained and certified experts who will guide you with all your queries.
Facing the QuickBooks error code 1926 repeatedly may be pretty annoying. This error is often experienced due to insufficient permissions for specific folders. Besides the prime reason being related to permissions, several other reasons may provoke the error code 1926. Handling this error isn’t tricky if you read this article and adhere to the contents cautiously. This error is often witnessed with an error message that states:
Error
Description
Warning
“You do not have sufficient permissions to the specified folder. To use QuickBooks in multi-user environment, you must have read/write access and create/delete rights to the folder where the company file is stored”.
In case you are also facing the QuickBooks error code 1926 issue, then it is advised that you read this article till the end. However, if you are seeking professional help and want our experts to perform the resolving methods for you, then contacting our support team using our toll-free would solve the problem.
Principle Factors Driving the QuickBooks Error Code 1926
The below-stated disparate factors can cause the error code 1926 in QuickBooks. It becomes essential to go through the causes contributing to this error as they will give you an idea about the right resolving method to choose.
You can experience this error if you are unable to access files due to insufficient permissions.
If the QuickBooks file is saved in a secure area, like the root of drive C:/ or program files.
If the file is stored in a password-protected area.
Choose the Copy option. You can also hit on the file and then press the Ctrl + C buttons to copy.
Now, return to the Default location.
The last step requires you to right-click on the screen and hit on the Paste tab.
Wrapping-up..!
With this, we arrive at the conclusion of this article, where we hope that the information stated above might be of some help in fixing the QuickBooks error code 1926 successfully. However, if there is any query, then contacting our QuickBooks error support team at 1-888-368-8874 would be of much help.
In this article, we will be discussing the different effective troubleshooting measures for resolving the multi-user error H101. We shall also learn about the various factors causing such an error. The Error code H101 is basically an H series error that can be seen when you try to switch between normal to multi-user mode. This error is encountered in different situations and can also be seen if the file configuration is incorrect and the system is unable to connect with the server.
You can also face the QuickBooks multi-user error H101 if the incoming communication blocked. To know more, go through this article till the end. Or one can also get in touch with the support team to avail of further assistance.
Why does the QuickBooks error code H101 occur?
You can end up with such an error due to the following reasons:
When QuickBooks software tries to create a connection to the company file but is unable to communicate with the server.
QuickBooks firewall ports not set up.
You can also face a similar issue if the windows firewall restricts the passage of the incoming and outgoing services to the QuickBooks files.
Damaged or incorrect file configuration can also lead to such an error.
If the QuickBooksDBXX or QBCFMonitor services aren’t running.
Inappropriate hosting configuration settings can also lead to such an error.
Adequate Methods to Resolve the QuickBooks Error Code H101
There are different solutions that can be performed tofix QuickBooks Error H101. However, different solutions can prove effective for different users due to the diversity in the sources of error. As such, it is advised to start right-away from the first step and if the error still keeps showing up after performing the steps, the user can try out the next steps.
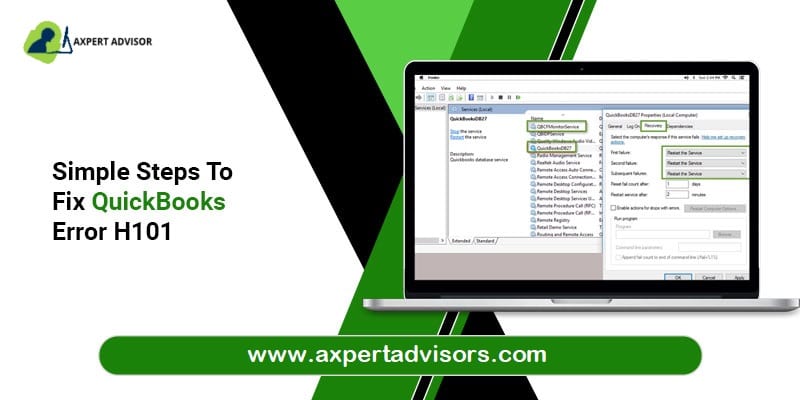
Method 1: Verify the QuickBooks services
The very first step is to hit on the Windows key + R keys to open the Run box.
After that, type in services.msc and hit the Enter key.
You should then move to the Services window, and look for the QuickBooksDBXX service.
After that make sure that startup type is set to Automatic and Service status is running.
The next step is to opt for the Recovery option.
Also, pick the drop-down menu for the first failure to choose the Restart the service option.
After that, Save the changes and hit on OK tab.
Repeat the steps for the QBCFMontiorService.
The last step is to open the software on every affected workstation in multi-user mode.
Method 2: Create a new folder for the company file
The first step is to create a new folder and share it with the hosting system.
Now, you will have to set the windows to get the entry for sharing company files.
After that copy the qbw file to the newly created folder.
Opt for the Start Scan if the location of the company file is displayed correctly.
If it doesn’t, choose the company file by hitting on Browse, then choose the Start Scan option.
The QuickBooks Database Server Manager will now fix your firewall and grant you access to all workstations as needed.
Afterward, hit on Close.
Next, launch the QuickBooks Desktop software.
Afterward, hit on the File and then Switch to Multi-User Mode.
The above mentioned set of steps should be sufficient to resolve the QuickBooks Error message H101.
Method 6: Change the Firewall Setting
To display the Run dialogue box, hit on the Win + R keys.
In the text box, type Control.
Hit on the OK key.
Now, choose the option for System and Security.
Afterward, hit on the Windows Defender Firewall.
On the left side of the screen, choose to Allow an app or feature through Windows Defender Firewall.
Allow the QuickBooks software from the list of active software at this point.
Press OK to confirm.
Concluding!
The above-stated set of steps is expected to fix the QuickBooks error code H101. But if in case the user is unable to fix the issue, then in that case contacting our team professionals at 1-888-368-8874 is suggested. We are a team of technically sound QuickBooks error support professionals, who work round the clock to provide the best possible assistance. You may visit our other blogs and get all the QuickBooks error codes resolved in no time.
All that you need to know about the QuickBooks Payroll won’t update error:
QuickBooks is one of the best accounting software available in the market. With the advent of this software, there has been a major shift in the way accounting is being handled. Businesses have largely benefitted through this software as it has successfully performed some of the major tasks including accounting, payroll, bookkeeping, and filing of taxes a lot simpler than before while saving time and effort.
However, even though this is a revolutionary application in the business world, users do often face errors while using it. One of the most common issues faced is the QuickBooks Payroll update not working or Won’t open. This generally happens when there is no active subscription to the payroll. In order to resolve this error, it is very important to understand the causes behind it so that you can easily find its solution.
Causes Behind the QuickBooks Payroll Won’t Update Error
There are several causes that may lead to the Payroll error in QuickBooks. There have been listed as follows:
The service key that is being used may be an incorrect service.
QuickBooks desktop might be showing the Invalid Number status.
The file of the QuickBooks payroll is not Updated.
When the Direct Deposit agreement is inactive, and it has more than 1 active payroll
How to Resolve QuickBooks Payroll Updates Not Working Issue?
Go through this section very keenly and master the technique to troubleshoot the QuickBooks payroll update errors and other related problems:
Method 1: Download Payroll Updates in Safe Mode
Initially, shut down your computer.
Then, start your system in the Safe mode. This requires hitting the F8 key repeatedly. This will in turn show the Advanced Boot Options.
Again, download the QuickBooks Desktop Payroll updates.
When done successfully, restart your computer in Normal mode.
Once done, again download the QuickBooks Payroll Updates.
Method 2: Reset the Settings of the Internet Explorer Browser
Firstly, open the Internet Explorer browser.
Now, head to the Tools menu that is 3 dots on the right side of the window.
Next you need to hit on the Internet Options.
Then you are required to press Advanced tab.
Now you have to choose the Restore Defaults or Reset option.
Once done with that, hit on the Apply button to apply all changes.
And then hit on the OK button to close the window.
Method 3: Repair QuickBooks Desktop Software
At the first, open the Control Panel.
Now, hit on the Programs or Programs and Features option.
You will get a list of programs.
Now you will have to choose QuickBooks.
Right-click on it then select Uninstall/Change option.
In the open-up window, hit on the Repair option.
This will help you in repairing the software.
Now, open the QuickBooks software.
if the issue pervades, jump to next method.
Method 4: Manually Resolve the QuickBooks Payroll Won’t Update Error
The first thing you need to do is opt to Update the payroll Tax table.
For this, you will have to hit on the Employee’s menu.
Then choose the Get payroll update option.
After this, hit on the link which prompts you to Download the entire payroll update.
Once done, opt for the Update tab.
When the download is successful; a message will appear on the screen. The message will contain the following line ‘A new tax table or updates to your payroll tax is installed on your system. Select the OK tab to read all the changes.‘
Now, hit on the OK button to read it.
If the issue is still persisting then in that case you need to rename the folder by adding the old at the end of the name as CPS to CP SOLD.
After these changes, you have to Update the payroll again.
If it is not working then do turn off the User Account Control (UAC)
After the UAC is off, try to download it now.
Method 5: Install Digital Signature Certificate
Initially, open C: Drive and head to Program Files/Intuit in Windows Explorer.
Afterward, choose QuickBooks from the list of options.
Hit on Properties by right-clicking the QBW32.exe file.
Next, opt for the Digital Signature tab from the menu on the left. Check to see if intuit is selected in the list of signatures.
Choose the Details option.
Now, choose the View Certificate option.
Then, under the certificate box, opt for the Install Certificate option.
Hit on Next repeatedly until the final page shows up on your window desktop.
Next, choose the Finish tab.
After that, open QuickBooks and restart your computer before installing the latest payroll update.
Method 6: Check the System Time and Date
To start, check if the system time and date are correct by checking the right-bottom corner of the toolbar.
If the time and(or)data are incorrect, then right-click on the same and choose Adjust Date/Time.
Hover over the Change date and time tab and rectify the time and date.
Afterward, choose the correct time zone by hitting on Adjust Time Zone option.
Now, hit on OK to reflect the corrected date and time.
Now, open the QuickBooks software and check if the issues related to the payroll update got solved.
The issue must be resolved by now.
Summarizing!
QuickBooks payroll update won’t update error is not that complicated. You can easily fix the issue by following the above-mentioned methods. But if you face any kind of problem while fixing the error you can always reach out to the error support service providers who are available 24/7 to assist you with all your queries. Our team is always there to assist you in every possible way. All you need to do is ring us a call and seek for assistance from our experienced team of professionals.