Have you lost your QuickBooks data file and are now looking for a comprehensive guide to recover lost Quickbooks data from hard drive? Well, if that is the scenario, then we have got you covered. This piece of writing will brief you with the right set of steps to recover lost QuickBooks data file from a hard drive. Losing the data file is one of the most annoying issue one might land into. It is always recommended to create backup files frequently and hard drive is one of the best ways to store the files. You can get a better grip on to recovering the lost QuickBooks data file from a hard drive by going through this segment.
Whereas, if you aren’t interested in manually performing the set of steps for recovering QuickBooks data from a hard drive, then connect with our professionals today. Our tech personnel will be more than happy to help you.
What Causes QuickBooks Data Loss From a Hard Drive?
You can end up into this particular issue due to the following reasons. Let us have a look:
One of the most common reason can be if you upgrade the company file into the higher version of QuickBooks accounting software.
Steps to Recover the Lost Company File in QuickBooks Desktop
The below stated set of steps can help you in recovering the lost QuickBooks data file from hard drive.
Step 1: Running the QuickBooks Auto Data Recovery
You can retrieve the lost company files by using the QuickBooks auto data recovery method. Perform the following steps:
Using the current transaction log file (.TLG) and a copy of the company file, you can simply recreate the lost transaction.
After that with the copy of the company file and the transaction file you can simply recreate all the transactions barring the last few hours.
Step 2: Use the Current Transaction Log File and Company Log File
Under this step, you need to create a new folder named QBTest.
You now have to locate the folder where the company file is saved and open it.
Now, on the QBtest folder that you have saved, you need to paste the tlg file of the company after copying it.
Heading forward, you need to locate the QuickBooks auto data recovery folder and open it.
Under the QBTestfolder, paste the qbw.adr file
Open the QBtest folder and then on the qbw.adr file, right click and choose the option of rename.
Now, on the file delete the adr from the end.
Open QuickBooks.
Move to the QBtest folder and also open the company file that you saved there.
Make use of the account register to confirm that all the transactions are there.
Ascertain that the integrity of the company file run verify utility.
In case you see that the company file is good, then move the damaged company file to a different location.
Move the copy from the QBTest to the original location.
Step 3: Use .qbw.adr and .tlg.adr Files
You need to create a new folder named QBTest
Furthermore, locate the folder that saves the company file and open it.
From there you need to locate the folder of QuickBooks auto data recovery and open it.
Now, on the QBTest folder paste both tlg.adr and .qbw.adr files after copying them.
You now have to click on the QBTest folder to rename it.
Remove the adr file.
On the QBTest folder you will now have a qbw and tlg file
Click and open QuickBooks desktop.
Head to the QBTest folder and open the company file that you have saved.
Use the account register to confirm that all the transactions are there.
Ensure that the integrity of the company file by running verify utility.
Check if you see the company file is good, then move the damage file to another location.
And move the copy from the folder to original folder.
Wrapping it up!
Recovering the lost data file from a hard drive in QuickBooks becomes super easy, once you perform the right set of steps. Despite that if you are stuck at any point of time or if you need our assistance at any moment, then do not hesitate in connecting with our Axpert Advisors tech personnel using our helpline. Our 24/7 QuickBooks error support geeks will ensure to take over the situation for you and deal with it successfully.
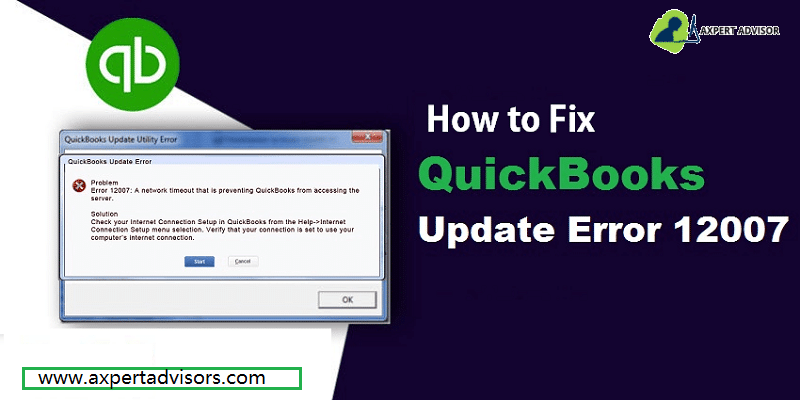
Here’s how you can fix the QuickBooks error 12007:
QuickBooks is one of the most employed accounting software, especially by small and medium-sized businesses. This new age application is packed with many powerful features like bookkeeping, payroll management, tracking of financial transactions, generating reports, etc. Even though QuickBooks is very beneficial for businesses, its users do face technical glitches at times and one of the common errors faced is the QuickBooks payroll update error 12007. There are several reasons behind this error and even more methods for troubleshooting the issue. In this article, we shall be dealing with all of those methods, and we assure you that by the end of this article, the error won't even exist.
If you want our certified professionals to fix the QuickBooks error message 12007 for you, then all you need to do is call our helpline. Our experts will make sure that the error gets rooted out from your computer.
What is QuickBooks error 12007 and What Leads to it?
The QuickBooks error 12007 generally occurs due to misconfigured files or when a user is downloading a payroll or QuickBooks Desktop updates. This is a common issue that QB users may face at the time they try to update the QuickBooks Desktop or make any kind of alterations in the QuickBooks Payroll Service function. The following error message might appear on your computer screen upon the arrival of this error:
Problem
Error 12007: A network timeout that is preventing QuickBooks from accessing the server
Solution
Check your Internet Connection Setup in QuickBooks from the Help > Internet Connection Setup menu selection. Verify that your connection is set to use your computer's Internet connection.
What Factors Cause the Error 12007 in QuickBooks?
Before troubleshooting the QuickBooks error message 12007 it is essential to understand what causes the error code to occur. So, below are some of the most possible causes of this error:
System unable to connect to the internet
Internet Explorer is not set as the default browser
Due to network issues, QuickBooks is unable to access the server
The firewall blocked the connection
From the Internet Option, the SSL checkbox option may have been removed.
Easy Solutions for Fixing the QuickBooks Error Code 12007
Below we have mentioned viable solutions to rectify the QuickBooks error message 12007. So, let us go through each of the solutions elaborately.1
1st Solution: Check your Internet Connection Configuration to Fix Error 12007
Firstly, on the top right corner of Internet Explorer hit on the Gear icon and pick the Internet options from the drop-down menu.
Now, head to the Connections tab and then hit on the LAN Settings.
After that, check-mark the box beside Automatically Detect Settings and make sure that all the servers are blank while updating QuickBooks.
Once done, apply the Changes and then jump to the Advanced tab.
Now, find the SSL 2.0 and SSL 3.0 and place a Checkmark on the respective boxes. Uncheck the box against the Check for publisher’s certificate option.
Subsequently, on the same tab, scroll down to verify that TLS 1.2 option is not checked. Ensure that the box next to TLS 1.1 is checked.
2nd Solution: Reset the QuickBooks Update Settings
The first thing to do is restart the computer.
Now Reset the QuickBooks updates and try to download an update.
Afterward, you have to launch the company file in Single-user mode.
Once done download the Latest QuickBooks update and install it.
3rd Solution: Check for Issues in Internet Explorer
Firstly, hit on the Windows + R simultaneously and type 'sfc/scannow in the provided box.
Now, hit on OK and follow the instructions displayed on the screen carefully to complete the File Checker Process.
Now restart the Windows after the completion of the file repairing process and then verify if the QuickBooks error code 12007 is resolved. If not, go to the next method.
4th Solution: Make Internet Explorer your Default Browser
Firstly, open Internet Explorer and then hit on the Tools menu.
Now, choose Internet Options.
After that, you have to opt for the Programs tab.
Choose the Make default option and hit on OK.
finally, close Internet Explorer.
5th Solution: Fix Internet Explorer’s Installation Issues
Initially, all running applications running in the background need to be closed
Afterward, hit the Win + R to open the run box and type 'inetcpl.cpl' , and tap on the OK button.
Once the Internet Options box appears head to the Advanced tab.
From the Reset Internet Explorer options choose the Reset option twice.
Check-mark the Delete personal settings option and from the Reset Internet Explorer Settings window choose the Close option
Once done, restart QuickBooks and check if the error is now resolved.
6th Solution: Update QuickBooks Desktop
If the solutions illustrated above couldn't fix the error code 12007, we highly recommend you update your QuickBooks software to the latest release. For doing this, follow the steps provided below:
Initially, make an exit from the QuickBooks software.
Subsequently, press and hold the Ctrl key when you double-click on the QuickBooks icon to bring up the No Company Open window.
Additionally, check the Reset Update box and choose the Get Updates.
After the update is complete, close the window.
7th Solution: Go for a Clean Installation of the QuickBooks Desktop
By now the error should be sorted out. However, if the issue seems bleak and pervades even after confirming the above-mentioned solutions, it is advised that you go for a clean installation of the QuickBooks software. You can either do it manually through the control panel or opt for the Clean Install Tool. It is a comprehensive utility that aids in the complete wipe out of the QuickBooks software from your system, and also helps in reinstalling the software without any hassle.
Steps to Opt for a Clean Installation Using the Clean Install Tool
In the inception, download the QuickBooks Clean Install Tool from the Intuit website and save it to some convenient destination.
Afterward, double-click on the downloaded '.exe' file to initiate the installation.
Upon completion of the installation process, launch the tool by double-tapping on it.
Utilize the tool for uninstalling the QuickBooks software from your system.
Once completed, re-install the QuickBooks software (make sure to keep your license and product keys along with you).
Steps to go for a Clean Installation Using the Manual Procedure
Head to the Control Panel from the Start menu.
Afterward, move to Programs and Features. Pick QuickBooks software from the list and subsequently, hit on Uninstall/change button.
Choose Uninstall to start the process.
Once the uninstallation concludes, restart your computer and re-install the QuickBooks software.
Hopefully, the issue must be resolved by now. Verify the same by opening the QB software and inspecting if error 12007 vanished.
Concluding on a Supportive Note!
We hope that you could comprehend and implement all the points to resolve the QuickBooks error 12007 pretty easily. Our experts have made every attempt to make it easy to understand for everyone.
However, if still you are stuck anywhere or the problem still persists, then don’t panic as our Axpert Advisors team is there to assist you. Our professionals have vast experience in the field and will make sure that the error gets fixed.
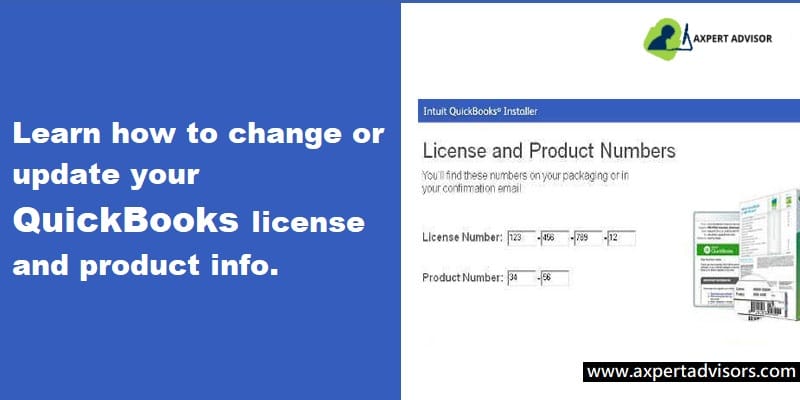
Unleash the best ways to change or update your QuickBooks desktop license and product information:
Do you know the process to change a QuickBooks license or product code number? Well, if not, then make sure to read this article carefully till the end. In this process, you will learn the process to update the QuickBooks license and product info. There might be situations when users need to change the license number or product code for the QuickBooks desktop.
Well, if you are looking for the process to install QuickBooks in another system, then need not worry. You can follow the steps below and also use the migrator tool, in order to skip re-entering the license number or product code in the new system. The tool will also take care of moving all the data for you.
To unleash the process to change a QuickBooks desktop license number or product code, reading the article ahead is recommended. An alternative for the same can be to get in touch with the support team via our toll-free i.e., 1-888-368-8874. Talking to our team will ensure to provide the best possible support services immediately.
Steps to Change the License Number in QuickBooks Desktop
You can change the license number in QuickBooks without even uninstalling and reinstalling the software.
QuickBooks desktop for Windows
It is supposed to select Manage my license from the QuickBooks help menu. And also opt for Change my license number.
And then Enter the new license number and also choose the Next and Finish tab.
QuickBooks Desktop for Mac
In order to carry out this process, users need to select Manage my license from the QuickBooks menu and then deauthorize this system.
The next step is to opt for the Reauthorize option and Quit when the user gets the prompt.
The last step is to re-open QuickBooks and then follow the registration process. This will let the user enter a different license.
Steps for Changing the QuickBooks Product Code for Windows Users
Solution 1: Uninstalling and reinstalling QuickBooks
In case the business runs Pro, premier, or enterprise on five or fewer computers, the best way to change the product code is to re-install the software.
Solution 2: Manually edit the qbregisteration.dat to change a QuickBooks license or product code number
Step 1: Opening the qbregistration.dat file through QuickBooks
This can be done by opening the QuickBooks desktop.
And then tapping the F2 key and then F3, in order to open the Tech Help window.
Also, select QBREGISTRATION.DAT on the Open file tab and also select the open file. This will open in a notepad.
The next step is to create a backup of the qbregistration.dat file.QuickBooks won’t open right if there are any types in the file. This is very much important.
For this, you need to select Save as from the notepad File menu.
And also select Desktop in the save as window, along with that select Save.
Also, close the file.
Then, re-open the file from the Tech Help window.
And also, close the QuickBooks desktop.
Step 2: Editing the qbregistration.dat file
You need to select Edit then replace or Ctrl + H keys in the qbregistration.dat file.
And then type in the Old product number in the Find what field and then replace it with the new one in the replace with the field.
Also, choose Replace all tab.
And lastly, opt for file and then Save and close the file.
Step 3: Checking the product code
This can be done by opening the QuickBooks desktop.
And also, hit the F2 key to display the Product information window.
After that, Check the product number field to ensure that the product code is updated.
In case the product code didn’t change, then you need to reboot the system. In case you see the old product code after a reboot, then it is important to follow the reinstall process.
To wrap it up!
We expect that after reading the steps above and implementing these steps you might be able to successfully change the QuickBooks desktop license number or product code. However, as the case of license number might be a bit sensitive, so we recommend you to consult a professional in case of any query.
You can directly call us at our toll-free support line i.e., 1-888-368-8874. Our 24/7 QuickBooks desktop support experts and certified professionals will ensure to provide you with the best possible support services immediately.
Technical bugs can be very annoying, and when it comes to QuickBooks accounting software, there can be certain errors that might trouble you. One of the common errors you may come across is the QuickBooks update error 12045. Well, this error is an update error that can be seen due to a slow internet connection. This error code is seen when you try to update the latest version of QuickBooks.
You might come across this problem when trying to update the latest version of QuickBooks. This error appears with an error message that states the following message:
Error
Description
Error Message:
Error 12045: Failed to download the update
To get in-depth information related to QuickBooks error 12045, make sure to stick around the segment till the end. We shall apprise you of the causes behind the error and the various methods that contribute to this snag.
Causes Behind the QuickBooks Error Code 12045
As we mentioned earlier, this error can be triggered due to a couple of factors. These factors include the following:
One of the major reasons behind the error can be if the date and time settings are incorrect on your system.
Double-click on the QuickBooks database server manager to open it.
And also choose the port monitor
Furthermore, save the port number of the version of the QuickBooks software installed on your system.
You need to then open the Windows firewall.
Follow it up by accessing the Windows firewall and heading to the advanced settings.
Opt for the inbound rules and also pick the new rule.
Choose the port option.
Ensure that the TCP is enabled.
Furthermore, mark the specific local ports and type in the port number in the box.
Afterward, hit the next tab.
Opt for the allow the connection tab.
Hit a click on the Next tab and assign a new name to the rule.
For outbound rules, perform similar steps.
Method 2: Check the Settings of The Internet Connection
In case the first method failed to be of any assistance to you, then, in that case, you can perform the steps to check the settings of the internet connection.
At the first, launch the QuickBooks software.
Subsequently, move to the help section and choose the internet connection setup.
Opt for Use my computer’s internet connection settings option to establish a connection once this application accesses the internet.
Following that, choose the next tab.
Head to the advanced connection settings and opt for the restore advanced settings.
Now, hit on the OK tab.
And also reboot the QuickBooks and update it again.
Method 3: Rectify the Date and Time on Your PC to Fix QuickBooks Error 12045
In this process, you would have to right-click on the clock on the desktop.
After doing that, choose the adjust time/date option.
Hit a click on change date and time.
Also, add the correct date and time and hit the ok tab.
Reboot the system and QuickBooks desktop.
Lastly, Update QuickBooks again.
Method 4: Delete any Other Installation of the QuickBooks Desktop
Just in case you have installed the same version of QuickBooks twice on your system, then in that case it might end up in an update error. You would have to delete another copy of QuickBooks. This error can be instigated due to this reason, which can be resolved by deleting the other installation of the QuickBooks desktop.
Let's Wrap-it-up!
That was all you need to know about QuickBooks error code 12045. As always, if you have any queries, comments, or concerns, call us immediately. Our QuickBooks desktop technical support team will be happy to assist you. Ranging from minute technical difficulties or major intricacies, our technical team can solve it all. So, without any hesitation, give us a call at 1-888-368-8874.
Have you stumbled upon the QuickBooks error OL-203? Well, this issue can be quite annoying for the users. This particular error is generally seen when setting up online banking in QuickBooks desktop. One of the other reasons behind to this error can be the temporary bank server outage or company file having data integrity issues.
Few times users can also experience this type of issue, as the bank demands them to confirm the identity in order to access the online services in QuickBooks desktop. The following error message may appear on your desktop screen when OL-203 issue occurs:
Fixing this QuickBooks error code OL=203 can become easy, by performing the steps that we have tried to mention in this article. Thus, make sure to read this article till the end. You can also speak with our certified accounting team for any assistance.
Common QuickBooks OL and OLSU Bank Feeds Errors
You may see the following are the few common OL and OLSU Bank Feeds errors in QuickBooks Desktop:
OLSU-1013
OL-205
OL-209
OLSU-1016
OL-392
OL-232
OL-249
OL-301
OLSU-1011
OLSU-1014
OL-202
OL-206
OL-393
OL-334
OL-332
OL-231
What Causes QuickBooks OL-203?
You can land into the QuickBooks error OL 203, due to the factors discussed below:
In case the QuickBooks software isn’t updated, then this error can be experienced.
If the bank or financial institution has modified their service offerings.
If the bank account that is being used in online banking in QuickBooks is inactive.
Another common reason can be if the bank or financial institution might have altered their name.
If the bank account that you are using in online banking in QuickBooks is inactive.
Internet connection can also cause this error.
If the download format or the import format is incorrect may also occur this problem.
Solutions to Fix QuickBooks Error Message OL-203
There can be a couple of methods that you can try to apply to successfully fix the QuickBooks error OL 203. Let us have a look:
Method 1: Creating a Test Company File
You should first move to the file option and then tap on the new company.
Next step is to hit on the start setup and also tap on skip.
You will now have to enter the required information and tap on the create company option.
Please note that the QuickBooks accounting software might take some time in creating a new company file.
Now, you should hit on start working.
Then, add the bank account to the test file.
After creating the file, if you are able to download the bank transactions, then it simply means that the primary company file might have some issues, which needs immediate troubleshooting by professionals. However, if you aren't able to download the bank transactions, then it simply indicates that the bank needs the confirmation to verify the identity or the bank is making some changes on the server or website. In such scenario, contacting bank is suggested.
Method 2: Deactivate and Reactivate Bank Feeds
Deactivating Bank Feeds
You are initially supposed to move to the list and the chart of accounts.
After that right-click on the account from the list that causing the error code and choose edit account option.
Next step is to tap on the bank settings.
After that, choose to deactivate all online services.
Now, push the ok tab.
Last step is to tap on save and close.
Reactivate Bank Feed
This process requires moving to list and then chart of accounts.
Now, right-click on the account from the list that leads to this error and then choose edit account.
Once done with that, you should hit on set up bank feeds and then tap on the yes tab to close all open QuickBooks windows.
Now enter the bank name and hit on the continue tab.
After that, you will have to enter the bank username and password and hit on connect.
Please note that QuickBooks might take some time to pull up the bank account, once it found them LINK the account with a respective account.
End the process by tapping on the next tab.
Method 3: Enabling Security Protocol TLS 1.2
First step is to tap on the Windows + R keys for opening run command.
After that, you should type 'control' in the run box and subsequently, hit on the OK tab.
The next step is to choose network and internet and internet options.
Once done with that, tap on the advanced tab.
And moving forward, look for the security section.
Now, look for use TLS 1.0 and remove the checkmark.
Place a checkmark against the USE TLS 1.2
Next step is to choose the Apply tab and also hit on the OK tab.
And then close all programs that are open.
Complete the process by rebooting the system and check if the issue gets fixed.
Method 4: Running Verify and Rebuild Utilities
Step 1: Running Verify Utilities
First step in this process is to launch the QuickBooks desktop.
And move to the File menu.
Choose utilities option.
And also pick the verify data option.
You should now tap on the ok tab to close all open Windows.
If the QuickBooks software doesn’t detect any issue with the data, then it is suggested to opt for the ok tab.
In case the QuickBooks software found some issue with the data, then hitting on the rebuild option is recommended.
Step 2: Running Rebuild Utilities
You will first have to move to the file option.
Once done with that, push the ok tab and also hit on save to create a backup.
Now, tap on view results after the rebuild completes.
After that, if you found no issues, then you are suggested to move with the steps ahead.
In case any issues are detected with the data, then contacting our experts is suggested.
Method 5: Contacting Bank or Financial Institution
If the above steps didn’t help, then it is highly recommended to contact the bank, as there could be possibility that the errors can be on their behalf. Thus, make sure to get in touch with your bank.
Winding up!
Towards the end of this article, it is expected that you might be able to troubleshoot the QuickBooks error OL-203 by following the steps mentioned in this article.
However, if the error persists or continues to bother the QB user, then it is recommended to connect with our professionals directly using our helpline i.e., 1-888-368-8874. Our QuickBooks error support team is made up of professionals, who who strive to provide the best support possible.