All the valuable information you need to know about the QuickBooks Payroll Error 15222
Over almost a decade QuickBooks has evolved into one of the most popular accounting software used by organizations all across the world. With the launch of this software, business operations have become smoother and more organized. Besides harboring innumerable effective features, QuickBooks releases new updates each year which consist of new and improved features.
Even though it has benefitted small and medium-scale businesses, users often face several technical error codes in the software- the QuickBooks Payroll Error 15222 being no exception. This is one common error that shows up when the users try to download QuickBooks Payroll updates or QuickBooks fails to verify the digital signature certificate within the update file. In this article, we will discuss in elaboration why the QuickBooks error code 15222 issueoccurs and all the possible solutions to rectify it.
Causes of QuickBooks Payroll error 15222
Several causes may lead to the QuickBooks error code 15222. The most common ones include:
Erroneous settings in the I.E often lead to issues in the registered digital signatures.
Slow internet or failure to connect to the internet may also lead to the error code 15222.
When Internet Explorer is not set as the default internet browser.
The software is not compatible with the system
Your system is improperly configured.
Symptoms of QuickBooks Payroll error 15222
Before we jump onto the various methods of fixing the QuickBooks Payroll error 15222, let us get a rudimentary insight into the various signs and symptoms leading to the error.
You are not able to download the payroll updates.
When you are not able to download QuickBooks updates.
Within the file update, QuickBooks failed to verify the listed digital signature.
Your system becomes sluggish making it difficult to use the application.
Troubleshooting Methods to Resolve the QuickBooks Payroll Error 15222
Following are the advanced and updated methods to troubleshoot the QuickBooks Error 15222:
Method 1: Install Digital Signature Certificate
The first thing to do is close QuickBooks Desktop.
Afterward, right-clicking on the QBW32.exe icon and hit on Properties.
Afterward, choose the Digital Signature tab by hitting Intuit Inc. in the list of signatures.
In the Digital Signature details, you will require to choose the Details option and then choose the option View certificate.
In the certificate window, hit on the Install Certificate option and then choose the Next button.
Once done, hit on the Finish tab to complete the installation process.
After the entire procedure is done, start your system again and open and download the QuickBooks update again.
Method 2: Update your system security software
In case you have antivirus software, antimalware or antispyware, then these programs need to be updated so that the given exceptions can work:
Processes – qbupdate.exeandqbw32.exe
Domains – QuickBooks.com, Intuit.com, and Payroll.com
Once the entire process of updating this software is done, you will have to check if the QuickBooks Payroll error 15222 is being displayed or not.
Method 3: Rectify the time and date of your computer
You need to make sure the time of your PC is correct. To ensure the same, follow the steps given below:
At the right bottom of the screen is the Time, you have to hit on it.
Once done, the Date and Time Settings will open up. Now check if the current date and time are correct or not. If incorrect, then hit on the Change date and time tab and correct the time and date.
Afterward, hit on the Change Time zone.
Now you have to choose the Zone and choose your correct time zone.
If the system is on a network then go to the account and make sure that the date and time there are correct.
and then hit on the Menu bar and choose Properties.
Once done with that, you have to launch the Connection and then look for the number written before the bit encryption.
If the cipher strength is less than 128 bits, this will indicate damaged IE, and thus, the QB process may not work as it should.
Method 5: Upgrade the Internet Explorer Settings
Initially, go to the Tools option.
Then head to the Internet Options.
Now you have to open the tab named General and choose the Delete option. Delete all the Temporary Internet files, excluding cookies.
You have to now launch the tab named Connections. Hit on the LAN settings.
Place a checkmark against the Automatically Detect Settings.
If you do not have access to the Proxy servers, then ensure that they are blank.
After this hit on the Ok button and head to the Advanced option.
Place a checkmark against SSL 2.0 and SSL 3.0.
You also have to make sure that there should be no checkmark against the Check for publisher’s certificate. If there is, uncheck it.
On the same Advanced tab, head downwards towards the bottom and make sure that there must be a checkmark against TLS 1.2. If not, then put it.
There should be no checkmarks against TLS 1.0 and TLS 1.1. If they are marked, then in that case you have to remove the checkboxes.
Method 6: Make Internet Explorer the default browser
One of the most apparent causes behind the QuickBooks payroll error code 15222 is the internet explorer not being your default web browser. In that context, it becomes mandatory that you make I.E your default web browser. The steps to be followed are provided below:
Initial step requires you to launch Internet Explorer on your computer.
Subsequently, hit on the Internet options under Tools.
Hit on the Make default option under the Programs tab.
Finally, hit on OK.
Once done with the above-mentioned steps, update the QuickBooks software once more. Check if the error still bothers you. Hopefully, the snag must be resolved.
Method 7: Use QuickBooks Tools Hub Program
Firstly, you need to download and install the QuickBooks tools hub program.
Second you are then supposed to launch the tool.
Then next, navigate to the Company File Issues tab.
After that click on run QuickBooks file doctor tool.
At end the file doctor will detect the issue automatically and fix it immediately.
Final words..!
Fixing the QuickBooks Payroll error 15222 is not that much difficult. It is infect a cakewalk if you perform all the steps mentioned in this article in a sequential manner. However, if these methods are not working for you and you are facing any difficulties to implement, then you can connect with our QuickBooks payroll error support team at 1-888-368-8874. They are well-trained and experienced in Accounting & Bookkeeping software like QuickBooks, who are available 24/7 to help you and resolve all your issues and guide you with all your queries regarding QuickBooks.
A comprehensive guide to resolve the QuickBooks Payroll error PS077
QuickBooks has gone a long way towards benefitting small and medium-sized businesses all across the world by streamlining their business operations. In fact, this software has ushered an unfathomable change in the way accounting, bookkeeping, and payroll tasks were handled. But users often face many technical glitches while using this software.
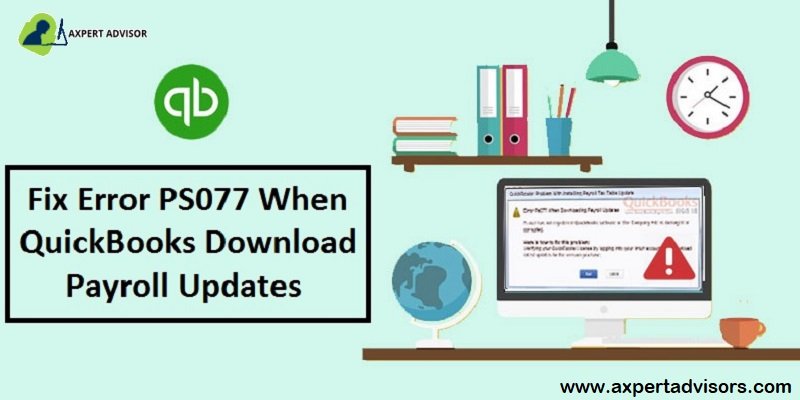
A common error is the QuickBooks Payroll code PS077 which occurs when QuickBooks users try to download the Payroll updates. In this article, we will discuss this error in detail and equip you with all the possible solutions to fix the issue. You might see the following error message on your computer screen:
Causes of QuickBooks Payroll Error PS077
Let us first go through the various causes that contribute to the QuickBooks Payroll Error PS077. Some of the most common factors include the following:
QuickBooks users fill up incorrect or outdated billing information.
Once the entire process is done try updating the tax table.
Solution 5: Open Run Tab
The first thing you have to do is Create a backup of the company file.
Once done, simply Shut down all the running programs.
You need to access the Run window.
On Windows 7 and XP
Firstly, you have to click on the Start button in case you are not logged in with Admin rights.
Ensure that you hit the All Programs.
Choose the Accessories tab and then click on Run.
On Windows 8
Go to the Window System section.
You have to access the Start screen.
Perform a right-click on the background to All apps.
Now click on the Run option.
On Windows Vista
Tap on the Start button.
In the search field type Run.
Solution 6: Turn Off User Account Control
User Account Control (UAC) issues occasionally prevent payroll updates in QuickBooks. To finish the troubleshooting, adhere to the instructions listed below:
Launch the Control Panel from your Windows Start menu.
Now, type in UAC into the search box and hit Enter.
Look for and decide to Modify the user account settings.
Now, hit on Yes, then move the slider to Never notify to disable User Account Control.
When prompted, type in your Admin user information.
Now, start-up QuickBooks software once more and attempt to download the payroll update.
Solution 7: Make use of the Rebuild Data Utility
Running the QuickBooks Rebuild Data Utility helps locate and resolve the issue if the QuickBooks error message code is caused by data damage.
In the beginning, launch the QuickBooks software.
Afterward, follow the given series of actions - Navigate to the File menu, followed by hitting Utilities. Afterward, head to the Verify Data.
The preceding section will make the tool detect the error in the QuickBooks company file
Afterward, head to the File menu and move to Utilities. finally, opt for the Rebuild Data option. It will fix all the detected data issues with the company file.
Now, go back to Verify Data and check if the error still prevails in the QuickBooks software. Hopefully, the error must be fixed.
Solution 8: Change the CPS folder name
Start with opening the file explorer by pressing the Windows + E button.
Second step, you are required to choose the option stating This PC.
Next, you need to head to the local disk C.
In case if you are unable to find the program files, you simply have to open the program files folder.
Once done, you need to open QuickBooks desktop folder that resembles your version of the software.
After that open the components and also go for payroll folder.
And then Right click on the CPS folder.
In the next step, choose the rename folder option.
Next, you are supposed to rename it and also enter CPSOLD.
And after that you are supposed to press the enter tab.
Now users need to make a new CPS folder and then should open QuickBooks desktop.
Last, download the latest payroll tax table update and you are done.
Wrapping up.!
The QuickBooks Payroll Error PS077 can easily be fixed by following the above-mentioned solutions. However, if the problem still persists then you should definitely get in touch with QuickBooks error support providers by dialing 1-888-368-8874 who are available 24/7 to assist you with your problems. If you found significant value in this article, you may be interested to visit other blogs on QuickBooks troubleshooting. Our team of professionals is diligently striving for making the QuickBooks software error-free.
Learn the easy way of creating a portable version of your company file that you want to move:
Want to share your accounting data or move it to another system? Well, creating portable company file in QuickBooks is an easy job if you stick to the steps mentioned in this article. A portable company file is basically a compact version of the company file that’s small enough to send in an email or put on a USB or hard drive. You can easily create the portable files for QuickBooks and transfer them to other devices and open or restore them quickly. This lucid article shall apprise you of all the necessary information you need in this context.
To upskill your technical hold on the process to create and open portable company files in QuickBooks desktop, make sure that you go through this concise segment carefully.
Steps for creating and opening a QuickBooks portable company file
We assure you that by following the easy steps mentioned in this section, even if you aren't adept in the technical complexities of QuickBooks, you will still be able to get this error fixed in no time. Just make sure that you follow the guidelines in the same pattern and order as have been depicted below. You can perform the easy-to-comprehend steps to create and open a portable company file to quickly move to the data or fix issues.
Step 1: Update QuickBooks desktop
You initially need to open the QuickBooks program and choose the help tab.
The next step is to hit on update now and thereafter hit a click on reset updates to clear all the previous updates.
Afterward, hit on get updates and wait for QuickBooks to finish downloading and installing the updates.
Before you proceed ahead, don't forget to reboot the QuickBooks software.
You can also set QuickBooks to download the latest software automatically. And follow the same process as above and hit on the options tab. Choose the dots to yes against the automatic update and shared download.
Step 2: Create a backup file
Herein, you need to open the QuickBooks software.
Afterward, choose the files and switch to the single user.
Then, choose the files and create alocal backup.
Also, choose the local backup option and then hit on the Next tab.
You are then required to browse and navigate to the locations to save the backup file.
Finally, the system will check the files and you will have to hit on the OK tab to save it now and hit on Next to conclude.
Step 3: Make a portable company file
Launch the QuickBooks software and log in as an admin.
And further, head to the File menu and opt for the create copy option.
Choose a portable company file and hit on the enter tab.
You are additionally required to assign a name to the file.
Choose a location to save the portable company file and prefer the Windows desktop to save the file (as it is easily accessible.)
Lastly, hit on save and click on the OK tab.
Step 4: Open a portable company file
After you have created the file, you would have to perform the steps below:
You will need to open QuickBooks and log in as an admin.
Further, proceed to the File menu and choose the open or restore company option.
Choose to restore a portable file and hit the Next tab.
You are then required to opt for the portable company file and click on the open tab.
Make sure not to employ the same name for a portable company file and a regular company file. In case you save them in the same folder, then the portable file will overwrite the regular one. You can either rename the portable company file or save it to a different folder.
And also, go through the notes on where you want to restore the file page and hit the Next tab.
End the process by hitting on the save tab.
When you open the file, QuickBooks will automatically re-index the data.
Step 5: Try an attempt to work on the sample file
Firstly you need to choose the “Open a Sample File” tab in the No Company Open
Secondly use the company file to create the portable file.
At next step, save it to the Desktop.
After that In the “File” menu, choose the “Close Company/Logoff“.
At last step you are supposed to attempt to restore the portable copy of the sample file which you have saved on your system.
Concluding the article, but not our indomitable support for you!
That was all you need to know regarding the process to creating and opening portable company file in QuickBooks desktop. Still have any queries or questions unaddressed? No worries, as our experts feel privileged to assist you. Our team comprises professionals with unfathomable experience and expertise in the field and can solve your issues through a mere phone call. Just call our helpline at 1-888-368-8874. Our QuickBooks desktop support representatives are ready to help you 24/7, 365 days a year!
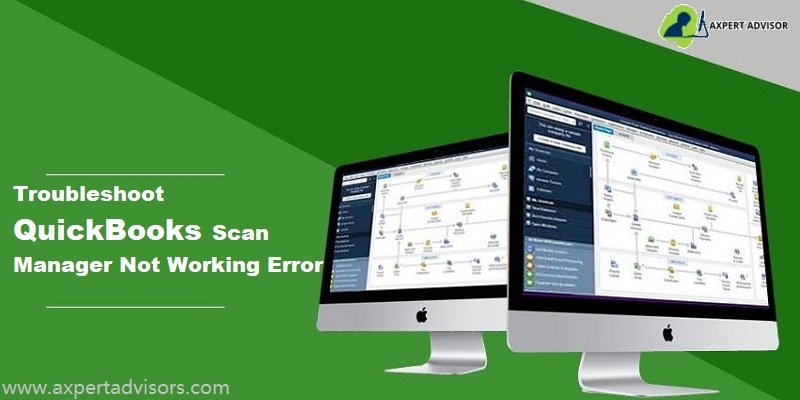
QuickBooks scan manager can perform multiple tasks including scanning invoices, sales receipts, and other transactions. Along with that it assists in smoothly attaching various files to the bills. When this manager ends up in an error, it might be a little problematic for you. Experiencing the inability to select the scan manager is a common error. When you aren’t able to select the QuickBooks scan manager, it might disturb certain functions.
In order to deal with this error, a scan profile can be created. Learn a little more about fixing QuickBooks scan manager not working or could not be selected error, by reading this segment till the end. You can also consult our tech professionals and let our tech geeks handle the situation for you.
The perks of using the QuickBooks scan manager
Scan manager can be of great assistance. Check out how:
You can simply attach the files to the invoices, bills, sales receipts, and other transactions.
The tool doesn’t need you to be a professional to handle it.
Furthermore, you can easily connect it to the bank accounts, so as to import and categorize the transactions.
Note that, in the QuickBooks scan manager, the balance sheet gets updated automatically.
The scan manager is endowed with a warehouse manager so that the warehouse workers can get their work done in a short interval of time.
Issues you might see when scanning bills via QuickBooks scan manager
The following issues can be encountered when scanning bills using QuickBooks scan manager. Let us check them out one by one:
One of the major concerns can be the inability to detect the scanner
If the scan manager isn’t responding
You might also face issues when accessing the document in multi-user mode
If you aren’t able to look for the scanner driver
QuickBooks scan manager is unable to create a new profile
Or if the screen is showing an error that says “No profiles in QuickBooks scan manager”.
Steps to Fix QuickBooks Scan Manager Could Not be Selected
Ending up in such an error is pretty usual and can be fixed using the TWAIN-compliant scanner. Along with that, you need to ensure that the 281, 1 error isn’t present in the system. If that is the case, then the scan manager error will continue to appear. Perform the below steps to troubleshoot this error with much ease.
Method 1: Using TWAIN Compliant Scanner with scan manager
You might have entered a situation where the QuickBooks scan manager couldn’t be selected. Well, if that is the case, then you will have to keep things in mind.
At very first step you need to check whether you are using a TWAIN-compliant scanner.
At second step you are required to start testing the scanner externally to verify the scanner is working fine.
If not, then it means an error exists the scanner internally.
In that case, users are supposed to reach out to the scanner manufacturer to fix QuickBooks Scan Manager.
Method 2: Installing QuickBooks and fixing 281, 1 error
In case you aren’t able to choose the scan manager of QuickBooks, then fixing the error 281, 1 by performing the steps below will surely help. Just in case you wish to do away with the 281, 1 error, then turning off the QuickBooks desktop software is suggested. The steps below can be performed. Let us have a look:
At first, close the QuickBooks desktop app, just in case you are running it on the PC.
Furthermore, hit the start tab.
You need to now choose the search tab and look for the control panel.
Head to the add/remove programs in the classic view of the control panel.
You need to then select the option for repairing the installation.
Lastly, relaunch the QuickBooks software and check that the error is rectified or not.
Winding up!
Once you are able to perform the steps above, it would be a little easy to shun off the QuickBooks scan manager could not be selected error. As always, if you have any queries or concerns, call us immediately at 1-888-368-8874! Our 24/7 QuickBooks error support team will be happy to help you.
Learn the easy and effective ways to resolve the QuickBooks Online error 350 smoothly:
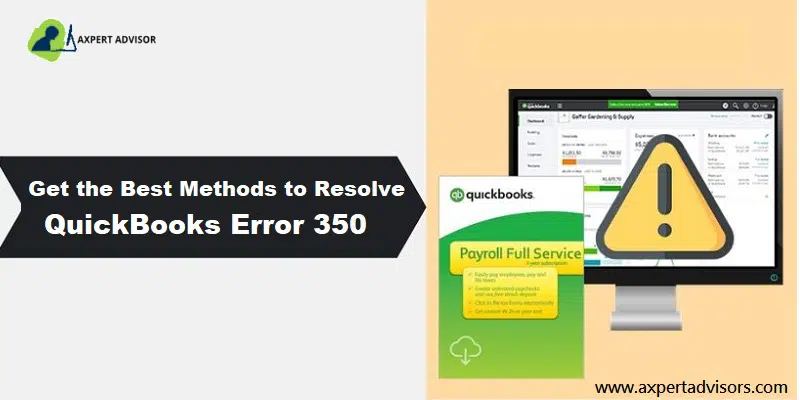
QuickBooks is an impressive, yet intricate accountancy software that occasionally encounters unique error codes and related technical snags. However, it is quite common, and resolving these errors is a cakewalk if you are well aware of the technical knowledge to fix the issue. QuickBooks Banking Error 350 is one such error that can be easily resolved by adhering to a few basic walkways. This error might be seen when you attempt to connect with the bank or credit card server. The software enables you to connect to the bank or credit account and download the recent transactions automatically. When such an error pops up on the screen, you might not be able to use this particular feature.
To know about all the possible causes and fixes for the QuickBooks online banking error 350, make sure to scroll through the segment carefully till the end. For further technical assistance, contact our technical support team using our dedicated customer support line. If you find the walk though too complicated to implement, we can do it on your behalf. All you need to do is ring at 1-888-368-8874 and our team will be there to assist you in every possible way.
Causes Leading to QuickBooks Error Code 350
The error code 350 may be quite exasperating, particularly this issue can be encountered due to several reasons. The most prominent reasons behind the error constitute the following:
Another conspicuous reason may be if the QuickBooks online may be unable to connect to the bank due to some reason.
The size of the company file may be surpassing the prescribed limit.
Abrupt system shutdown.
If the damaged data file is present.
The company file that you are accessing may be damaged.
Corrupt/Erroneous transactions may be providing impetus to the QuickBooks error code 350.
Easy Methods to Fix the QuickBooks Error 350
After going through all the principal causes leading to the error, it will be easier for you to go through the troubleshooting methods contained in this section for resolving error 350 in QuickBooks online. We assure you that the error would show up the next time if you follow each of the methods listed below with keen attention and careful implementation. Let us explore each of the methods one by one:
Method 1: Diagnose and Recover Damaged Data
It should be noted that when facing QuickBooks online error 350, you might not be able to download the bank transactions automatically. The corrupted data file can be of the major contributory factors causing such an error. To know more, check the steps given below:
At the first, launch the QuickBooks online and hit on the File menu.
Afterward, choose Utilities and Verify data.
In case you see a message on the screen, then Your data has lost its integrity. It means that the company file got damaged and needs recovery on an immediate basis.
You can rebuild the file, then you would have to head to the File menu and choose the Utilities tab.
Next step is to hit on the Rebuild data option to start repairing the damaged data.
Choose the OK tab and afterward opt for a Preferred location to save the recovered company file.
After the backup is created successfully, the damaged data will get rebuilt.
After the rebuild data utility finishes recovering the corrupted company file, then you would have to restart the QuickBooks online and check if the problem persists.
Method 2: Reconnect your Bank Account with QuickBooks
If the preceding walkway didn’t solve your issue, then perform the steps below and attempt to reconnect the bank account with QuickBooks:
Initially, navigate and open the Banking menu on QuickBooks online.
Choose the Account in which you are facing the issue.
Hit on the Sign-in option.
Afterward, enter the banking credentials to log into the banking website.
Choose the account in which you were trying to Download the recent bank transaction.
Now you need to opt on the Continue tab and then choose the Update tab. This will update the recent transactions to the QuickBooks online.
Method 3: Manual Diagnosis of the Corrupted Data
You need to initially hit on the F2 tab on the QuickBooks homepage.
The Product information page will show on your display. You need to hit on the F3 tab to reach the Tech help section.
Afterward, find the QuickBooks log file also named qbwin log. This file contains all the necessary information related to various issues, and it would help you reach the root cause.
When you see the log file, then hit on the Open tab.
Look for QuickBooks online error 350 or any other corrupted data that might be the cause of the issue.
Method 4: Make Use of the Verify and Rebuild Tool
Verify and Rebuild tool can be used to rectify damaged file(s) in QuickBooks. It's a holistic tool that can help you recover your company files. You can use this tool to get rid of the QuickBooks error 350 by following the easy procedure listed below:
Launch the QuickBooks software, then choose Utilities from the File menu.
You are subsequently required to opt for the Verify Data option.
If your data is destroyed, you need to run the Rebuild Data. In such a case you will see the message 'Your data has lost its integrity.'
Now, head back to the File menu and choose Utilities.
Follow up by hitting on OK and the choose Rebuild Data to create a backup of your company file.
Afterward, choose a suitable location for data backup and hit on OK.
After backing up your file, the tool will reconstruct the corrupted data to fix the QuickBooks error code 350.
Method 5: Clean Your Browser of Any Cache
Initially, Launch Internet Explorer from the Start menu.
you are then required to hit on the Gear icon and choose the Internet Options button.
Afterward, hit on the Delete button in the Browsing history section.
Make sure to check-mark the Temporary Internet Files option and the Cookies and website data check boxes.
Follow it up by hitting on Delete.
Now, perform your usual QuickBooks operations and check if the error gets fixed.
Method 6: Reconnect your bank or credit card account in QuickBooks
To reconnect QuickBooks with your bank account, follow these steps:
Log in to QuickBooks and navigate to the Banking tab.
Find the account you want to reconnect and click on the Edit icon next to it.
In the Account details screen, click on the pencil icon next to the Bank Account section.
Choose the option to "Disconnect this account on save".
Click on Save and Close.
Once the account is disconnected, go back to the Banking tab and click on Add Account.
Now select the blue bank square for the account you need to reconnect.
If prompted, enter your User ID and Password credentials and follow the authentication process.
Next, the user need to choose the accounts that he/she want QuickBooks to download transactions from.
Hit a click on Continue.
Once the account is connected, QuickBooks will start downloading transactions from your bank account.
Categorize the transactions in QuickBooks and make any necessary edits.
When you're ready, choose the Update option to get the latest transactions from your bank.
That's it! Your QuickBooks account should now be reconnected to your bank account.
Concluding!
That was all you need to know about getting rid of the QuickBooks online error 350. However, if you still face the issue on your software or you have any other queries or concerns, please feel free to call us at our QuickBooks error support number i.e., 1-888-368-8874!
We are a hub of technical experts who have proficiency in the QuickBooks software and are diligently involved in rectifying a plethora of error codes encountered while using the software. We work round the clock to provide the best possible support services. So, do not hesitate in calling us anytime and seeking for assistance!