Here is how you can configure firewall settings for QuickBooks to set up multi-users in QuickBooks:
Firewall and security settings can often be a complex area when it comes to optimizing your QuickBooks accounting software. Firewall is basically a must to have as an application as it saves the system from different threats including malware, viruses, and unwanted programs. Often firewall blocks the internet access needed to run QuickBooks desktop and the company file. You can experience such an error when using QuickBooks desktop in multi-user environment.
This comprehensive guide will illuminate the process of configuring firewall settings for QuickBooks and outline all the relevant procedures involved in adjusting your security settings. If you're looking to understand what it takes to fine-tune your firewall and security for QuickBooks, carefully scroll through this segment. For personalized expert advice, don't hesitate to give us a call on our QuickBooks technical support line.
Procedure to configure firewall and security settings for QuickBooks desktop
You are suggested to perform the below set of steps for configuring firewall and security settings for QuickBooks accounting software.
Step 1: To configure firewall settings for QuickBooks, initially, set up the QuickBooks Tools Hub
So as to use the QuickBooks tool hub program, shutting down QuickBooks software is the first and foremost step. Moreover, while opting for Tool Hub on Windows 10, 64-bit is believed to be the best choice for a seamless experience.
Kick start the procedure by closing QuickBooks.
Head forward by downloading the recent version of the tool hub.
Make things easy by saving the file to a folder therefrom it can be easily accessed in future.
Most importantly, in case you have installed the tool hub previously, then you can spot the version you are using. Head to the home tab and you will be able to find the version at the bottom.
Opt for and open the file downloaded in the previous step.
Performing the steps that pop up on your screen would take you further in the process.
After the installation process concludes, double-tap the icon on the Windows desktop to open the tool hub.
Mark that, if you are unable to spot the icon, search for the same in windows and choose the program.
Step 2: Run the QuickBooks File Doctor tool
Under the QuickBooks tool hub, you need to opt for Company File Issues.
The file doctor tool might take a couple of minutes to open.
You need to note that if the tool doesn't open up, then look for the QuickBooks file doctor tool and open it manually.
Once it opens up, you need to tap on the company file from the dropdown menu.
In case identifying the file becomes difficult for you, then you are suggested to hit on Browse and search to find your file.
Head for Check your file and network and then Continue.
Fill in the QuickBooks admin password.
Hit next.
One of the most important points to note is that the scan time depends on your file size. Often, it can take up to 5 minutes. When the scan finishes, you need to open QuickBooks and your company file. The scan may say it was unsuccessful even if it fixes your issue.
Step 3: Updating and configuring the firewall manually
Afterward, enter the windows firewall and also hit on windows firewall and open the same.
Head to the advanced settings tab.
Then, right-click on the inbound rules and opt for the new rule.
Tap on port and hit the next tab.
Ensure to hit on TCP.
Insert the ports needed for your QuickBooks year version
QuickBooks desktop 2021: 8019, XXXXX
QuickBooks desktop 2020: 8019, XXXXX
QuickBooks desktop 2019: 8019, XXXXX
QuickBooks desktop 2018: 8019, 56728, 55378-55382
QuickBooks desktop 2020: 8019, 56727, 55373-55377
The point to be noted here is that QuickBooks desktop 2019, 2020, 2021 and upcoming versions use dynamic ports. These are firewall ports mentioned during installation. The format of the port for QuickBooks desktop 2019 and later version is said to be 8019, XXXXX.
Steps to get the dynamic port number
Perform the below steps to get the dynamic port number. The steps are easy to follow, the only prerequisite is that you follow them sequentially.
You need to change the port number by hitting on the new tab. Find out the scan folder tab and also opt for the scan now tab. This will basically reset the firewall permissions, but you can only upgrade ports for QuickBooks 2019 and later versions.
Once you are able to enter port no., you need to hit on the next tab.
Then, choose to allow the connection, and later on, hit the next tab.
Check mark all profiles and then hit on next.
Create a rule and name it as QBPorts
Hit the finish tab.
For creating outbound rules, perform a similar set of steps. Move to QuickBooks desktop and switch to multi-user mode. Open QuickBooks on the network from one of the host systems.
Steps for creating windows firewall exceptions for QuickBooks programs
Initiate the procedure by heading to the windows start menu.
Type in 'windows firewall' and double-tap on the windows firewall to open the same.
Then, hit on the advanced settings.
Right-click on the inbound rules and tap on the new rule.
Furthermore, choose the program option and head to the next tab.
Head to the program path and also opt for the browse tab.
Look for and tap on one of the executable files on the chart above.
Hit the next tab.
Opt for allow the connection option and hit on the next tab.
Ensure that all the profiles should be marked and also tap on the next tab.
Generate a rule and later on assign a name to it.
You are required to create outbound rules and also repeat the steps for outbound.
In case you can notice program files, then it indicates that you are using the 64-bit operating system. You need to move to QuickBooks desktop and also switch to multi-user mode.
Check your antivirus or firewall settings
In case you configured the firewall but continue to land into similar issues, then checking the antivirus settings would be the best-recommended solution. You are also required to ensure that QuickBooks has general permissions. This ensures that it is not blocked. However, the procedure might be different. You can have a look at the procedure to set up permissions for your antivirus software.
Add QuickBooks ports exception on your antivirus or firewall
Are you still experiencing the same issue when opening the file over a network or in multi-user mode? A solution to that is to add port exceptions for the executable files listed in the table above.
Ascertain that the TCP is opted right and also type in the ports required for the QuickBooks version. The port numbers are mentioned in the step related to configuring the firewall manually. Also, keep in mind that if you are using different or multiple versions of QuickBooks desktop, then adding each year's ports is recommended.
Restart your computer
A couple of programs demand rebooting the system, so as to save the changes. After you are done with the procedure above, you need to reboot the system and try opening QuickBooks now.
Still unable to configure firewall settings for Quickbooks?
Having explored the steps mentioned above, you should be able to configure firewall and security settings for QuickBooks. However, if that isn't the case, all you need to do is to get on a call with our QuickBooks technical support professionals using the support line. Our customer executives will be more than interested in answering your queries associated with this accounting software.
Learn how you can fix any error using the QuickBooks component repair tool
Are you encountering frustrating installation errors like QuickBooks Error 1603, 1935, 1904, or 1402? These tricky issues can severely disrupt your QuickBooks experience. The good news is, there's a powerful and free solution: the QuickBooks Component Repair Tool.
This essential tool is designed to automatically diagnose and fix problems within the critical Microsoft components that QuickBooks relies on, including the .NET Framework, MSXML, and Visual C++. By addressing these underlying system issues, the Component Repair Tool ensures a smoother QuickBooks installation and prevents common operational glitches.
In this detailed guide, we'll walk you through everything you need to know about this invaluable tool. Learn how to download, install, and effectively use the QuickBooks Component Repair Tool to resolve those stubborn installation errors and get your QuickBooks up and running flawlessly.
What is The QuickBooks Component Repair Tool? An Overview
QuickBooks component repair tool can be downloaded and used to generally fix common installation issues. This tool is designed and developed in a way to resolve issues that can be experienced during the usage of .NET framework and other windows components needed to run QuickBooks. What makes this tool even better is that it doesn't demand any specific configuration and it automatically scans the components. You can try fixing the below set of errors, using the QuickBooks component repair tool:
The QuickBooks component repair toolcan be downloaded without any additional charges and can be of great assistance in fixing errors associated with QuickBooks.
Steps to Download QuickBooks Component Repair Tool
To automatically scan and repair QuickBooks components, first of all, you have to Download the QuickBooks Component Tool. But the positive thing is that this tool it doesn’t require any specific system configuration or requirement. Follow the below given steps to download this tool:
First of all, you need to make an exit from all the Open programs.
After that, reboot your computer system once.
Download the QuickBooks Component Repair Tool from here.
You need to double-click on the saved file to Run or execute the setup file.
Once the tool successfully installed on your computer reboot your computer once more time.
Steps to Fix common Installation Errors in QuickBooks
Run the program by double-clicking on the downloaded file.
Delete all the executive programs and scan your QuickBooks files using this component repair tool.
Restart your computer after running the tool.
Steps to Download Windows Updates
Expired Windows
will not allow you to Install/Open QuickBooks on your system. Your QuickBooks
may face several errors, and the Outdated Windows misses updates related to
Visual C++, .NET Framework, MSXML, etc.
Update Windows on your desktop by hitting on the Windows Key on the keyboard & type ‘Windows update’
After that, tap on the Check for updates option.
Download and install all the updates (if there any)
Once the windows is updated, restart or reboot the computer.
After the download is complete, Save the file to a local desktop.
Close all Running programs before running this tool
Now, restart the system after you have to RUN the tool
The problem should be solved by now and if it still exists then use QuickBooks component repair tool to resolve the issues.
Manually Fix Errors with Microsoft Components Using QuickBooks Component Repair Tool
If QuickBooks Component Repair Tool hasn’t worked and the problem still persists, then you need to manually fix errors related to the Microsoft components by:
Rebuilding/repairing Microsoft .NET Framework
Reconstructing/repairing Microsoft MSXML
Step 1. Rebuilding/Repairing Microsoft .NET Framework
The Microsoft .NET Framework is a Microsoft component that is used by QuickBooks to connect with web apps. Several errors and issues are faced by users which can be resolved by following the below steps:
The first step is to download the QuickBooks Component Repair Tool to your computer system.
When prompted, Save/Store the file on the local desktop.
Close all the "Open programs" and applications & double-click on the QBInstall_tool_v2.exe file
Restart your computer after process diagnosis is complete.
The above-mentioned process will Repair Microsoft .NET Framework, however, if still there is an error then follow the below steps:
Hit on the Windows Key
Head to the Search bar and type 'Windows Update.'
Now, opt for the check for Updates option.
Step 2. Reconstructing/Repairing Microsoft MSXML
QuickBooks will not run because of the damaged Microsoft MSXML component. To repair the damaged MSXML component, please find the below steps.
Register the ‘MSXML DLL files’
Uninstall & Reinstall MSXML 6.0
Download & Install the MSXML 6.0 SP1
Now, go for repairing the MSXML 6.0.
Winding up!
We hope that you find this article helpful in installing and using QuickBooks Component Repair Tool. In case you require any further help in installing this useful tool, you can contact our certified QuickBooks desktop support experts. Thanks for visiting us, and spending your valuable time in reading this article till the end. We expect that the information provided in this article might have helped in making the best of this tool.
A Guide to resolve data damage of QuickBooks Desktop
Encountering data issues with your QuickBooks company files can be a critical issue, potentially leading to missed deadlines and the loss of vital company information. If you suspect your QuickBooks data is compromised, this guide is designed to help you resolve the majority of these problems efficiently.
This article provides actionable solutions to address common QuickBooks data damage issues, helping you protect your crucial financial records.
However, if you're looking to save valuable time and effort or prefer expert assistance, our dedicated U.S.-based support team of Certified ProAdvisors is available round-the-clock to provide immediate help.
Fix Data Damage On Your QuickBooks Desktop Company File
There are only two ways to resolve the data damages on your QuickBooks company file.
Run the Rebuild Utility
Run the Verify Utility
Step 1: Rebuild data utility
Rebuild data utility is a useful tool you will have to run first to start troubleshooting data damage on your QuickBooks file.
Open the 'File menu' and hit on 'Utilities and Rebuild Data'.
After the QuickBooks Information window pops up, hit on 'OK'. Save a backup by simply following the prompts. (Important: Don’t be confused if your computer displays that QuickBooks is not responding. If your mouse cursor is moving, the 'Rebuilding process' is on. Wait patiently and allow the process to finish.)
After your computer displays to you that Rebuild has completed, hit on 'OK'.
Step 2: Verify data utility
Run the 'Verify data utility', which is the next step tofix data damage on your QuickBooks file.
Open the 'File menu' and opt for 'Utilities and Verify Data'.
If QuickBooks detects no issues with your data, tap on 'OK'. You may keep on using your company file.
If any issues are spotted with your data, you will receive a prompt to 'Rebuild Now' or 'View Errors'. Hit on 'Close' and you will have two options to choose from:
Review Last Verify/Rebuild
Tap on the 'F2' or 'Ctrl+1' keys on your keyboard and the 'Product Information' window will open on your computer screen.
Choose the 'Review Last Verify/Rebuild' option.
Check the results screen for errors.
ReviewQBWin.log
Do you know how to review the QBWin.log or the QuickBooks.log file? If your answer is yes, you can follow the given steps. (It’s recommended to contact a certified expert or our support for additional help in case you are not comfortable doing that on your own).
Find 'QBWin.log' or 'QuickBooks.log' files. (In case you seeking the help of a support agent, Press 'F2' followed by 'F3' to open the 'Tech Help' window. Once you are at 'Open File tab', click the log file once and click send log files to Intuit support. This process will forward the file to a repository and will finally allow the support agent to check your log files.
Check the log file.
Windows: Type Begin Verify in the search box (Ctrl+F keys) and spot the most recent file (it would be simple as logs are written in date order with the latest at the bottom).
Mac: Go to the bottom to find the most recent Verify information.
Find 'LVL_ERROR', copy the complete line and then search it on Inuit’s support site. (Note: Errors within MS Windows as well as Mac log files may differ slightly. However, they are displayed in the same format.)
Step 3: Repair your company file using QuickBooks file doctor
It can take up to one minute for the file doctor to open.
Next, choose your company file from the drop-down menu in QuickBooks File Doctor.
In case you don’t see your file, choose Browse and search to find your file.
Now, opt for Check your file and then hit on Continue.
Now, finally, put your QuickBooks admin password and then opt for the Next tab.
Fixing Data Damage Solutions for QuickBooks Desktop for Mac
Use the verify tool in QuickBooks for Mac for scan the company file for errors or damage.
Choose the file and choose Utilities tab.
You now have to select Verify data, and hit on the ok tab to close all windows.
In case you see Your data has failed the integrity check, then you need to Rebuild the file.
If there are No issues with the data, then you are done with the process.
Steps for rebuilding the company file data
Choose the File and also hit on Utilities.
Furthermore, tap on Rebuild data and choose the OK tab to close all windows.
QuickBooks will ask to make a backup before rebuilding the company file and tap on the OK tab. In case you don't want to backup, then hit on Cancel to continue rebuilding the company file.
In case you haven't Set up any backup preferences, QuickBooks will ask to update them. Choose the Backup preferences and Edit as required and hit on the OK tab.
After the backup is finished, then opt for a show-in finder to locate the backup or tap on the OK tab.
Hit on the OK tab and Rebuild in finished.
Step 4: Manually repair the company file by rebuilding the data
The very first step is to go to the File menu.
After that you need to hover over Utilities.
And next select Verify Data.
Let the tool check your file for data issues.
Next step is to select Expand All to see the errors, from the Verify Results screen,
At last, select See Online Article.
How to Identify Data Damage in QuickBooks Desktop Company File?
There are innumerable ways of identifying the data damage in the QuickBooks company file. The most conspicuous signs include the following:
If you encounter an error, like data issues, that hinders QuickBooks from continuing in the verify data utility or verify target, if the values in minor do not match the screen or the QBwin.log file.
Also, sudden or abrupt shutdown of QuickBooks, when trying to save or remove a transaction.
Any transactions are missing from the list.
The paid bills and invoices are reflected as unpaid.
If the transactions history shows a negative balance.
QuickBooks is slow and the operations performed are consuming more time than usual to finish.
Why data damage occurs in QuickBooks?
Data damage may occur for a variety of assorted reasons. the most prominent causes are highlighted below:
The file size expanded beyond the recommended healthy limit.
Lack of resources, like RAM, network cables, etc.
The system shuts down due to technical glitches in the mid of the process.
Trojan malware attack
A sudden power surge or drop ending in trashing the entire hard drive leading to such an error
Preventive actions
Before you head to the steps, there are certain actions you need to take:
Choose a hard-wired network over wireless: This is suggested, as in case you make use of a wireless network, it might enhance the risk of dropped connections, which in turn create issues with the data file. These issues can be avoided by opting for a hard-wired network
Create a backup within QuickBooks: Often the files are automatically backed up in QuickBooks, which helps a lot. However, when the log file is created and continues to increase in size, the performance starts getting hampered, and this increases the risk of data corruption unless you take the backup. This backup file is later used by Intuit for data recovery.
Check the file size: QuickBooks pro and premier users can opt for a 250 MB file. When the file size reaches 500 MB, it might turn down to sluggish performance. The QuickBooks enterprise users can select 500 MB. When this file reaches 750MB, it might start creating issues.
Update patches: You can check the release number in the first line of the product information window. Using the latest patch might not create such an issue later.
Keep a check on the database file fragments monthly: You can end up in fragmentation if the system gets filled up with the data over time. In case you are putting in the data without carrying out a cleanup in it.
Finalizing up!
We hope that you are able to fix your QuickBooks data damage issues by after reading this post. In case the issue persists even after trying the troubleshooting steps in this post, you can contact our QuickBooks error support team.
We offer quick and precise solutions related to all accounting related issues and are reachable round the clock.
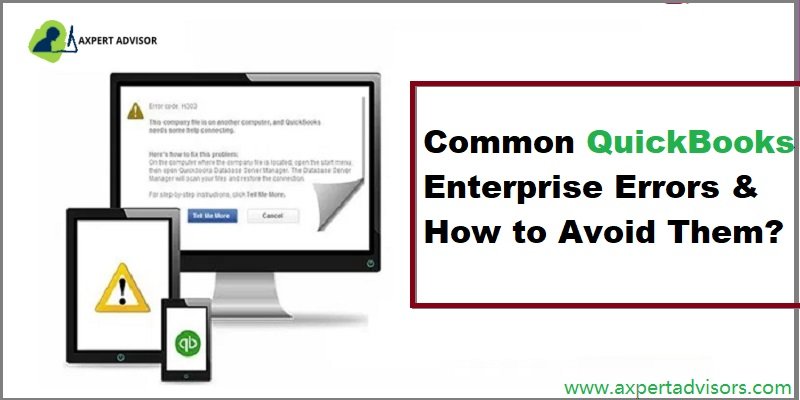
QuickBooks Enterprise, while offering an amazing features and functionalities, operates on complex codes and algorithms that can sometimes lead to technical errors. These issues can manifest in various forms, including functional glitches, configuration problems, server-related disruptions, or even data corruption.
This comprehensive guide is designed to help you understand and effectively fix common QuickBooks Enterprise errors. We'll delve into the various categories of errors you might encounter, providing clear, actionable steps to troubleshoot and resolve them.
To ensure seamless operation of your QuickBooks Enterprise software, we recommend carefully reading through this segment. Should you require personalized assistance or encounter persistent issues, our dedicated support team is readily available to provide expert guidance.
Common QuickBooks Enterprise Errors
These are a set of a few enterprise software-related errors that are reported by many users in the QB community.
Steps to Fix Most Common QuickBooks Desktop Enterprise Errors
Some of the most common errors found in using QuickBooks Enterprise are listed below with the instructions to fix them:
1st Error. QuickBooks Enterprise Error H202 and H505
QuickBooks error H202 and H505 constitute QuickBooks enterprise common errors. These errors might seem to be a bit confusing, but can be rectified by performing a few sets of steps.
What is QuickBooks Enterprise Error H202 and How to Fix It?
Error H202 arises when QuickBooks is unable to connect to the remote server in order to open the file. The solution to H202 QuickBooks Error is different, depending on the cause of the H series error.
Solution of QuickBooks enterprise Error H202
The H-series Errors in QuickBooks, i.e. Error H101, H202, H303, and H505 have similar fixing methods with some exceptions. One of the methods is "Network Connectivity Testing and Calibration".
Initially, launch the QuickBooks software on all the systems networked for using QuickBooks.
Thereafter, choose the 'File' menu and hit on 'Utilities',and turn off hosting.
Hit the 'Windows' key on your keyboard and type “This PC” on the QuickBooks Host Computer.
From the left side of the window, double-click the "Network" option to verify the visibility of all the networks.
Ping all the computers respectively from the QuickBooks Server computer.
Ping the 'QuickBooks Server' from the computer showing Error Code H202.
Perform the command for the ping test on Command Prompt.
Ping command syntax: ping [Computer Name] and hit the "Enter" key.
What is QuickBooks Error Code H505 and How to Fix It?
The H505 error code is a group of errors that usually occur when users are trying to access a company file that is not located on another computer. This error can also occur if users are accessing a file on their computer with improper configuration. These errors mean something is blocking the multi-user connection to your server.
Open the Run dialog box using the"Windows + R" key.
Type “CMD” in the command box on the bottom left of the screen and push the "Enter" key to access the Command Prompt window.
Type “ipconfig /all” (there is a space after ipconfig) and hit the "Enter" to run the command
Take note of the "Host Name" (computer name) and the "IP Address".
Repeat the above process for all workstations and computers connected in the multi-user environment.
Now, "Edit" the "Windows Hosts file" by closing QuickBooks and navigating to the "Start" Menu.
Hit on the “View” tab on File Explorer’s menu and choose the “Hidden items” checkbox in the Show/hide section. File Explorer will now reveal the hidden files.
Type in the "IP address" and type in the Computer Name.
After you finish, you can apply the changes and reopen QuickBooks in multi-user mode.
2nd Error. QuickBooks Enterprise Error 3371 Status code 11118
This error occurs when you are unable to load the license data. It can be due to some damaged or missing files, outdated Windows operating system, or components. This error occurs when you are trying to access the QuickBooks account after cloning the hard drive and reconfiguring the system. There are 3 types of 3371 errors that are shown:
Could not initialize license properties. Error 3371: QuickBooks could not load the license data. This may be due to missing or damaged files.
Could not initialize license properties. [Error 3371, Status Code -11118] QuickBooks could not load the license data. This may be due to missing or damaged files.
Could not initialize license properties. [Error: 3371, Status Code -1] QuickBooks could not load the license data. This may be due to missing or damaged files.
Steps to Resolve QuickBooks Error 3371 Status Code 11118
Updating Windows can automatically fix the Operating System issues causing the Error 3371 to your QuickBooks.
Update compatible ".NET Framework" or else "Repair Microsoft .NET Framework, MSXML, and C++" by repairing your QuickBooks Desktop.
Make your QuickBooks flawless by starting QuickBooks Repair and optimization process.
Close all the "QuickBooks processes" running in the background from the "Windows Task Manager".
Browse to file location of "ECML file" and "Delete" it.
Initiate the "QuickBooks Desktop Activation" after deleting the file.
Keep the "QuickBooks License and Product Code" handy while purchasing the product.
3rd Error. QuickBooks Enterprise Error 6000 816
This error occurs when QuickBooks is unable to open a company’s file when it is in use with other programs. For example third-party backup. This may be due to damage in the company file (.qbw).
Steps to Fix QuickBooks Error -6000, -816
To fix such errors, one must:
Rename the .ND and .TLG files.
To test any problem with the location of the company file, copy QuickBooks files on the desktop.
Error 15215 usually appears after or before installing a major update and the problem can be caused by several different factors like downloading a payroll update while another application is running in the background and updating QuickBooks desktop and process does not get completed fully, etc.
Steps to Resolve the QuickBooks Error 15215
This error can be solved according to different scenarios, i.e.
If the problem is caused due to blocking by anti-spyware, then modify the anti-virus software.
If the problem is due to "Internet Explorer configuration", then:
Hit on the "Tools", followed by "Internet Options", and finally move to the "Advanced Settings".
Check the box for ''Use TLS 1.0" and uncheck the boxes for ''Use TLS 1.1" and ''Use TLS 1.2”
Hit on "OK", and restart the computer.
Launch QuickBooks and verify the error resolution again.
5th Error. QuickBooks Error Code 80029c4a
Error 80029c4a is a complex error that comes with an error message stating "Error loading type library/DLL can't load a dynamic link library (DLL)".
This error code is usually encountered when QuickBooks component doesn't start properly or the dynamic link library files are missing or corrupted due to the system irregularities. Or if the antivirus or security software has falsely marked any QuickBooks executable file or the other components as unsafe.
Steps to Fix QuickBooks Error 80029c4a
You can follow the steps mentioned below to fix the issue:
Restart and register QuickBooks services & DLL's using Reboot.bat command.
Close QuickBooks desktop.
And then, "open" the "folder" that has the reboot.bat file.
Now, right-click the "QuickBooks desktop icon" and then opt for the "properties" option.
Now, hit on the "Open file location".
Opt for "run as admin" after right-clicking the "reboot.bat file".
Wait for the black window to disappear.
And lastly, "restart" the system and QuickBooks should run fine.
QuickBooks reboot process brings the software to its optimal default settings.
6th Error. QuickBooks Error Code 6129
QuickBooks error code 6129, 0 is experienced when the verification of the database connection fails or the QuickBooks software tries to access company files. As a result of such an error, you might not be able to open the company file. You can experience such an error due to mismatch between client and server domain, and a couple of other reasons as well.
Effective Solution to Rectify QuickBooks Error Code 6129
You can try fixing the issue by renaming the network files in QuickBooks. The procedure involves the steps below:
Open the folder containing the company file.
Search for the hard drive or the system for QuickBooks files that are named with the extension .nd
Change the name of the file to an old company file name and select rename option.
Enter in ''old'' as the file extension and hit enter tab.
If you have access to same company file on multiple systems, ensure to perform the steps for all the files.
Or if the company file is used on one system only, then opening the file is suggested.
Tap on the windows start tab and then head to the programs tab.
If there is no folder having the company file, then adding a new folder is suggested.
Hit the start scan tab.
Opting for the close tab will work now.
Access the company file and that's it.
Final words...! Are you still facing the issue? Just call our support team.
If any of the above-mentioned problems still persists or you receive a rare or new error after performing the given steps, call us and we will be happy to help you. Our certified QuickBooks error support experts are available 24x7. Use our support line to connect with our personnel. Thanks for reading this article and visiting us. We hope that the information in this article might be of some help to you.
Learn quick steps to troubleshoot QuickBooks error code 15227:
Are you encountering QuickBooks Error Code 15227 and struggling to get rid of it? This frustrating error can appear at various critical times, such as during Windows startup or shutdown, or even when installing the Windows operating system. It often indicates system instability, where vital system files might be unresponsive or missing.
This comprehensive guide is designed to help you understand and eliminate QuickBooks Error 15227. We will delve into the various factors that can trigger this error and provide you with actionable steps and effective measures to resolve it.
If, after following our troubleshooting steps, QuickBooks Payroll Error 15227 continues to be a persistent issue, don't hesitate to reach out to our dedicated support team. We're committed to ensuring this error is completely removed from your computer system, allowing you to get back to seamless QuickBooks operation.
Easy Methods to Repair the QuickBooks Error Code 15227
Here is how you can perform some easy-to-follow troubleshooting methods to get this QuickBooks error message 15227 fixed. You don't require a significant technical proficiency for performing these methods. Just make sure that you maintain the same order and sequence while implementing the directions. So, let us proceed.
Method 1: Repair the Windows Registry Entry
The first method requires you to repair the windows registry entry. Afterward, you need to run a trusted registry cleaner to scan and repair the error 15227 related registry problems. Using a reliable registry cleaner automates the process of finding invalid registry entries, missing file references, and broken links within the registry. Repairing registry errors can dramatically improve system speed and performance. The steps involved in repairing the windows registry are as follows:
Herein, hit on the Start tab or Windows tab.
Furthermore, type in 'Command prompt' in the Search bar. A black window will be seen on the desktop screen.
You now need to hit the Enter key.
Ensure that you have logged in the system as system admin.
Next, in the Command prompt window, type in 'Regedit.'
To head forward, tap on the Enter key.
When the registry editor window appears on the screen, choose the key that is related to the error. This is to Create a backup for the key.
Later on, choose the Registry editor.
Moreover, proceed to the File menu.
Now choose the Export option.
You are then required to save the enlist option.
And choose the folder that you want to Create a backup for.
Assign a name to the Backup file.
You now have to checkmark the Export range tab.
Lastly, save the key and ascertain that you save the key with the .reg file extension.
Method 2: Perform a Malware/Virus Scan
The next method involves a malware check of the laptop or the computer. There is a chance that the error could be related to malware. These malicious programs are harmful and can damage, corrupt, or even delete Run-time Errors-related files.
The steps involved in the disk cleanup process are as follows:
To kick start the process, hit on the Win + R keys and open up the Run box.
After that, hit on the Enter key and also tap on the OK tab.
You will see the Disk cleanup window where you have to hit on the Clean-up system files.
In the next step, hit a click on the YES tab, after which you will see a list of files to delete.
And then check all the items and click on the OK tab.
Head for the Delete files option.
This will clear the cache from the windows 10 computer in just a few clicks.
Method 4: Update All the Essential System Drivers
Updating drivers to their latest version can fix the error 15227. Maintaining a driver backup provides security to roll back any driver to a previous version if required. Updated device drivers can unlock new hardware features and also improve the speed and performance of your computer system.
You need to initially hit on the Windows key.
Furthermore, type in 'Device manager' in the Search bar and open it.
Expand the adapters category.
Moreover, opt for the device and right-click on the same.
Troubleshooting the QuickBooks error code 15227 in proper order gives efficient results. In this article, we have included all the updated methods of getting rid of this error. In the majority of the cases, the error must be solved by now. However, If the issue persists, that implies you require a professional to assist you. In that context, you can dial our 24X7 QuickBooks support line and speak to our certified technicians.