Here is how you can go for clean installation of QuickBooks (or reinstall) for your Windows computer
Is your QuickBooks Desktop performance lagging, or are you encountering persistent company file issues that a standard reinstall just won't fix? The solution might be a QuickBooks Clean Install. This powerful troubleshooting method is designed to resolve a wide array of problems by completely resetting your QuickBooks Desktop environment.
Unlike a basic reinstall, a Clean Install (or Clean Uninstall) involves a precise multi-step process: first, thoroughly uninstalling QuickBooks Desktop for Windows, then renaming associated company files, and finally, reinstalling the program from scratch. This comprehensive approach ensures that any corrupted or problematic components are entirely removed, paving the way for a fresh, error-free installation.
Before you begin the "un-establishment" process, ensure you have your QuickBooks Desktop downloaded .exe file or installation CD readily available, along with your license number. Having these essentials prepared will make your clean installation process smooth and successful.
Methods to perform a clean install of QuickBooks Desktop for Windows
The repair tool for the complete Clean Install of QuickBooks procedure subsumes 'uninstalling, renaming QuickBooks company file(s), and then reinstalling QuickBooks Desktop. Following is the step-by-step guide to performing the uninstalling and reinstalling of the QuickBooks Desktop software:
At first, hit the Windows+R keys on the keyboard to show the RUN command window.
After that, type in Control Panel and then hit OK.
Now opt for the Program and Features option.
Open the Programs list, click on QuickBooks, and then opt for the option to uninstall.
Next, follow the online instructions to complete the procedure.
Method 2: Rename the QuickBooks installation folders.
Post uninstalling QuickBooks, the next step involves renaming the folders by using the Clean Install Tool. You can also rename the QuickBooks Installation folders manually by navigating to the QuickBooks folder and then right-clicking on it to opt for Rename option.
Step 1: Download and RUN the QuickBooks Clean Install Tool.
After you have renamed the folders, download and run QuickBooks Clean Install Tool. Here is how you can perform this procedure.
Download the QuickBooks Clean Install Tool from the QuickBooks Tool Hub program. This tool can be downloaded from the official website of Intuit.
Soon after, launch the downloaded QuickBooks Clean Install.exe file.
Choose the I Accept option on the license agreement page.
Now, pick the QuickBooks desktop version and then check the option to continue.
Now, hit the OK button when a message box that reads QuickBooks is prepared to complete a clean install appears, and you can install this to the default index.
Next, you can rename the QuickBooks Desktop Installation folders to show the hidden files, and after that, rename the 'folder location' listed for the MS Windows version. Add 'OLD' at the end of the name of the folder. With this activity, you will maintain a strategic distance from QuickBooks from perceiving the folder while you make another one.
Step 3: On the off chance that you see the error message stating, 'The Access Denied while Renaming the folders', perform the following steps:
The following steps will assist you in getting rid of the above situation:
On the Windows Taskbar, right-click and choose Task Manager. You can alternatively access the Task manager by clicking on the Ctrl + Alt + Delete keys.
Within the Task Manager, head to the Processes tab and choose the Image Name column header to unravel the processes alphabetically.
At this stage, you are required to pick the following processes: QBDBMgern.exe, QBDBMr.exe, QBCFmonitorservice.exe, and qbw32.exe. Click on these processes one by one and then tap on the option to End Process.
Opt for YES when you receive a warning message box.
Method 3: Re-Installation of QuickBooks Desktop
The final step is to go for the uninstall and reinstall process. After uninstalling the accounting application, head forward to download and install QuickBooks Desktop. You will need your license and product keys to authenticate the installation process.
What is the utility for a QuickBooks clean install?
QuickBooks Clean Install Tool is basically a repairing tool that is generally used to fix damage in the QuickBooks company file. There can be issues that might not get resolved by a mere re-installation of the QuickBooks Desktop. Such issues are generally addressed by uninstalling QuickBooks, retitling the installed files, and then reinstalling the same again. This complete process is named clean installation of QuickBooks Desktop and can be performed either manually or by taking the help of the clean install tool. Considering the complexities involved in the manual process, users often conform to using the QuickBooks Clean Install Tool.
Points to remember
Before you uninstall the QuickBooks software, there are specific points that you need to keep in mind.
The points to remember are as follows:
Having the installation CD and license number or the QuickBooks .exe file downloaded on your system is one of the essential points.
Also, you need to back up the company data file because there are chances of data loss.
Make sure that you take note of your product and license keys before proceeding with the clean install process. Just open QuickBooks and then hit the F2 key to reveal the Product Information Window. Your license keys and all relevant details are contained in this window.
Prior steps to be performed
Before you start with the actual steps for running a clean install tool. Make sure to perform the below steps:
Step 1: Ascertain that a clean installation of QuickBooks is the right option.
In case you haven't already, then you simply have to do a basic reinstall of the QuickBooks desktop. A basic re-install is a simple process that might resolve the issue in a few cases. If that doesn't work, then you need to perform a clean install of QuickBooks desktop on each system you are facing issues with. Note that a clean installation of QuickBooks generally does not affect the company data.
Step 2: Gather information and back up the data.
You need to initially download a new install file for your version of QuickBooks. This way, you might be sure to get the latest updates for your version.
Make sure to have a license number handy. Note that on the original packaging or the purchase confirmation email, if you bought a digital version.
Note down the product year and version.
It is recommended to get all the info from your account management portal.
In case you haven't already, then ascertain to back up the company file to save the work.
Winding Up!
We hope this article helped to brief you on the complete procedure for a clean installation of the QuickBooks desktop for Windows. But if you face any issues, you can always contact our 24x7 QuickBooks Support team and speak to certified experts at the helpline 1-888-368-8874. Our certified experts are always ready to offer you any kind of assistance that aims at fixing the numerous issues confronted while using the QuickBooks accounting software.
Learn to fix common problems and errors with the help of QuickBooks Tool Hub
Struggling with QuickBooks errors or performance problems? Intuit, the creators of QuickBooks accounting software, has the ultimate answer: QuickBooks Tool Hub. This recently introduced, multi-functional application is your go-to, one-stop solution, integrating a comprehensive collection of advanced tools into a single, powerful resource. QuickBooks Tool Hub is designed to tackle a wide array of common QuickBooks issues, providing essential functionalities that were previously scattered across various utilities. Within this invaluable asset, you'll find powerful tools like QuickBooks File Doctor to diagnose and repair company file issues, the QuickBooks Refresher Tool to optimize performance, the Condense Data Tool for managing large company files, the PDF and Print Repair Tool to fix printing and PDF-related glitches, the Install Diagnostic Tool to resolve installation errors, and the Connection Diagnostic Tool to troubleshoot network and connectivity problems, among many others. Empower yourself to quickly diagnose and resolve common QuickBooks issues with this essential suite of tools. Download QuickBooks Tool Hub today and streamline your troubleshooting process.
What is the QuickBooks Tool Hub program?
This tool is a compilation of tools that are used by users so as to get rid of various minor and major QB-related bugs. You need not download and install multiple tools; simply download the QuickBooks Tool Hub program, and you are good to go. You will have to download the tool hub from the Intuit official website. This will fix the common errors for you, and all you need is to have Windows 10 (64-bit) on the PC. Steps, as you need to follow here, are
In the first step, you need to close your QuickBooks.
Start off by downloading the tool from Intuit and saving the file to an accessible location.
After that, launch the QuickBooksToolHub.exe file to start with the installation process.
Moving ahead, click on the Next tab.
And later you will be asked to accept the License and Agreement to Intuit’s license agreement. For which you should hit on Yes.
In the next step, select the QuickBooks Tool Hub program, install the destination folder, and hit Next.
Now tap on the Install tab to start the installation.
Opt for the Finish tab and the tool hub will open upafter this.
Step 2: Use QuickBooks Desktop Tools From the Tool Hub
Now that you have downloaded the QuickBooks Tool Hub program, you will see the following components inside the Tool Hub:
Home
The home screen gives essential information that is associated with the QuickBooks Tool Hub. It also specifies the components that are to be used for specific problems.
Company File Issues
The next component that you will see is the company file issues tab that can be opted for fixing the company file-related issues. You just need to choose the second tab and run QuickBooks File Doctor by using the below steps:
Choose the Browse tab and head for the company file that is to be repaired.
Verify that the Check your file option is chosen.
Afterward, log in to the file as an Admin user.
And hit on the Continue tab.
Network Issues
In case you get any type of network issue, then go for the third component. You'll have to go for this particular option to use the QuickBooks database server manager.
Program Problems
The next tab that would be seen is the program problems tab. This includes the Quick Fix My Program, QuickBooks Program Diagnostic Tool, and QuickBooks Print and PDF Repair Tools.
Quick Fix My program feature will terminate all the background processes from QuickBooks and run a quick repair on the program. This process might take a few minutes but would resolve the error properly.
QuickBooks program diagnostic tool can be used to repair various errors and work with every Microsoft component that is used by QuickBooks.
The print and PDF repair tool will help you in fixing print- or email-related issues.
This is basically the last component that you can opt for in order to avail of QuickBooks support.
Advanced Tools
This one would be used when you face other issues that you are unable to fix with the above components.
Perks of QuickBooks Tool Hub
Following are the perks of the QuickBooks Tool Hub program:
The major perk is that it is free, and there is no fee associated with its usage.
Moreover, if you are facing network issues, then the tool hub can be the best option for you.
The tool hub is a great tool even for company file errors.
Also, it has a basic and simplistic interface, which is intuitive enough.
System Requirements for QuickBooks tool hub
In order to make the best use of the QuickBooks Tool Hub program, you will have to ensure that your system meets the requirements for the same. To ensure optimal performance, it's recommended to have a higher-specification computer, especially if you are working with large company files. Additionally, it's important to keep your operating system and other software up-to-date to ensure compatibility with Tool Hub.
System Requirement
Version/Driver/Hardware/Software
Operating system:
Microsoft Windows 10, 8.1, 8, or 7 (64-bit)
Processor:
2.4 GHz or higher
RAM:
4 GB or higher
Hard drive:
2.5 GB of available hard-disk space
Screen resolution:
1280 x 1024 or higher with up-to-date video card driver
Internet connection:
High-speed internet connection recommended for download, installation, and use of the tool
Microsoft .NET Framework:
Version 4.7.2 or higher
Microsoft Visual C++ Redistributable:
Versions 2015 to 2019
Net Framework: It is very much essential for you to have a .Net Framework on the system for installing the tool hub program.
Microsoft Visual C++ redistributable package—Another system requirement is the Microsoft Visual C++ redistributable package.
List of Errors that can be Fixed With the QuickBooks Tools Hub program
In the practical sense, the tool hub software solves all major and minor errors. The following are the errors that you can try to resolve using this tool hub program:
Install issues or errors:
If QuickBooks Desktop has troubles with installation-related problems while installing QuickBooks Desktop, then you need to click on the Installation Issue tab and choose the given options one by one to rectify the issue. This will help you in fixing all the install-associated errors.
Login issues:
There can be situations when you miss out on the QuickBooks password; then, in that case, you would have to tap on the Password Reset tab and pay heed to the on-screen instructions. This will assist you in resetting the password successfully.
Company file errors:
In case of company file errors, you can opt for the Company File Issues tab. This will help you in opening the QuickBooks file doctor and repairing the company file. Moreover, you will have to perform the on-screen instructions
Connection and network troubles:
When you encounter connectivity issues on a specific network, then you can tap on the Network Issues tab and this will help you in fixing the network-related bugs.
Performance bugs:
The performance problems tab in the QuickBooks Tool Hub can be used when QuickBooks starts lagging and the user is unable to fix issues.
Other Related Errors
Other than the above-stated errors, there are a couple of other bugs as well, which include the following:
This was all that you needed to know about the QuickBooks Tool Hub program. However, if you need any help, you can connect with our QuickBooks desktop support team via our dedicated helpline, i.e., 1-888-368-8874. Our team will provide your business with the right support that it needs to eliminate errors and QB-related glitches, ensure success, and save some serious money. We have the most relevant solutions to all your errors and other accounting software-related issues.
Get the latest methods to fix Error 1321: The installer has insufficient privileges to modify the file:
QuickBooks is the go-to accounting software for countless small and mid-sized businesses globally, consistently refined with updates to enhance usability and minimize glitches. However, like all software, it's not entirely immune to issues. This guide addresses a common challenge: QuickBooks Error Code 1321.
This error typically emerges when you attempt to install or update your QuickBooks company file or software. When you encounter Error 1321, it's often accompanied by specific messages that pinpoint the nature of the problem. We'll delve into these messages and provide clear, actionable steps to resolve this installation and update hurdle, ensuring your QuickBooks remains seamlessly functional.
The installer has insufficient privileges to modify the file C:\Program Files\Intuit\QuickBooks\sdkeventl.DLL
The installer has insufficient privileges to modify the file C:\Program Files\Intuit\QuickBooks\CfScan.DLL
The installer has insufficient privileges to modify the file at C:\Program Files\Intuit\QuickBooks YEAR\ QBONLI32.DLL
The installer has insufficient privileges to modify the file [2]
The installer has insufficient privileges to modify the file C:\Program Files\Intuit\QuickBooks Point of Sale X.0\ dataimporter.exe
Note: The actual .dll file name will vary in the error. If you choose the Retry option, you may see more than one error message, and the installation or update process may fail.
QuickBooks Error 1321: Updated Solutions to Resolve the Error
You are required to follow the technical methods contained in this section in order to resolve the QuickBooks error code 1321. Check out these solutions one by one and see if the error gets cleared out from your computer.
The QBinstall tool will automatically detect the problem and try to diagnose it.
Solution 2: If the Speed of Copying the File is Slower Than the Speed of File Update
You will need to hit on Retry to allow the update to complete.
If the update fails, then opt for the Cancel tab.
Following that, proceed to the Option tab.
You now need to temporarily turn off your antivirus software. For that, proceed to the subsequent solution.
Solution 3: Turn Off the Antivirus and Try to Update the File
You have to manually disable your antivirus program or system security programs.
Now try to update your QuickBooks company file.
Solution 4: Create a New User Account With Administrative Privileges
The very first step is to hit the Start button on the screen or pick the Start key on your keyboard.
Head to the Control Panel and choose Users/Accounts.
Next step, opt for New User.
Once done with that, provide a name for the account and set it as an administrator.
Next step, hit on Create account to create a new one.
At the end, log out of the current account and log in to the new account.
Solution 5: Update the User Privileges to Modify Your File
The error message box will exhibit the error generated during the update installation process. In the given example, "AcrobatConnect.cfg" produced the error message.
Error 1321: The installer has insufficient privileges to modify the file. C:\Windows\system32\Macromed\Flash\FlashPlayerTrust\AcrobatConnect.cfg. Action ended at xx:xx:xx: Install Validate.
Now you can set the privileges for the folder stated in the error message, for example, "\Windows\system32\Macromed\Flash\FlashPlayerTrust\AcrobatConnect.cfg."
Steps for Modifying the Permissions in Windows XP Professional
Before you begin, check out hidden files in the computer and ensure that simple file sharing is disabled. Check "Display hidden files and folders" and "Simple file sharing" on the support website of Microsoft.
In Windows Explorer, proceed to the parent folder listed in the QuickBooks error 1321 message in your log file.
For example, in the path "c:\Windows\system32\Macromed\Flash\FlashPlayerTrust\AcrobatConnect.cfg," the parent folder is always FlashPlayerTrust. In the error message that you received, the parent folder could be different.
Right-click on the parent folder and choose the Properties tab.
After accessing the Properties window, move to the Security tab.
Hit on the Administrators in Group or User Names.
Change Permissions in Windows XP Home
Restart your computer.
Hit the F8 key on your keyboard as soon as the Windows logo appears. Using the down arrows key, choose Safe Modewith Networking and hit the Enter key.
Follow the instructions provided in Update user privileges in Windows XP Professional.
Restart the computer again before reinstalling your software and tools.
Opt for System in Group or User Names.
In the Permissions for System field, make sure that Full Control is opted.
While in the Security tab, hit on the Advanced option.
Once in the Advanced Security Settings window, head to the Permissions tab.
You are now required to choose to Replace Permission Entries on All Child Objects with Entries Shown Here That Apply to Child Objects and then hit the OK button.
Signs That Indicate the QuickBooks Installer Error 1321
It is quite simple to identify this error, as several symptoms reveal the presence of this error. When it occurs, you receive an error message on your computer screen that reads, “System doesn’t have sufficient privileges to modify this file.” One or more of the following reasons may trigger this issue:
Your antivirus or other security software is blocking QuickBooks.
The speed of copying the file is slower than the speed of file updates.
The folder that contains the company file has Windows restrictions.
QuickBooks file is either in use or is damaged.
What Triggers the QuickBooks Error Code 1321 (Insufficient Privileges)?
Having gone through the various signs that indicate the presence of the error code 13221, let us now get familiar with the various factors that provide impetus to this error. You may bump into such an error due to the following factors:
Just in case the file copying process is slower than the update process.
You can also bump into the following error if there is any sort of antivirus or firewall blocking the software.
Another reason can be if the file update process is faster than the file copy process.
You can land into such an error if the Windows permission for the folder containing the file has been restricted.
Wrapping up with the hope that your issue got sorted out!
We hope that by the time you reach this concluding portion of this blog post, you’re able to resolve the QuickBooks install error 1321. In case the same issue persists, you can contact our certified 24/7 QuickBooks support team for quick and precise solutions.
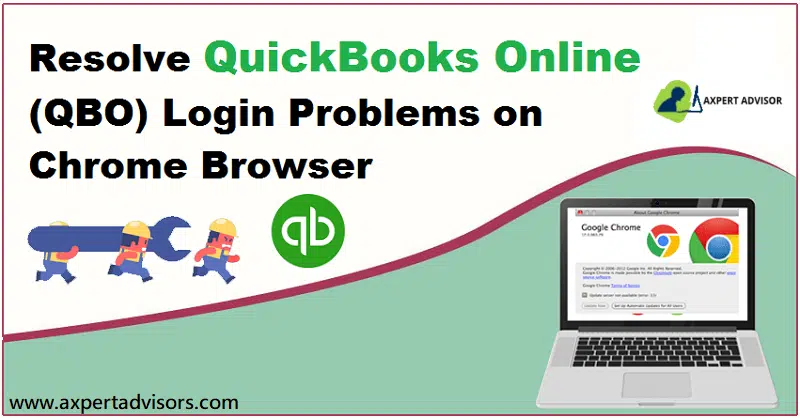
Here is what you can do when you face QuickBooks Online login problems in Google Chrome.
QuickBooks Online is a top-rated web-based accounting software. The software enables users to create and send invoices, manage expenses, and prepare for taxes. If you are a user of this software, you might be familiar with the fact that errors and glitches may appear at any time while operating the software. In this blog post, we are going to discuss QuickBooks Online (QBO) login problems with Chrome.
There are multiple reasons behind the occurrences of this issue. In order to resolve these login errors, you may take help from our online support team by connecting with professionals using the dedicated helpline.
Most of the time you are not able to log in to QuickBooks Online (QBO) due to the security enhancements set by Intuit. To resolve this issue, your account needs to be updated to a new Intuit account with enhanced security. When you face a login issue in your Chrome browser, you may see the following error message on your desktop screen:
[Web page cannot be found, Error 404: File Not Found, OR [QBO is currently unavailable, please try again later]?
QuickBooks Online login Issues on Chrome
Google Chrome is a popular web browser and appropriate for the accounting software. Sometimes, issues may appear while attempting to log in to QuickBooks Online in Chrome. The login issues may be of different types.
Your computer screen displays a “loading” message on your web browser, but nothing loads up.
An error message, “The services are not available,” may appear on your screen.
The sign-in screen and the screen to choose my company may show up in a loop.
Solutions to Fix QuickBooks Online (QBO) Login Problems for Chrome
Check out the following easy troubleshooting steps to fix QuickBooks Online Google Chrome login issues:
Method 1: Use Chrome Browser in Incognito Window
If you face a login issue with Chrome, you can try logging in to QuickBooks in incognito mode in Chrome. When you use Chrome in incognito mode, you can browse the internet without being recorded, and your online activities don’t show in history either. Also, using QuickBooks Online on Chrome in incognito mode is as simple as using it in normal mode.
Here is how you can use Chrome in Incognito or private mode:
Once a Google Chrome window is up on your screen, click on "Customize and Control Google Chrome" (three dots at the top right-hand corner) and select "New incognito window," which is the third option.
You can also use shortcut keys—the "Ctrl+Shift+N" keys.
When Chrome opens in “Incognito mode,” you will be able to see “Incognito” in the top right-hand corner.
Method 2: Clear History and Cache to Resolve the QuickBooks Online Login Problems
If the issue persists even after using QuickBooks Online in incognito mode, you can try this step. The login issue may also be caused by old history or cache, as they may slow down the performance of Google Chrome when you try to open QuickBooks accounting software. Users are required to clear all the history or cache so that it can help you fix the login issue.
Firstly, hit on the "Customize and Control" Google Chrome icon on the top right and choose "Settings".
Now, opt for the "History" tab on the left and then hit the "Clear browsing data" button.
When you hit on "Clear browsing history," several boxes will appear on the screen.
Afterwards, choose the appropriate box.
And then just clear everything, including cookies, cached images and files, and other site and plug-in data.
Method 3: Create the Additional Chrome User
You can also get rid of the login issue by creating an additional chrome user to use QuickBooks Online. Here is how you can create an additional chrome use:
Open the Chrome web browser and hit the "Settings" tab on the left.
Find the "Users" section at the bottom of the page.
Opt for the "Add new user box."
Hit an icon, type a name, leave the "Create a desktop shortcut," and choose the "Create" button.
The "New user" icon will appear on the top left corner of your web browser. Hit on it if you want to switch between different users.
Method 4: Use a Different Web Browser
If you still face any issue logging in to QuickBooks Online in Google Chrome, try using a different browser. See if you have Internet Explorer or Firefox. You can also download them from the internet for free.
Use a different web browser - Screenshot
Method 5: Verifying Google SSO can Fix QuickBooks Online Login Problems
SSO basically refers to single sign-on. One of the updates from Google and QuickBooks stated that QuickBooks users using iPhones and iPads will not be permitted to log in to the QuickBooks online app using a Google account. The iOS mobile users can use a Google account for the login process. Thus, if you are using an iPhone and trying to sign in to QBO with the Google account, then avoid wasting your time doing that. You can use Intuit account credentials for the login process. Put in the user ID and password and log in to QuickBooks Online using the Intuit account.
Advanced Steps to Rectify QuickBooks Login Issues with Chrome
Check out the latest solution steps to resolve the QuickBooks Online login problems.
Step 1: Checking the SSL Setting of Internet Explorer and Mozilla Firefox
Fox Internet Explorer
You need to tap on the "Windows + R" tab and then type "inceptl.cpl", followed by hitting on the "OK" tab.
Now, launch up the "Advanced" tab, and then scroll down to the "security" option.
Moving ahead, you need to mark both "SSL 2.0 and SSL 3.0" turned on by check-marking then and then hit the "OK" button.
The last step is to "open the browser" and then "sign in" at "https://qbo.intuit.com"
For Mozilla Firefox
You need to, first, launch "Mozilla Firefox."
And after that, type in "config" in the address bar and just hit "Enter."
Once done with that, type "tls" in the search bar.
Followed by double-clicking the "tls.version.min" from the shown preference names.
Then, you need to type the "integer value" according to the TLS/SSL version you wish to enable.
Next, hit the "OK" tab.
And the final step is to "close the browser" and open it once again.
Step 2: Check and Change Some Additional Privacy Settings
First of all, the "privacy settings" must be set to "medium" or "lower."
Then, manually "allow access" to "https://qbo.intuit.com."
And after that, "enable cookies."
The last step is to close all the browsers and try to sign in again.
What Causes Intuit QBO Login Problems?
The list of causes is not huge; a few factors in general affect the QuickBooks login on Chrome. These factors include the following:
If you haven't signed out properly from the previous session.
If someone has logged in to QuickBooks Online from a different system or location with the same sign-in credentials, then this type of issue could be seen.
Another reason behind the occurrence of any such issue can be some firewall or antivirus blocking the access.
Antivirus and other firewall applications are blocking you from accessing QuickBooks Online.
If old history or cache is slowing down the performance of Google Chrome.
Summing up!
We hope that this blog post helps you to fix the QuickBooks Online login problemson Google Chrome. Not being able to log in to QuickBooks Online on Chrome can be frustrating and delay your work. You may also check the web browser’s setting if the issue occurs while logging into QuickBooks. If, in case nothing works, you can contact us and speak to our QuickBooks Online error support experts. They are experienced experts.
Simple and Updated Troubleshooting Steps to Fix the QuickBooks Error 6000
Encountering QuickBooks Error 6000 can be a frustrating hurdle for QuickBooks Desktop users. This umbrella error code signals various issues, all pointing to a damaged company file. Common culprits include altered company file extensions or incorrect file permissions, preventing seamless access to your crucial financial data.
This comprehensive article dives deep into QuickBooks Error Code 6000, exploring its root causes, identifying its symptoms, and providing proven solutions to resolve the issue effectively. By understanding the common triggers and following our expert-backed steps, you can often fix this error yourself.
Read on to gain the knowledge and techniques needed to overcome QuickBooks Error 6000 with ease. Should you require additional support or personalized assistance, our dedicated technical support team is available around the clock to provide unmatched service and get you back on track.
What does QuickBooks error code 6000 means?
QuickBooks error 6000 77 is usually occurs when the company file is located in the incorrect folder. An error message error pop-ups on your desktop screen when you haven't granted sufficient permissions to take access to any QB file. When this error takes place, one of the an error message might get on your computer screen that state:
“We’re sorry. QuickBooks encountered a problem. Error codes: (-6000).”
The user must need to resolve the issue at the earliest, otherwise, this problem might cause a serious data damage.
Updated Solutions to Resolve QuickBooks Error 6000: While Opening Company File
Here are specific solutions to help resolve the problem of QuickBooks error 6000. Let us take a look at them in detail -
Solution 1: Opening the Company File Locally
There may be an issue with the current location of the company file. You can try moving it to another place like the desktop to open it.
You need to first open the folder of the company file.
After that, find the file with the .qbw extension.
Furthermore, you have to right-click on the file and choose Copy option.
Moving ahead, hit a right-click on desktop and choose the Paste option.
You now have to hit the Ctrl key and open QuickBooks. It will be directed to the No-company open window.
Here you need to choose Open or restore an existing company option.
In the last step go to the desktop and find the company file you copied and open.
Just in case you are getting the same issue, then opt for the other steps.
Solution 2: Restore a Backup
Many of the QuickBooks file errors, including error -6000 can be easily fixed by restoring a backup copy of your company file. That done, the file may work as new. In case you don’t know how to restore a backup, here is how you can do that.
At first, open the folder that has your company file and then select Open the File.
After that proceed to the File menu and click on Utilities tab.
Furthermore, if the Stop Hosting Multi-user access is on the list, choose that and select Yes on the next two windows that pop up.
Ensure that the name of your company file doesn’t consist of more than 210 characters long.
Now try to Restore the company file again.
If the issue persists, your file is corrupt and you can try the next solution.
Solution 3: Rename the '.ND' and '.TLG' Files
Open the compony file folder where your company file is saved.
After that look for the Company file that you have to fix.
You need to note the name of the company file and search the files with the .ND and the .TLG extensions.
In the next step hit a right-click on the file and change their "Extensions".
Additionally, right-click on .ND file and select “Rename”.
Add .OLD at the end of the file name.
Repeat the same process for .TLG file as well.
Open QuickBooks and open the company file again.
Solution 4: Configure your Firewall Ports and the Anti-virus Software
Initially, you need to locate the Port Monitor tab and look for the QuickBooks version.
After that copy or note down the Firewall port number.
Moreover, access your Windows Firewall and head to Advanced Settings.
Then hit a right-click on the inbounds option and choose New Rule.
Lastly, hit on Port and then choose Next option.
Solution 5: Open up a Sample of the Company File
To open a sample company file, initially, open the folder that contains the required company file.
The next step is to find the file, with the extension ".QBW".
After that, right-click the file and hit on the Copy option.
Moving ahead, right-click on the desktop and choose the Properties option.
Followed by, opening QuickBooks so that you are redirected automatically to the No company open window while hitting the Control key.
Next, restore an existing company.
The last step is to Find the company file you have copied first, and then Open it and navigate to the desktop.
Solution 6: End All the QB-Related Processes
For performing this method, you need to log in as System Admin.
And then, open the task manager by hitting the Ctrl + Shift + Esc keys together.
After that, hit on the Processes tab.
Following that, you need to hit on the End task button, on every QuickBooks process (QBW32.EXE, qbupdate.exe, and QBDBMgr.exe) highlight.
The last and final step is to open the file in the QuickBooks multi-user mode.
Solution 7: Check the Folder Permission
You might get these issues if the folder where you save the file doesn't have the right permission. You should check the folder permissions to share company files. Try opening the file again.
Solution 8: Run the QuickBooks Database Server Manager From the QuickBooks Tools Hub
In the next step click on the Browse option, then select the company file.
Additionally hit a click on “Check your file”, then hit on Continue.
Now enter the Admin password.
Lastly, you need to click on Next tab.
Various types of QuickBooks Desktop 6000 Series Errors
These are the different -6000 series errors you may see on your desktop screen:
Errors
Possible Cause
-6176, 0
Your firewall blocks the connection between two computers
-6000, -107
The .TLG file is corrupt
-6000, -1076
Your QuickBooks installation is corrupt
-6010, -100
A computer that is not the server is hosting the company file
-6138, -105
-6210, 0
-6189, -83
-6190, -83
-6012, -1061
Incorrect network setup
-6144, -82
-6000, -82
-6129, -101
Incorrect folder permission or the QB Database Server Manager isn't working right
-6190, 816
A user is in single-user mode while they work in the company file. It can be a mismatch between the transaction log file (.tlg) and the company file (.qbw)
-6190, -85
-6190, -82
-6000, -832
This error happens when hosting is on or the .ND file doesn't work right
-6144, -304
When you start QuickBooks or open your company file and this happens in a sample file
-6190, 1005
-6189, 1005
-6000, -305
Incorrect network setup or there's damage to your company file
-6073, -816
Multiple computers are hosting the file, firewall settings block the connection, or there's damage to the company file
-6144,-103
The .ND file has an incorrect path to your company file or there's damage to the QuickBooks Database Manager Windows user account
-6144, 0
-6120, 0
One of the workstations hosting the company file or the firewall port 8019 is blocked
-6087, 0
This error occurs when you open the file locally
-6131, 0
-6147, 0
You receive this error when you open the company file or restore a company backup (.QBB)
When does QuickBooks Error message 6000 Appears?
Mostly, you receive this error code when you try to open a company file. This error pops up on your desktop screen and restricts you from opening the file. Generally, the general format of this error is the error code followed by two, three, or more digits. It looks something like the form QuickBooks Error 6000, XXXX.
Symptoms of QuickBooks desktop error 6000
The common signs and symptoms are:
The most common symptom is that you are not able to open the company file.
An error message will pop up for “QuickBooks error 6000”.
A file corruption message can turn up. It shows that the company file is corrupted.
QuickBooks Error code 6000 - List of Causes
There might be one or more of the following reasons to cause you -6000 series error.
Your QuickBooks file got corrupted.
The network connection isn't configured properly.
Incorrect file extension of the company file.
Two or more users are logged in for the same file.
The server isn't allowed to access to access the company file(s).
The user doesn't have permission to access the file.
You are trying to restore a previous backup of your file.
The firewall settings block the connection to the server.
Conclusion!
We have concluded the article here. I hope you are now able to fix the QuickBooks Error 6000 by following the above-mentioned troubleshooting methods. However. in case the problem still persists after following the above steps, then in this case you can contact us at 1-888-368-8874 for 24x7 quick and precise QuickBooks desktop error support services.