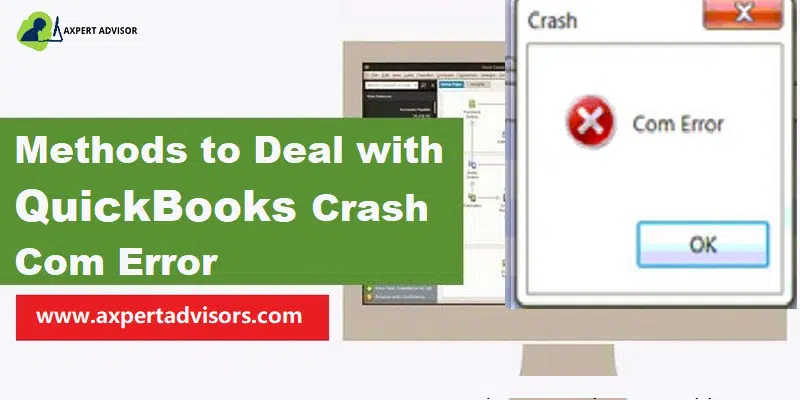
Get accustomed to the 8 Simple ways of fixing the QuickBooks crash com error without any hassle.
Smaller companies and financial experts have a great concern about QuickBooks collapsing since they heavily rely on the software for performing their financial operations. When emailing payments, numerous QuickBooks subscribers run into the QuickBooks Crash Com Error. When users hit on OK to mail a payment to a client or customer, they receive this error code. After tapping on OK once more, the crash warning emerges on the display.
The most frequent problem in the QuickBooks desktop nowadays seems to be the "Crash Com" warning. Whenever users access or try to mail payments or other operations, several users receive this problem. It's undoubtedly inconvenient to miss unprotected data in another QuickBooks active tab that is being operated on at the same time. Nothing else can be done except for hitting the OK button on the Crash Com Warning notice and bidding your QuickBooks a farewell.
What is the QuickBooks Desktop Crash Com Error?
Crash Com Error counts as one of the common errors that QuickBooks desktop users receive. The error occurs when you try to email Invoices and other transactions. This may also cause you to lose the unsaved data in QuickBooks you may be working on simultaneously. Once this error appears, the screen may freeze and you may only be able to click on the OK option on the error message box. Knowing the reasons that trigger QuickBooks crash com error may help you prevent this issue as well as save your important data. Along with telling you how you can prevent this error, this blog post will also tell you how you can fix incur QuickBooks com error. The error message may also call it crash com error, QuickBooks crash com error or com error QuickBooks.
The terms may be referred to differently, but they are all same errors originating because of sending emails from QuickBooks. The basic and premier reason for this issue is the failure of syncing with Windows or other Microsoft components. If your software crashes repeatedly, your company file data may also be damaged. Repeated crashes may also cause permanent damage to your company file thus it’s mandatory to get rid of from crash: com error in QuickBooks desktop soon after it appears.
Typical Reasons Behind the Emergence of the QuickBooks Crash Com Error
Several reasons may be behind this error code. While there may be several other hidden factors contributing to the error, we have earmarked below the most conspicuous and major ones.
Windows Components or other Microsoft components are damaged.
QuickBooks is unable to interact with the users or the messaging server.
QuickBooks Elements misplaced or defective.
One or more essential QuickBooks components are missing.
The synchronization hampered by spyware or malware.
Infected programs removed QuickBooks elements or essential data.
Essential QuickBooks files have been either deleted or damaged by third-party software.
QuickBooks connection blocked by a firewall.
When the QuickBooks Crash Com Error Appears?
Users should first determine the instance when the QuickBooks crash com problem occurs before proceeding with the diagnostic methods. No matter what tasks the users were performing during the emergence of this error, the processes for resolving the issue are all the same.
An issue occurred during sending payments from QuickBooks.com
A crash com problem appears when accessing payments.
When working on a file, QuickBooks com crashes may occur.
A crash com error shows up during storing QB.
Verify register opens with a com fault, resulting in a breakdown.
During the viewing of a file in QuickBooks, a breakdown occurs due to a com issue.
Solutions to Solve the QuickBooks Desktop Crash Com Issue
The QuickBooks Com Error might be fixed in a variety of methods; users may need to try several of the techniques listed here. Before users start using the below methods, make a backup of your current QuickBooks data:
Solution 1: Update Windows and Office Software
Install the latest versions of Windows, and Office Software, including (Word, Excel, PowerPoint, and Outlook).
Firstly, access your Outlook mail and choose File > Office Account > Update Options > Update Now.
After that, check to confirm that you no longer receive the Com Error Crashes.
Make Outlook the primary email application.
Go to Control Panel and then choose Default Programs
Now set your default programs.
From the Programs list, choose MS Outlook then choose Set this program as default.
Hit on the OK button.
Turn off the antivirus software for the time being.
Create Security Restrictions in QuickBooks.
Reboot the system and see if the crash com problem has gone away, if it hasn't, attempt the subsequent solution.
Solution 2: Refine QuickBooks Desktop as Well as Company Files by Frequent Updates
Whenever users get QuickBooks update problems, attempt QuickBooks Manual Upgrades.
Test the data quality of the QuickBooks company file by opening and verifying it.
Attempt to send the object upon where the QB crash com problem appeared.
Start another file or page and submit it to oneself to see if the issue still arises.
Solution 3: Configure the Email Settings in QuickBooks
Launch QuickBooks. Then, access the company file.
Process as follows : Change >>> Options >>> Forms to Send >>> My Preferences.
Choose the 'Email' button and resubmit it if users find Outlook as a choice.
Change Outlook's email configuration: Choose Microsoft Outlook from the Settings Panel > Mail menu.
In the Email Settings box, choose Show Profiles. Pick Prompt for an account for use if Outlook is not specified as the primary mail program, then Accept.
Change the choice immediately. Only utilize this account, after which Submit and OK to complete the process. Otherwise, move on to the next step.
Solution 4: Repair Windows as Well as Office Software
Rebuild Office software and replace any problematic elements.
Reboot the device after updating QuickBooks.
Run a Windows update once more.
Uninstall any unknown or harmful software from the system.
Solution 5: Set up the Firewall as Well as Security Exceptions in QuickBooks
Put QuickBooks Security Restrictions in the proper place in the QuickBooks communication channel.
Within the computer protection program, establish QuickBooks activity and port Restrictions.
Reboot the machine to double-check that the changes are still in place.
Open another file or form then send it to oneself to see whether the Crash Com Issue remains; if it does, go to the last procedure.
Solution 6: Using QuickBooks Desktop to Connect the Emailing Services or Client
To acquire email setups, contact the emailing Service/client solution providers.
Within the emailing Service/client settings menu, grant third-party application permission.
If you're using a Non-legacy emailing application, stay in contact with the programmers to gather Port data and other QuickBooks-related details.
Follow the internet provider instructions for adding or configuring the options, and that is everything.
Solution 7: Run QuickBooks in Compatibility Mode to Fix the QuickBooks Crash Com Error
First of all, you need to hit a Right-click on the QuickBooks icon and then click on Properties.
After that choose Run this program in compatibility mode in the Compatibility tab.
Now choose the Windows 7 option From the drop-down menu.
Hit a single click to mark a check on Run this program as an administrator.
Choose the Apply button and finally hit a click on OK.
Solution 8: Add Windows Admin User
Firstly, you need to create a Windows user with Admin rights.
After that, log in to your Windows with the newly created user.
Finally, open your QuickBooks one more time.
Winding up!
If the QuickBooks Crash Com Error continues, contact our QuickBooks error support experts, who may provide a combined assessment of this Crash Com Issue and remedy. Intuit does not handle Microsoft apps, however, if users are confident to complete these actions, then they may attempt it at their own risk. You can get in touch with our dedicated support team. We are available 24×7 and offer fast and precise solutions to all QB-related issues.
Convenient Ways to Resolve QuickBooks Unrecoverable Error Like a Pro
QuickBooks is a versatile bookkeeping and accounting software that helps small and mid-sized business owners do multi-tasking in a seamless manner. With the help of this robust software, business owners can perform most of the complex tasks, such as tracking expenses, managing cash flow, creating invoices, preparing for taxes, etc., with ease. Over the years, several features have been introduced in the software which will assist you in performing your accounting tasks easily without having to face any difficulty.
However, sometimes, you might face some unknown and undefined error with a code like “XXXXX-XXXXX” written on the dialog box. Such errors are termed as unrecoverable errors on QuickBooks desktop and can occur any time. There is no restriction or particular definition about when or how these errors will occur. So, preventing them is like trying to find a needle in a haystack.
The only thing one can do is to troubleshoot the general unrecoverable errors appearing on the QuickBooks desktop. However, before that, it will be better if you knew the circumstances where the unrecoverable error codes can pop up all of a sudden.
What does QuickBooks Unrecoverable Errors means?
Unrecoverable Errors XXXXX XXXXX are often found with QuickBooks desktop, and caused due to faulty installation of the software. This type of error can also be seen as a result of an update as well as data corruption, which needs immediate resolution for smooth working of the software.
Here, In this post we are going to discuss about the possible solutions steps of QuickBooks unrecoverable error. However, if you are looking for instant resolution of this error or you want to save your time and efforts please contact our QuickBooks support team. Before starting the solution understand the possible reasons behind the error occurring.
When does the QuickBooks Unrecoverable Error occur?
Unrecoverable Error XXXXX XXXXX can happen in a variety of circumstances, including but not limited to the following factors:
At the time of creating or modifying a portable file type.
Downloading any kind of updated file based on the payrolls.
Sending the payroll files via Direct Deposit.
While closing any sort of open tab or window in the Company File.
At the time of create backups for any Company File or transaction details.
Saving and updating any accounting transactions.
Using certain in-built features of QuickBooks like Verify, Rebuild, Close, and so on.
Recording transactions
When creating a file backup
Whenever a user tries to open a company file
Shutting off any open windows in a company file
Making use of the Open Previous Company function.
Common QuickBooks Unrecoverable Error Codes
The list is not inclusive and you might encounter a different error from the scenarios given.
00000 14775
20888 41171
00000 15204
00227 55008
19758 63847
13730 84631
20103 33023
00551 46274
02457 79428
19062 00238
14070 43851
12565 30728
13824 75582
15563 13890
Situations when QuickBooks unrecoverable error might occurs
You might see unrecoverable errors (XXXXX XXXXX) in the following situations:
Unrecoverable error when opening a QuickBooks Desktop file on a workstation
Unrecoverable errors when printing, emailing, or saving as PDF out of QuickBooks Desktop
Unrecoverable error when performing a bank reconciliation or viewing previous reconciliation reports
QuickBooks Unrecoverable Error when importing Accountant's Changes
Unrecoverable error when writing checks with QuickBooks Online Bill Pay
Easy Steps to Fix the Unrecoverable Errors on QuickBooks Desktop
There are different ways in which you can fix the unrecoverable errors (XXXXX XXXXX) when it will appear on the QuickBooks Desktop. In this section, we have described the most efficient methods of troubleshooting this error which won’t cause any data loss or damage to the Company File and others.
Checkout the manual solution steps given below to fix this error:
Note: Before you attempt the provided solutions, make sure your QuickBooks is updated.
Solution 1: Identifying the total number of users who are getting affected
First, you need to identify the number of users who are getting affected by the unrecoverable errors having the same code. If several users are getting affected, you need to check the issue at the admin user level for which you will need the QuickBooks File Doctor software. But, if the issue is occurring for an individual user, it means that the credential has become corrupted or is damaged and you will have to recreate it.
Head to the Company menu, from where you need to choose “Setup users” and then select on “Passwords”.
Once done, hit on Add Users and then enter new login details with a username and a password. While doing so, always choose a new credential set to prevent further damage.
You can Customize the username to make it more unique. Once done, tap on Next and then on Finish. Logout from the Desktop and again try to login with the new credentials.
Solution 2: Prevent QuickBooks from opening multiple Windows during Start-up
Tap on the ALT key on your keyboard while double-clicking on the QuickBooks icon on the desktop.
Let go of the ALT key when a window pops up for you to put in your Password.
Type in the User password and hit the OK button.
An application will open, push the Alt key again.
Wait until the file is open and release the Alt key.
Solution 3: Save the form differently
You can use Save and Close or Save and New tabs towards the bottom of the form in order to save the transactions.
Make sure you don’t leave the cursor anywhere on a blank like on the form while saving that. The cursor shall always be on a line that has some items written.
You should tap on To Be Printed prior to saving the transaction.
Give Print commands from File and Print forms.
If the QuickBooks desktop unrecoverable error appears while giving print commands, making changes or editing your preferences, follow these steps:
head to Edit Menu and hit on the Preferences option.
Before you proceed to the Print check box, tap on Clear theSave transactions beneath the Company Preferences Tab.
Hit on OK and save changes.
Solution 4: Suppressing the Desktop while using QuickBooks
For suppressing the Desktop during opening the QuickBooks, you need to follow these steps:
Tap on the Ctrl key and hold it after which you need to double-click the QuickBooks program icon.
You need to hold the key in the pressed position until the No Company Open window pops up.
If you want to suppress the Desktop at the time of opening a Company File, follow these steps:
Choose the company file name from the No Company Open box and then hit on the Alt key and keep holding it.
Subsequently, choose the Open option. If you are asked to enter the login credentials, you can release the Alt key and then enter the credentials.
Solution 5: Opening a sample of a company file
If you open a sample company file and face the unrecoverable error, it means that the particle file is corrupted and there is nothing wrong with QuickBooks account. So, to open the Company File sample, follow these steps:
Hit on the option saying Open a Sample File present on the No Company Open Window and then choose the sample file you want to open. Save it somewhere in a folder.
Move to the QuickBooks Desktop and create a new a folder with name Test. Once done, open the folder where you have saved the company file sample. Copy the file and then paste it in the blank folder present on your desktop.
Try to open the file from the Test folder. If the sample file opens up, the Unrecoverable error is resolved and you can continue with your work.
Note: If you receive a prompt to initiate a restore/update operation, click ‘OK’. In case the sample file opens without any issue, it means the company file that was receiving the error may be corrupted or damaged.
The ADR folder is located in the same folder as your QuickBooks company file. By default, the folder is named "AutoRecovery."
There are two types of ADR files, .ADR and .QBW.adr. The .ADR file is a temporary file and the .QBW.adr file is a permanent file. Check the size of the .QBW.adr file, which should be larger than the .ADR file.
Copy the .QBW.adr file to a new folder or location to ensure that you don't overwrite any existing data.
Change the file extension from .QBW.adr to .QBW.
Open QuickBooks Desktop and then open the company file.
Verify that the data in the company file is accurate and up-to-date.
Solution 7: Copy the company file to your desktop
There might be an issue with the location of the company file you are trying to open. That said, you can act upon the below-given steps to fix the location of your company file.
Move to the folder in which your company file is stored and find the QBW file using the Locate option. Copy and Paste the file on Desktop.
Launch QuickBooks by clicking the icon twice while keeping the Ctrl key pushing till the No Company Open message shows up on the screen.
Hit on Open and browse to the company file you copied on Desktop.
Finally, open the file.
Solution 8: Update QuickBooks Desktop
If none of the above-mentioned solutions work, that means there is some issue with your QuickBooks software or with the installation. You can perform the following steps to update your QuickBooks desktop to latest release version.
Hit the Ctrl key and double-click on QuickBooks icon to open it.
Tap on Update Now on the Update QuickBooks screen.
Choose New Features and hit on Get Updates‘
Exit QuickBooks after the update is complete.
Solution 9: Repair the QuickBooks desktop software
Hit on the "Start" menu to access the Control panel.
Then ho to the "Programs and Features" option.
From the lengthy list of installed programs, look for the "QuickBooks" software.
Once selected, hit on 'Uninstall/change' from the menu.
Next, choose the "Repair" option.
Wait for the end of the process.
Restart your computer once you're done, then open QuickBooks to see if the issue has disappeared.
Solution 10: Create New Windows Admin
The QuickBooks Desktop unrecoverable error (XXXXX XXXXX) can be fixed by crafting a new administrator user. Simply adhere to the instructions listed below. Different operating systems have different processes for creating administrators. As a result, make sure you follow the instructions provided under the O/S that is currently installed on your computer.
For Windows 10:
Hit on the "Start" menu. After that, choose "Settings."
Then pick ‘’Accounts’’, then hit on "Family & Other Users."
Add a computer user under "Other Users."
Tap on the option "I don't have this person's sign-in details for a system."
Next, choose "Add another user" without first creating a Microsoft account.
Change the account's name next, and then hit on the "Finish" button.
Finally, opt for an administrator and then hit on "OK."
For Windows 8, 8.1, 7 & Vista Users:
The first step is to access the ‘Run’ window. The 'Run' window can be opened by hitting the 'Win + R' keys simultaneously.
Hit on the "Enter" key after typing "Control" in the "Run" box.
Choose the option for "User Accounts."
Then opt for "Manage another Account.’’
Choose the option labeled "Establish a new account."
Now, type a new account's name.
Finally, hit on the Administrator and then choose the "Create Account" button.
For Windows Server users:
It is important to note that a professional computer technician maintains the servers before moving on. Follow the steps listed below:
After that, opt for the "tools" menu and then the "Computer management" option.
Thereafter, you must increase the local users & groups. After that, choose 'group' from the menu.
Next, double-click the "Administrator group" to choose it.
Hit on the "Administrator Properties" tab next.
At this point, you must pick the "Add" option.
After that, navigate to Users, computer systems, service accounts, and groups.
At this time, enter the name of the account you wish to include in the local admin groups.
In the end, tap on the "Ok" button.
Solution 11: Create a backup of your company file
Creating a backup of your company file is an important step to protect your financial data from loss or corruption.
Initially, you need to open your QuickBooks and log in to your company file as an System Administrator.
After next, go to the File menu and select Backup Company and then hit a click on Create Local Backup.
In the window that appears, select Local Backup and hit a click on Next option.
Now choose a location to save the backup file.
Next, click on the Options button to set your backup preferences.
Also, hit a click on the Next button to continue.
Review the backup settings and click on the Save button.
After following the above steps QuickBooks will start creating the backup file.
Once the backup is complete, you can click on the Finish button to close the Backup Company window.
Solution 12: Move your file to a different folder
Moving your QuickBooks company file to a different folder is a simple process.
Initially, you need to open QuickBooks and log in to your company file.
Naviagte to the File menu and select Close Company/Logoff.
After that go to the current location of your QuickBooks company file. The default location is [Documents\Intuit\QuickBooks folder.]
Now hit a click on the file to select it and press Ctrl + C keys on your keyboard to copy it.
Also, go to the new folder where you want to move the company file.
Here you need to press Ctrl + V keys to paste the company file.
And then open QuickBooks and go to the File menu and choose Open or Restore Company.
Then, hit a click on Open a company file.
In the next step, browse to the new location where you have moved the QuickBooks file and select it.
In last step hit a click on the Open button to open the file.
Solution 13: Run Quick Fix my Program from the QuickBooks Tool Hub
Quick Fix my Program is a tool available in the QuickBooks Tool Hub that can help to fix common QuickBooks desktop issues. Here are the steps to run this option from the Tool Hub program:
After that open the QuickBooks Tool Hub and click on the Program Problems tab.
Also hit a click on Quick Fix my Program to run the tool.
The tool will scan your QuickBooks installation for issues and try to fix them automatically.
Once the tool has completed its scan and repair, restart QuickBooks and try to open your company file again.
In case the Quick Fix my Program doesn't fix the issue for you, then you can try running the other tools that are available in the QuickBooks Tool Hub program.
Conclusion..!
In the above article, we have explained the circumstances during which the QuickBooks desktop unrecoverable error usually pop-up and prevent you from doing your general task. So, to solve the issue, we have explained a step-by-step troubleshooting guide that will definitely help you in resolving the issue and continue with whatever you were doing. Also, these troubleshooting steps will prevent any damage to the files or worse, permanent removal of any data.
However, if you want our technical support team to resolve the error on your behalf, then you can simply get in touch with our QuickBooks error support team. Our team will ensure to provide you with immediate technical assistance and also resolve the error on your behalf.
Whenever you feel your software is working great, you might come across some typical error in QuickBooks accounting software. In this segment, we will be discussing the steps involved in shunning the QuickBooks error code 41. It is basically a PDF converter activation error which is usually seen when QuickBooks uses an older version of the print driver activation code, for newer version of driver.
You might face QuickBooks error code 41 if the integrated QuickBooks PDF converter or the driver licensed by QuickBooks is in use. This sort of issue can be quite annoying for you to handle. To get a better insight into this error, make sure that you stick around till the end.
What Leads to QuickBooks Error 41?
Well, there can be a handful of assorted triggers to the QuickBooks error 41, all of which we have listed below. Scroll down to find out the root causes of this error.
This particular error could be seen due to the blue screen of death error when working on QuickBooks.
If the system is performing quite slowly.
Another reason can be if when the installation of QuickBooks desktop on the working system is facing any kind of difficulty.
You might also face this sort of error if any kind of windows updating issue appears.
In case you have opened up multiple applications at the same time on the system.
Methods You can Fix the QuickBooks Error Code 41
You can perform any of the below set of steps, so as to fix the QuickBooks error 41. Let us have a look:
Method 1: Uninstall and Reinstall the USB Composite Device
Start with advancing to the Start menu. Thereafter, open the Run window using the Win + R keys.
Furthermore, add 'devmgmt.msc' in the Run window and hit the enter tab.
You further need to hit on the Plus sign.
And opt for the USB composite device.
Heading forward, opt for the Uninstall option and hit OK tab.
Reconnect the USB cable with the PC.
You need to follow the directives for installing the drivers:
You would have to right-click the Printer tab.
And choose the Print test page for printing a windows self test page.
End the process by shutting down all the windows opened on the system screen.
Method 2: Disable the Services From the Startup
Under this method, you would have to hit the Start tab and type in 'MSConfig' in the open box.
Furthermore, choose the Disable all tab.
Open the Startup tab and pick the Disable all and OK option.
This will need to reboot the system.
Just in case the System configuration utility option appears on the screen, then you would have to authenticate the don’t show message or start the system configuration utility.
Hit the OK tab.
Reopen the QuickBooks software to confirm that error code 41 is fixed.
Method 3: Reset the Temp Folder Permissions
Step 1: Reset the Temp Folder Permissions
You would have to press Windows + R, which would open up the Run window on the screen.
Type in TEMP and hit Enter tab.
You then need to right-click the empty area of the temp folder and opt for the Properties tab.
Choose the Security tab.
You will have to ensure that all the Usernames and groups on the security tab have Full control.
Lastly, save it as a PDF again within QuickBooks, after the permissions have been set up to Full control.
Step 2: Verify Print to The XPS
Under this, you need to open up the notepad.
And then, enter in test by selecting the file and opting for Print option.
You need to select the XPS document writer and hit the Print tab.
Type a Filename and save it to the desktop.
Move to the desktop and then see the XPS document that has been printed from the notepad.
Method 4: QuickBooks Print and PDF Repair Tool
Step 1: Download and Install the QuickBooks Tool Hub
Under this process, you need to close QuickBooks software.
You are then required to carry out the on-screen prompts, so as to install and Agree to the terms and conditions.
Double click the Icon on the Windows desktop to open the QuickBooks tool hub, when install finishes.
Step 2: Run PDF and Print Repair Tool From QuickBooks Tool Hub
You are supposed to select Program problems option in tool hub.
And further, head for QuickBooks PDF and print repair tool. This will take a couple of minutes.
Now you need to try to Print, email or save as a PDF from QuickBooks desktop.
Method 5: Restart the System
Tap on the Start tab or press the Windows key.
Afterward, hit on the Arrow next to the Shutdown tab.
Choose the Restart tab and you are done.
Sometimes a simple restart can rectify huge errors.
Method 6: Download and Install Fix Tool
You need to Download and install the fix tool on the system.
Furthermore, choose the Scan tab.
Hit on Repair after the completion of the scanning process.
Reboot the software.
Method 7: Configure Printing Permissions
Initially, advance to the Printer control panel.
Then, make a right-click on the Microsoft XPS record to access it.
Opt for the Houses (or printer houses) option.
Pick 'Everyone user institution' in the Security tab.
If the item isn't in the list, proceed as follows:
Opt for Add choice and include 'Absolutely everyone' in the field.
Pick 'Have a look at names' & 'Test names.'
Subsequently, opt for Print in the 'Permit' column, afterward choose 'Sufficient.'
After following the previous steps, head to Windows Explorer and provide the following command 'c: WindowsSystem 32 spool.'
Now, go to Printers, followed by Properties.
Pick the Security option and then move to the Edit tab. Choose Add option.
Now, you can add the local carrier and verify that local services are possessing Full control.
Then, choose Sufficient option.
Finally, in QuickBooks, make a PDF record.
Check if the issue related to the Error code 41 got fixed
Closing up!
That was all you need to learn about QuickBooks error code 41, so as to get rid of the PDF Converter Activation Error. As always, for any queries, comments, or concerns, call us immediately via our helpline i.e., 1-888-368-8874. We are a hub of technocrats, who work round the clock to provide the best QuickBooks error support services. So, do not hesitate in calling us anytime and seeking for assistance!
QuickBooks stands as the undisputed leader in accounting software for growing businesses, empowering countless companies to manage their finances, track revenue and expenses, and maintain a clear picture of their financial health. From invoicing clients and paying bills to generating insightful reports and simplifying tax preparation, QuickBooks offers an all-encompassing solution.
However, even the most robust software can encounter occasional hiccups. A common challenge users have recently reported is QuickBooks Error 15221. This update error can disrupt your workflow and prevent you from accessing crucial new features and security updates.
ExperiencingQuickBooks Error 15221? You're not alone, and solutions are available. This article will guide you through understanding and resolving this specific QuickBooks update error, helping you get back to seamless financial management.
Effective Methods to Troubleshoot the QuickBooks Error Code 15221
In this section, we shall discuss the various avenues of troubleshooting the QuickBooks error code 15221. So, buckle up and start implementing the measures. We assure you by the end of this article, the error code 15221 will be resolved. So, without wasting any second, let us jump to the methods for fixing the error.
Method 1: Update QuickBooks Desktop to the latest release
Updating QuickBooks is a viable method of resolving the problem. It's critical to update QuickBooks desktop regularly to keep it up to date with new functionality, services, and security patches. The updated software is better in features and is much more convenient for users.
Firstly, proceed to your device's homepage.
Choose the QuickBooks Icon option.
Afterward, choose Help from the drop-down menu.
Then, hover over the Update QuickBooks option then hit on it.
Find the appropriate software version from the table to upgrade it.
Afterward, hit upon the Update Now option to start the upgrading process.
To save the modifications, just reboot the computer after completing the foregoing process.
Method 2: Install the Digital Signature Certificate
Initially, make an exit from the QuickBooks software.
After that, browse to C:/Program File/Intuit/QuickBooks. Check for QBW32.exe in this folder.
After you've located QBW32.exe, right-click it and choose Properties.
Opt for Digital Signature from the drop-down menu, then ensure Intuit Inc. is chosen.
Now, hit on Details from the drop-down menu.
Choose View Certificate from the Digital Signature Details tab.
Upon on the Security page, hit on the Install Certificate option.
Once the final text appears, tap Next.
Finally, hit on Finish.
Reboot the system and reopen the QuickBooks desktop once more.
Finally, install the update.
Method 3: Windows update is necessary
The QuickBooks software will not operate properly if you are operating on an older browser. As a result, you should go for updating the software to the current version. The methods to setup and upgrade the Windows Operating System are listed here:
To begin, hit on the Start button.
Afterward, type Update. Then, hit on the Enter key.
When you're finished, choose the Windows Update option from the drop-down menu.
Finally, hit on the Check for Updates option. Following that, the system will display the most recent updates that are available.
If any recent versions are found, choose Download and Install.
Finally, when the installation is complete, restart the PC. Verify to see whether Error 15221 QuickBooks is still there on your PC.
Method 4: Clean any junk files from your computer
Initially, head to My Computer from the Start menu. Afterward, right-click System C: Drive and hit on Properties.
You are now required to choose the Disk Cleanup option. Wait for the process to analyze and Clean the junk files.
Once done, make sure to remove any Temporary files. This can be done by opening the Run window, followed by typing '%Temp%.' Subsequently, hit the Ctrl + A keys and hit the Delete Button.
After performing the above-stated steps, launch QuickBooks and check if the error got fixed.
Method 5: Label the Intuit website as Trusted
One more approach of fixing Error 15221 is by the addition of Intuit in the trusted sites list, the procedure for which is given below:
Hit on the top-right gear icon to enter Internet Explorer.
Click on the Security tab, and then head to the Trusted Sites icon and Sites button.
The next step is to add the following website to the zone, “https://www.intuit.com/ (if using the US version)” or “https://www.intuit.ca/” (if using the Canadian version)
Following that, hit on Add.
Also, make sure to check mark the option “Require server verification (https:) for all sites in this zone”
Now, hit on Close and then click on Ok.
Most Common Causes Leading to the QuickBooks Error Code 15221
Before you learn how to resolve the QuickBooks error code 15221, let us first make a visit to the various causes that provoke the error code. There is a wide range of factors that combine to bring this issue. After you've gone through these causes, you'll be able to come up with the best remedies. Let's have a look at the various causes first. The various causes are earmarked as follows:
Internet Explorer settings are incorrect.
Your system does not support electronic documents(e-docs).
QuickBooks updates are prevented by the firewall settings or some security program running on your computer.
Out-to-date or incompatible digital signatures.
In QuickBooks, there are certain files that got damaged. They may comprise your company files or the QB installation-related files.
Culminating!
If the methods above somehow fail to assist you, you may have to remove and restart QuickBooks Windows to resolve the QuickBooks error code 15221 completely. Also, contact our QuickBooks error support team at 1-888-368-8874 for a detailed solution where we check all possible causes and fixes based on our depth analysis. We always give the best solutions that are not available anywhere else. So, make sure to drop us a call and get all your QuickBooks issues solved.
Learn how to troubleshoot the QuickBooks Desktop or Payroll Update Errors
Running a business often means juggling a million things, and QuickBooks Desktop Payroll is designed to simplify one of the most crucial: paying your team. It's a fantastic tool, but let's be honest, even the best software can throw a curveball. If you've ever been halted by a QuickBooks payroll error from the 15xxx series – think 15103, 15104, 15223, or 15240 – you know how frustrating it can be, especially when you're trying to process updates or run payroll.
These "15xxx" errors are a common headache for many users, often appearing right when you need things to work seamlessly. They can stem from various sources, such as issues with your internet connection, a blocked digital signature, outdated QuickBooks components, or even a hiccup in your system's security settings like your firewall or antivirus. Essentially, anything that prevents QuickBooks from properly downloading or verifying necessary updates can trigger these errors.
But here's the good news: you're not stuck! This comprehensive guide is specifically designed to help you understand why these commonQuickBooks Desktop Payroll errors occur during updates and, more importantly, provides clear, actionable solutions to get you back on track. We'll walk you through the typical causes and efficient fixes, ensuring your payroll processes can run smoothly again. So, if you're ready to banish those stubborn 15xxx error codes, keep reading – your straightforward solutions are just a scroll away.
Solution steps to Resolve most common QuickBooks payroll errors
Every error has its solution, and so is the case with QuickBooks payroll-related issues. You can implement the below-stated steps to tackle the error without difficulty.
Method 1: Renaming the CPS folder in the system
One of the viable approaches to solving common QuickBooks payroll errors is altering the CPS folder. The steps for the same are as under:
You need to initially update the QuickBooks Payroll tax table.
Furthermore, you would have to access my computer and visit the local drive C:\ProgramFiles\Intuit\QuickBooks 20XX\Components\Payroll\CPS.
The XX here denotes the year of the QuickBooks version, like QuickBooks desktop 2022, QuickBooks 2021, QuickBooks 2020, QuickBooks 2019, etc.
The next step is to rename the CPS folder to CPSOLD and check if the issue is fixed.
Finally, update the QuickBooks payroll tax table to check if the issue is resolved.
Method 2: Disable the user account control
Another noteworthy solution for fixing payroll errors in QuickBooks is by disabling the User Account Control.
Under this method, you should tap on the Win + R keys, which will launch the run window.
Furthermore, type in 'control panel' and opt for the Ok tab.
Tap on the user accounts and hit the user account classic view tab.
At last, head back to the change user account control settings tab and choose the never notify tab.
Method 3: Uninstall and reinstall QuickBooks
If the first two methods didn’t work for you, then, in that case, you can execute the following methods:
At first, you are supposed to tap on the Microsoft Windows Start tab and then opt for the control panel.
You need to further manually remove the following QuickBooks installation folders:
C:\Program Files\Intuit
C:\Program Files \Common Files \Intuit
C:\Documents and Settings\ All users\ Application data\Intuit
C:\Documents and settings \All Users\Application data\Common files\ Intuit
C:\DOuments and Settings \ All users\ documents Shared documents\ Intuit
Method 4: Run a repair on QuickBooks to rectify common QuickBooks payroll errors
If In case none of the first three methods worked for you in tackling the payroll errors, then we suggest you run a repair on QuickBooks. Follow all the steps given below:
Start with hitting on start tab and visiting the control panel.
Once done with that, you have to double-tap the add or remove programs.
After that, hit on the QuickBooks program.
And then opt for the change or remove theprogram tab.
Next, in the QuickBooks installation window, you need to hit on the next tab.
Furthermore, in the QuickBooks maintenance window, choose repair.
Afterwards hit on to the next tab, and tap on the repair tab.
At Final step, you have to select the finish tab in the QuickBooks maintenance complete window.
Method 5: Run Reboot.bat
Running the Reboot.bat can also help in a situation wherein users get entangled in common QuickBooks payroll errors. This batch file can be located in the QuickBooks folder. The steps given below will help you out.
Close QuickBooks Desktop/Payroll.
Find and open the folder where the reboot.bat file is saved.
Run the file as an Administrator.
A DOS command window will pop up. Let the file utility complete, and the window will close down on its own. Don’t close that manually.
Restart your computer.
Now, launch the QuickBooks Desktop and see if the issue is fixed.
More often than not, the above-mentioned steps shall fix the error. If the error persists, you can move on to the next steps.
Method 6: Verify Internet Explorer Settings
If your computer is connected to the internet but cannot update your QuickBooks Desktop, you should consider configuring Internet Explorer in your system.
Set Internet Exploreras your default browser.
Also, check if the date and time on your computer are correctly set.
Verify the Cipher Speed.
Visit Tools and proceed to the Internet Options to update settings.
Method 7: Close all the QuickBooks processes
Closing the QuickBooks-related processes in the Task Manager can also rectify common QuickBooks payroll errors. The simple steps for the same are given below:
Make sure you have an active subscription.
After that, reset the QuickBooks Desktop update.
Soon after, check the accuracy of the payroll service key.
Restart your system.
Proceed to Task manager by hitting the Ctrl + Alt + Delete keys and then move to the Processes tab. Now, opt for Qbwebconnector.exe and then click on the End process option.
If the issue still exists, move on to the next solution.
Method 8: Configure firewall and Internet security settings
Perform this method if you know how to configure firewall, antivirus, and other third-party programs. In case you need assistance, refer to Intuit’s official website or speak to your IT team.
Method 9: Uninstall and reinstall QuickBooks Desktop in Selective Startup
Uninstalling and reinstalling QuickBooks, a method termed the Clean Installation, can be performed to resolve payroll-related errors in QuickBooks. The walkthrough for the same is given as under:
Open the Run command (by pressing the Windows and R keys together).
Within the Run command, type MSConfig and then hit the Ok button.
Tap on the General tab, then proceed to the selective startup and Load system services.
Open the Services tab and then opt for hiding all Microsoft Services.
Now, Disable all.
Uncheck the Hide all Microsoft Services checkbox.
Verify the Windows Installer checkbox is clicked. Hit on the OK button.
Opt for Restart on the System Configuration window.
Method 10: Install a digital signature certificate
Some errors within the digital signature certificate can also provoke QuickBooks payroll errors. The same can be rectified by either updating the certificate or by installing a fresh one, the process for which is described as under:
Firstly, navigate to C:\Program Files\Intuit\QuickBooks.
Within the QuickBooks folder, look for the QBW32.exe file.
After locating the same, hit right-click on it.
From the drop-down options, choose Properties.
Now move to the Digital Signature tab.
Ensure that Intuit is selected in the signature list.
After that, select the Details option.
Choose the option to View Certificate option in the Digital Signature Details window.
Now, choose the option to Install Certificate.
Keep hitting Next until the Finish message is displayed on your computer screen.
After that, choose the Finish button.
Reboot your computer.
Once the system reboots successfully, open QuickBooks Desktop and re-download the payroll/QuickBooks update.
Method 11: Downloading the updates in Safe Mode can fix common QuickBooks payroll errors
Some conflicting programs in the background can be a potential cause of payroll errors while updating QuickBooks. Users should try updating the accounting application after opening Windows in Safe Mode to check this.
The first step is to Open your computer in Safe Mode by restarting the computer and pressing the F8 key.
Choose Safe mode with Networking and then hit the Enter key.
After that, Re-download the update. The significant difference between running windows in the safe mode and the Normal mode is that the safe mode obstructs any background programs from working. This will give a straightforward indication of the cause of the payroll issue.
Once the QuickBooks download process culminates successfully, reboot your computer in Normal Mode.
Finally, try to re-download the update in normal mode.
Some QuickBooks payroll errors like 15xxx errors require additional resolutions
Below you will find a few 15xxx series errors and their solution steps:
How to troubleshoot QuickBooks payroll error 15223?
Initially, visit Internet Explorer.
Tap on the Gear icon and select Internet Options.
Tap on the Advanced tab.
Head to Security and find Use TLS 1.0, TLS 1.1, and Use TLS 1.2.
Verify that the Use TLS 1.0 box is unchecked and that TLS 1.1 and Use TLS 1.1 boxes are checked.
Hit on Apply and then tap on OK.
Retry the update.
If the error still appears, uninstall and install QuickBooks Desktop in Selective Startup and retry the update.
If the issue still exists, follow these steps:
Consider registering .dll files.
Access Internet Explorer and clear the SSL state.
You may have to configure Firewall and Internet security settings.
Steps for Fixing QuickBooks update error 15240
In the inception, launch QuickBooks as Windows Administrator.
Verify your computer’s date and time settings and compare them with the current time to check if they are currently set.
Include Windows permissions to the installation folders of QuickBooks.
Open and verify the Internet Explorer settings.
Check your firewall.
Solution Steps for QuickBooks payroll update error 15271
Turn off the UAC (User Account Control) in Windows. If this step doesn’t fix the issue, move on to the next step.
Close and reopen QuickBooks Desktop/Payroll.
In case the QuickBooks Update Service message window pops up, select Install Later.
Next, update QuickBooks Desktop to the latest release.
Close and reopen QuickBooks Desktop.
If you receive a prompt to install an update, click Install Now. After the installation is over, wait for the QuickBooks desktop to open. Select Yes if you are prompted to restart the system.
Ensure that your payroll tax tables are updated.
If the error persists, install or uninstall QuickBooks Desktop in Selective Startup.
Solution Steps for QuickBooks error code 15205
Check the internet connection and also double-check QuickBooks settings.
Ensure that the date and time are correct.
Then, verify the Cipher Strength.
Also, change the settings using the tools and Internet tab.
The last step is to set internet explorer as the default browser.
Solution Steps for QuickBooks payroll error 15218
First of all, log in to the system as Administrator.
And then, right-click the Net mortal and open it.
Once done, move to the net choices from the right-hand corner at the highest of the net browser.
The next step is to add two essential websites to the list of Sites: QuickBooks.com and Intuit.com.
And the last step is to reboot the system.
Common QuickBooks Desktop payroll errors
Some of the common QuickBooks desktop payroll errors that trouble users time and again include the following:
Another reason can be if your billing information is incorrect.
When the QuickBooks payroll is updated to the latest version.
You might face a similar issue if the employer identification(EIN) number is invalid.
Conclusion
We hope you find this blog post helpful in fixing issues received while updating QuickBooks desktop or payroll. As always, for any queries, comments, and concerns, connect with our 24/7 QuickBooks error technical support team ensures you get quick and precise solutions to all your QuickBooks-related issues. You can call us at our dedicated helpline at 1-888-368-8874!
QuickBooks Desktop installation process can be very annoying, especially if you start using your accounting program right away and facing Errors during the same time. Unfortunately, these early technical issues are fairly common and can cause you to lag before you even start. We have created this comprehensive guide because underlying system problems are typically the cause of QuickBooks installation errors. By detailing the precise procedures required to identify and address QuickBooks installation problems at their root, we hope to clarify these complex issues. Our goal is to offer you workable solutions that will guarantee a seamless and efficient setup. Whether you would rather get direct help or follow detailed instructions, this resource can help you regain control.
Our team of committed tech experts is available via our helpline to help you with any issues if you need quick, individualized assistance.
Corrective Measures That can be Performed to Fix QuickBooks Desktop Install Errors
You are supposed to perform the below corrective measures so as to fix QuickBooks installation errors.
Measure 1: Download the QuickBooks Tool Hub
QuickBooks tool hub program usually assists in fixing common errors, especially those related to installation errors.
From downloads, hit on the QuickBookscleaninstallutility.exe file
Hit on I accept and choose the QuickBooks version being used.
Hit the continue tab.
Hit on the ok tab.
Repair QuickBooks files and folders and reinstall the software.
The steps and solutions given above will surely fix all the QuickBooks Installation Errors. You can easily identify the errors by going through the causes given in the article. This post also includes the method to fix the issues in the installation process and also during the working on the software. We hope that users will easily manage to follow the steps to remove the issues.
Measure 6: Terminate the QBW32.exe Process
To begin with, access the Task Manager through the Ctrl + Shift + Delete buttons, followed by choosing Open Task Manager.
Now, advance to the Processes tab.
Herein, look for the process named QBW32.exe. All you need to do is hit the process and choose the End Task button.
Now, commence with your installation/update and check if the issue got fixed.
A List of QuickBooks Desktop Install Errors
QuickBooks installation errors are those errors that are commonly faced when you open QuickBooks desktop after installation or sometimes when you install the software. QuickBooks desktop installation errors are from the category due to which the software couldn’t be installed due to certain reasons. The basic reason found behind this is when there is some important Microsoft component is missing or there is a problem in the functioning of the software. Some of the common installation errors in QuickBooks are given below:
Quick solution: Use QuickBooks install diagnostic tool
Why do You End up With QuickBooks Desktop Install Errors?
Below are reasons that can drag you to QuickBooks desktop install errors. Let us explore:
Just in case you are making use of a different version of QuickBooks, in order to open the company file, folder, compressed or encrypted file.
You can also experience a similar issue if there is an incomplete or wrong name of a file or an extension that corrupts all data.
Another reason for the same can be if you are using a different version of QuickBooks for opening the company file, folder, compressed or encrypted file.
Experiencing a similar issue is possible if you have implemented an incorrect method to open a specific file type.
For further technical help..!
Still facing the install errors in QuickBooks desktop repeatedly? Well, we can help you in that case. Connect with our QuickBooks error support team personnel using our helpline. Our tech professionals will ensure to come up with the most genuine support services to help you dealing with QuickBooks install errors.