Here is how you can use QuickBooks Install Connection Diagnostic Tool
Encountering unexpected errors while installing QuickBooks Desktop can be incredibly frustrating. Fortunately, Intuit provides a powerful solution: the QuickBooks install diagnostic tool. This essential utility is designed to automatically diagnose and fix a wide range of common installation errors, getting you back on track quickly.
This article will delve into how this handy tool works, explaining its effectiveness in resolving problems that arise during QuickBooks installation. Since QuickBooks Desktop relies heavily on core Microsoft components, issues often stem from missing or malfunctioning elements within your Windows operating system. Specifically, problems with .NET Framework, C++, and MSXML are frequently linked to installation failures.
The QuickBooks Install Diagnostic Tool is your primary resource for addressing these underlying Windows component conflicts that trigger installation glitches. For personalized assistance or a free consultation on utilizing this tool, our dedicated support team is available round the clock to help you.

Steps to download and Install QuickBooks Connection Diagnostic Tool

- First of all, you can download QuickBooks connection diagnostic tool from Intuit’s official site.
- Once the setup file appears, save that on your desktop.
- Let the download complete and the ‘QBInstall_tool_v2.exe’ file will appear on your screen.
- Close all open and running apps.
- Double-click on ‘QBInstall_tool_v2.exe file’ and click on run when prompted.
- Once you restart your computer, you should be ready to proceed.
Steps to Use QuickBooks Connection Diagnostic Tool
- The very first step is to 'double-click to the 'QuickBooks desktop icon'.
- Next, make sure to avoid opening the corrupted company file for now.
- Thereafter, hit on the 'utilities' option and then navigate to the option for repair file and network problems.
- A pop-up will prompt you to grant permission to collect private QuickBooks data and information; accept it by clicking 'Yes' and 'continue' option.
- In next step navigate to the folder where your company files are stored, locate the faulty company file, and access it.
- Then select the option to show 'advanced settings' and you should progress to a drop-down list of items.
- A list of fixes would be found to choose from. It is supposed to select the one that suits the situation.
- The next step is to enter the 'QuickBooks login ID and password'.
- Following the above steps correctly will launch the QuickBooks connection diagnostic tool.
Steps to Test Workstation's Connectivity
- Tap on the company file field to search the company file.
- Next, ensure you are using a Linux system when the network setup is available in alternate mode.
- Opt for the change hosting server checkbox.
- Each status might appear as not application in blue, before starting the connectivity test.
- After you run the test, status should appear in green that denoting that no threats are found or red denoting threats found.
- Now click to the test connectivity option.
- If the file open status shows 'red', it means that the test failed and the advanced section option will display.
- Now, hit on what do these mean? option.
- After the state has been fixed, you need to run the tool again to see if there are any other problems.
- You would now get a message denoting the success of the process.
- Repeat the same steps on all the systems that have QuickBooks.
- Wait for the tool to complete its task.
Steps to Fix Installation Errors using QuickBooks Install Connection Tool
QuickBooks Desktop connection diagnostic tool enables you to examine and evaluate the following points:
Diagnose Connection Tab:

You can use this tab to check the status of your system. Moreover, this tab also assists you in setting up the ‘QuickBooks company data file.’
Checking the Firewall Status:

This diagnostic tool provides significant information on the Firewall status. You can take suitable action depending on the obtained details.
Testing Your System Internet Connectivity:

QuickBooks Connection Diagnostic tool can assist you in analyzing your system connectivity. Thus, the tool’s installation requires a smooth internet network setup.
Perform a Re-install in a Selective Start-up Mode:
Many a time, third-party apps like ‘antivirus and anti-spyware’ programs create issues with QuickBooks desktop installation. They may misunderstand QuickBooks as a malicious program or software. In order to avoid and fix such instances, it is imperative to perform the installation process in a selective mode. The selective mode starts the windows with a few items already running in your system. Here are the steps that you can follow:
- Access your computer in the 'Selective start-up' mode.
- Now click 'Window + R keys together' to open the ‘RUN’ dialog box.
- Type 'msconfig' there and tap on 'OK' button.
- In the General Tab, choose ‘Hide all Microsoft Services.’
- Choose the ‘disable all’ option.
- Un-check the‘ Hide Microsoft services’ checkbox.

- Check the ‘list of services.’
- Choose the ‘Windows Installer checkbox’ and hit the 'OK' tab.
- Open system configuration and select ‘Restart’ to restore the computer to its ‘Normal Configuration.’
- Now, tap on the 'Windows + R' keys together to reveal the ‘RUN’ command.
- Type ‘msconfig’ there and click 'OK' button
- Go for the ‘General tab,’ and opt for ‘Normal Start-up'.

- Click 'OK' button.
- Finally, opt for 'Restart' on the system configuration screen.
How does the QuickBooks Install Connection Diagnostic tool work?
The QuickBooks Connection Diagnostic Tool is an innovative tool that can diagnose errors while installing QuickBooks Desktop. The tool also ensures that the QuickBooks installation process starts on time. The tool fixes multiple errors and issues, including the .NET Framework, MSXML & C++ errors; it also fixes several other errors and issues. The tool also fixes several additional errors, which are listed below:
| QuickBooks Error Code 1402 | Error Code 1904 | QuickBooks error 6175 | QuickBooks Error H202 |
| Access denied to QuickBooks database | Wrongly configured Windows firewall | Multiple entries in the Employee lists are missing | Any kind of virus attack to the QuickBooks company files |
| Empty customer lists | QuickBooks Install Errors | QuickBooks Error H505 | QuickBooks error 6150 1006 |
| QuickBooks Error Code 1603 | QuickBooks error 6129 | QuickBooks error 6177 | QuickBooks error 6000 832 |
| Error Code -6150 | QuickBooks error 6144 82 | QuickBooks Error Code 1935 | QuickBooks Error -6000, -82 |
| Error -6000, -301 | QuickBooks error 15215 | QuickBooks Error 6190 |
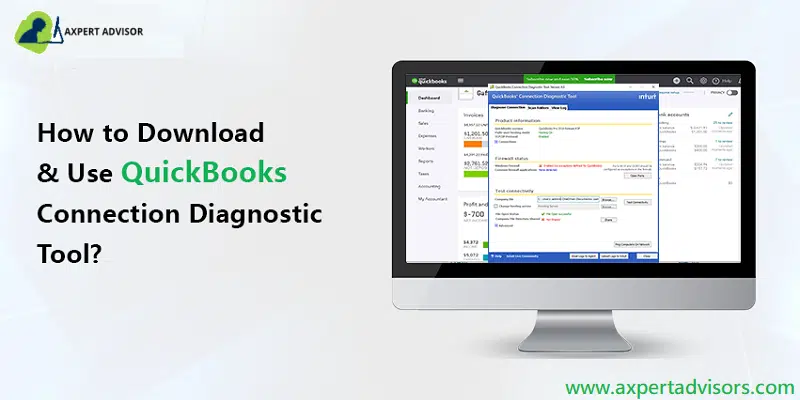
An image of the QuickBooks Connection Diagnostic Tool is given below:

Finding and fixing issues is extremely simple with the QuickBooks Connection Diagnostic Tool. You just have to start the diagnostic tool before you continue to fix the errors manually. The tool also significantly cuts off the time taken to fix issues.
Benefits of Using QuickBooks Connection Diagnostic Tool
The QuickBooks connection diagnostic tool rolls in with some great features and benefits. The advantages include the following:
- This particular tool helps in diagnosing different QuickBooks errors that are seen at the time of installation of QuickBooks.
- Furthermore, it assists in fixing countless errors faced by users and also saves a lot of time and effort.
- It assists in resolving unexpected errors and multi-user errors in QuickBooks.
- The QuickBooks connection diagnostic tool also resolves problems caused by employees making specific entries that QuickBooks doesn't update.
When to Run the QuickBooks Connection Diagnostic Tool?
One can run the QuickBooks Connection Diagnostic Tool in the following situations:
- If you encounter problems with the QuickBooks Database Server Manager.
- When issues related to the Windows Firewall appear.
- If there is any damage to the company files.
- If there are multi-user errors.
- Using such a tool would work when any sort of virus is affecting the QuickBooks functions.
- Or where the employees make certain entries that do not get updated.
Final Words...!
We hope that you find this write-up helpful in making the most of the QuickBooks Connection Diagnostic Tool. This tool can assist you with many of the common QuickBooks issues. If you need any assistance in regards to this tool or you are not able to fix any accounting-related issue, you can contact us at our QuickBooks Support Number for quick and precise solutions.
If this article served your purpose, then Read the following articles also:
